Welcome to the most comprehensive guide to exercise bike pedals on the net.
As the designers and manufacturers of exercise bike pedals for several brands, we know what we’re talking about—we live and breathe exercise and spin bike pedals—all types of pedals actually.
And rather than simply evaluate the various branded models available on the market (some of which we manufacture anyway), we’ll give you something much better: essential information enabling you to make an informed decision when you’re assessing any branded spin bike pedal for purchase.
We’ve packed lot of value into the article below. Skim on down the page or jump to any section that catches your eye:
Table of Contents
What Kind of Pedals are on Exercise Bikes?
Toe Clip Pedals
Types of Toe Clip Pedals
Clipless Pedals
The Best Pedals For Exercise Bikes
How Do I Take My Pedals off My Exercise Bike?
Pedal Exerciser or Mini Exercise Bikes
Are Peloton Pedals SPD?
WHAT KIND OF PEDALS ARE ON EXERCISE BIKES?
You’ll find one of three types of pedals on an exercise bike:
I lied. There’s actually one more—the hybrid, possibly the most convenient type of spin bike pedal available on the market today.
One side of the pedal has a toe clip; the other, a cleat bracket. What’s a cleat, you ask? Don’t worry; all will be explained soon.
Flat Pedals
Flat pedals are the kind of pedal you learned to ride a bike on when you were a kid, the pedal that’s been with us since the modern bike’s invention in the 19th century.
You’ll find some exercise and spin bikes fitted with flat pedals; you could certainly install flat pedals on your bike at home.
A flat pedal would appear to be the most comfortable pedal, at first glance anyway.
However, toe clip pedals and clipless pedals, developed later, are superior because of increased energy efficiency.
TOE CLIP PEDALS
Bikes progressed from flat pedals to toe-clip—or toe-cage—pedals in the early 20th century to overcome the problem of shoes slipping off pedals.
Bike racers wanted a more efficient pedal to conserve riders’ energy so they’d have more left in the ‘tank’ at critical racing moments.
Toe clips clip-in at the front of a pedal. A steel or nylon frame wraps over the top of the shoe back towards your ankle. An adjustable strap loops around your shoe holding your foot firmly to the pedal.
Where you once gained forward movement from pushing a pedal on a down stroke, you now secure mechanical advantage by pulling during each pedal cycle’s upstroke, a crucial part of the pedal cycle usually wasted.
Some drive comes from your foot bracing against the toe-clip, but the straps securely anchoring your foot to the pedal platform also contribute. The clip-in toe frame allows the strap to remain open so you can easily slide your foot in; you then tighten the strap snugly around your foot.
A snug strap in concert with the toe clip ensures your channel your energy more into forward motion, rather than heat and sweat.
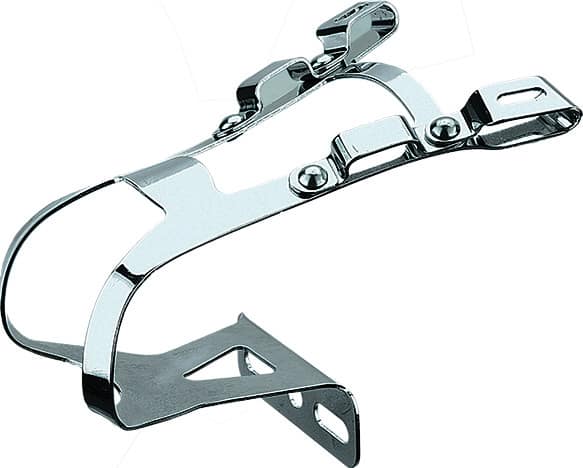
Toe Clip or Toe Cage Strap
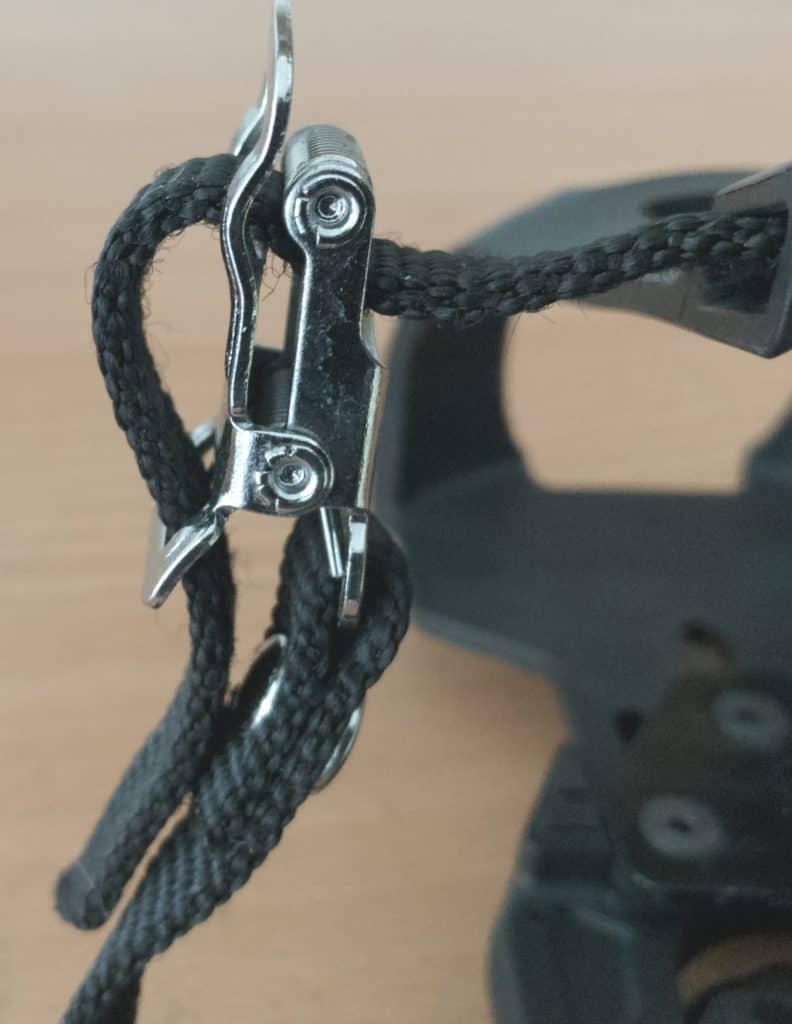
Modern toe clip pedals don’t actually clip into the pedal body’s front. The clip, or cage as it’s commonly known, bolts onto the pedal body.
You slide your foot snugly into the pedal cage, then tighten the strap encircling the pedal body’s rear around your shoe, close to your ankle.
The strap is made out of tough nylon threads braided into a binding much stronger than it really needs to be—you don’t ever have to worry about a worn out strap, that’s for sure.
You thread its 19 inches through the cage base, then up into the cage at the top and finally down into the strap clasp.
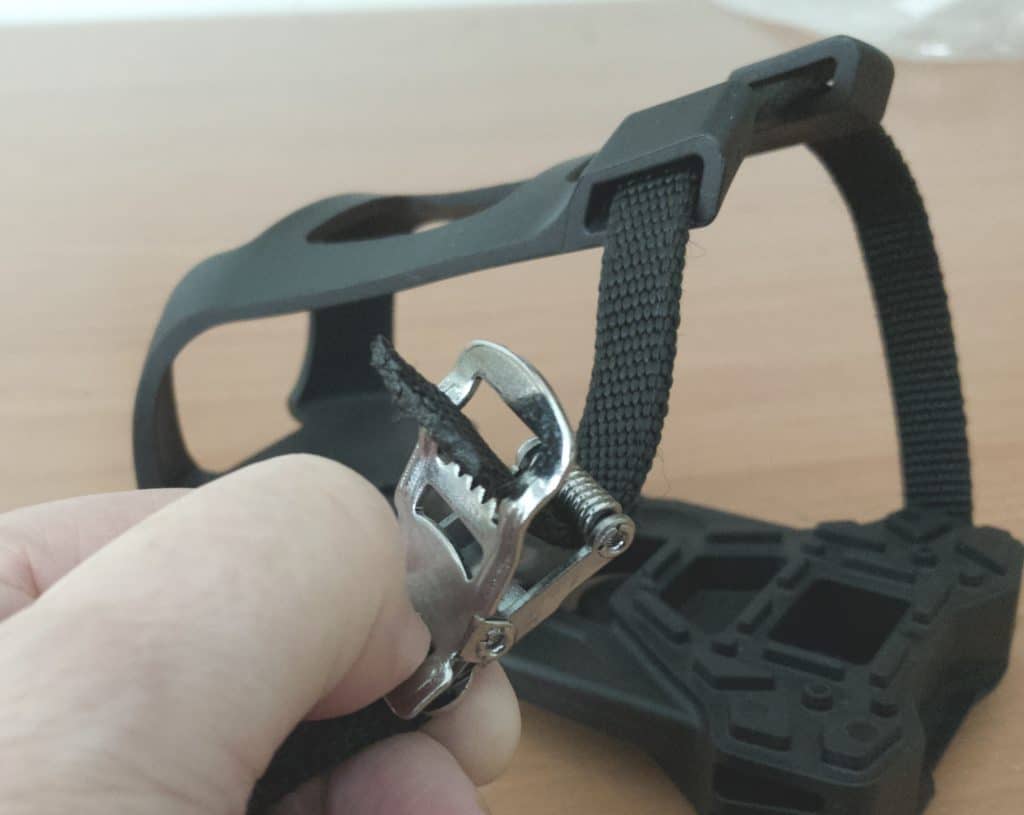
The stainless steel spring-loaded clasp opens with firm thumb pressure.
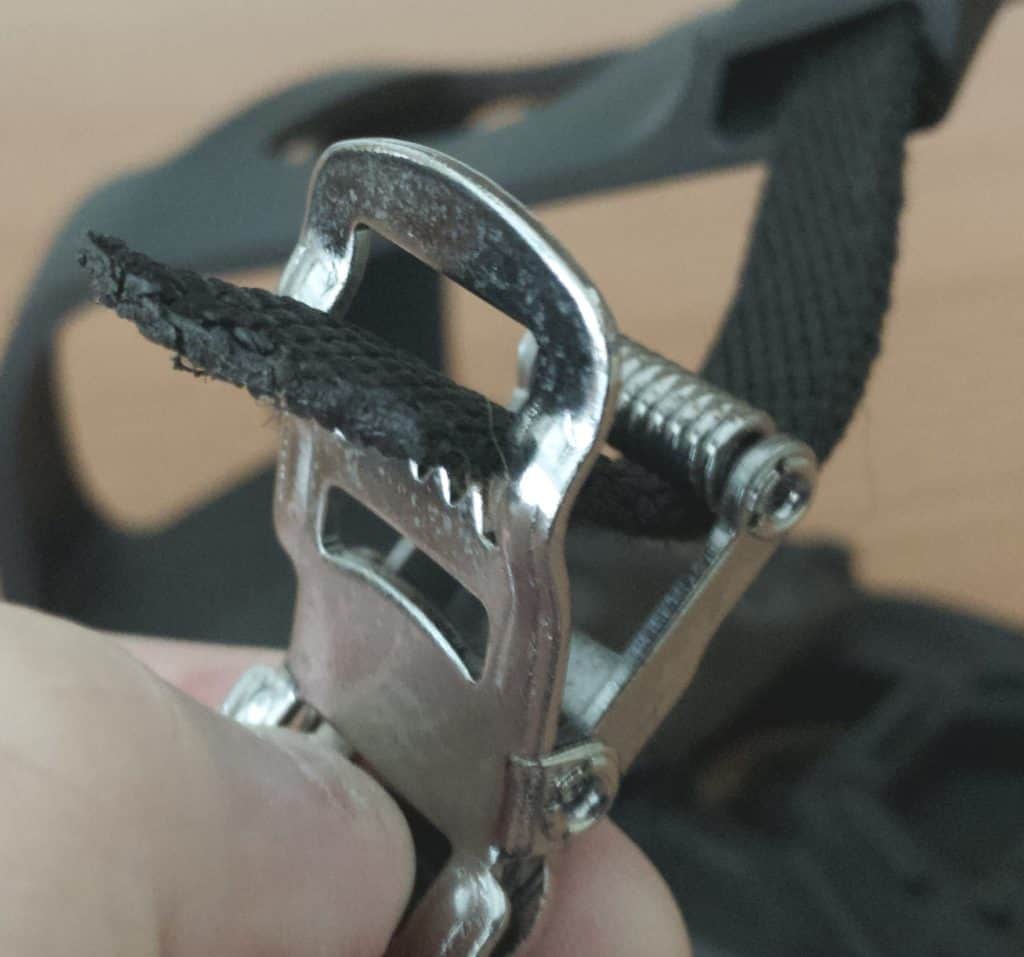
You feed the strap through the clasp from behind, up at an angle across the teeth. Releasing the clasp pinches the strap firmly preventing slippage, but not so tight that the teeth penetrate the strap’s nylon weave.
Having released the clasp, which firmly clamps the strap, feed the loose end through the buckle, keeping to close the rest of the strap.
To release, you pull the strap free of the buckle, depress the clamp, then pull as much of the strap through as required to loosen it from around your shoe.
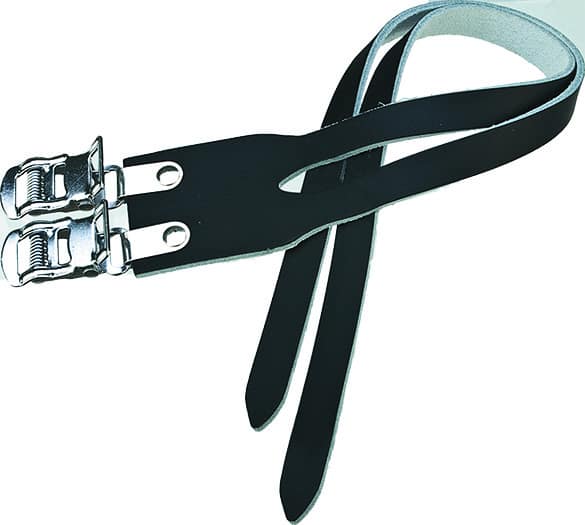
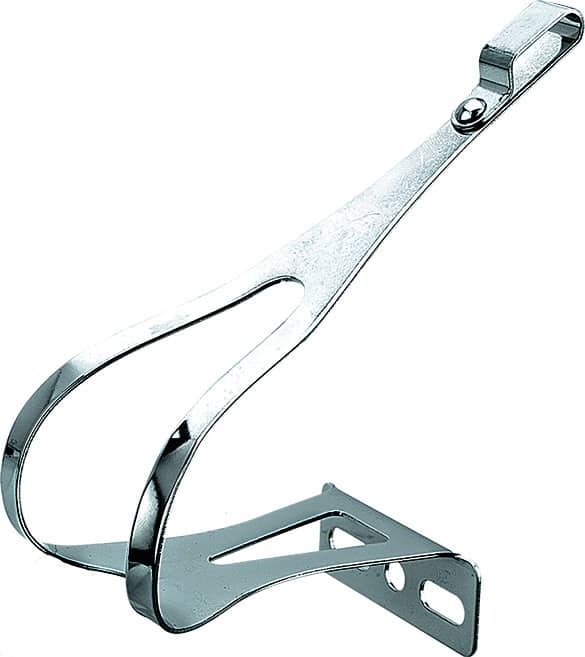
As an aside, straps with twin buckles are an option.
These straps are designed for stylish steel clips and are possibly more at home on the annual tweed run than on an exercise bike at home or in the gym.
But, hey, who says you can’t do your exercise in style?
Placing Shoe in Toe Cage
Fine-tuning strap-length enables more convenient shoe access and positioning.
Release the clasp then feed the strap through until it’s open wide enough for your shoe to slide in until coming to rest against the nose of the cage.
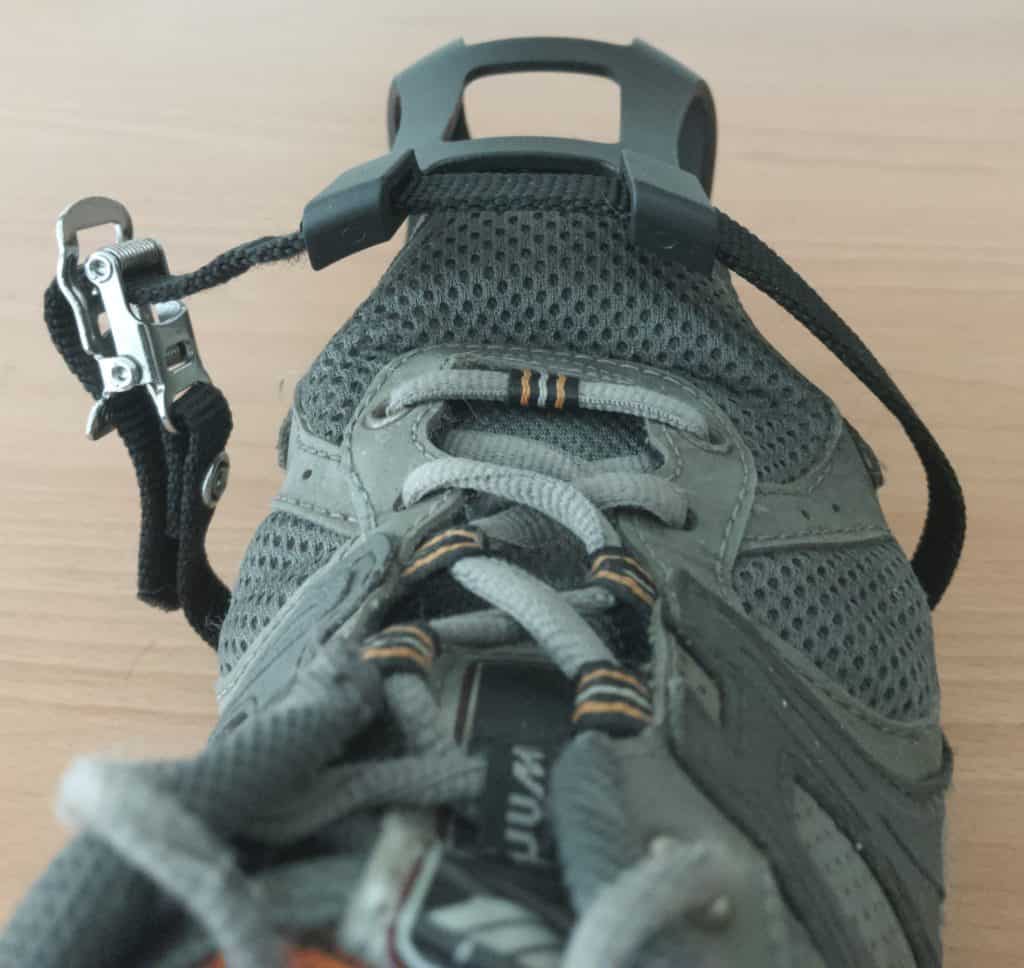
You’ll see there’s plenty of space to accommodate the gamut of shoe sizes and shapes.
Perched on your exercise bike’s seat, rest the front of one foot at the base of one pedal, then slide your foot in until snug against the cage. Whether your foot is large or small, you’ll find the toe cage accommodating.
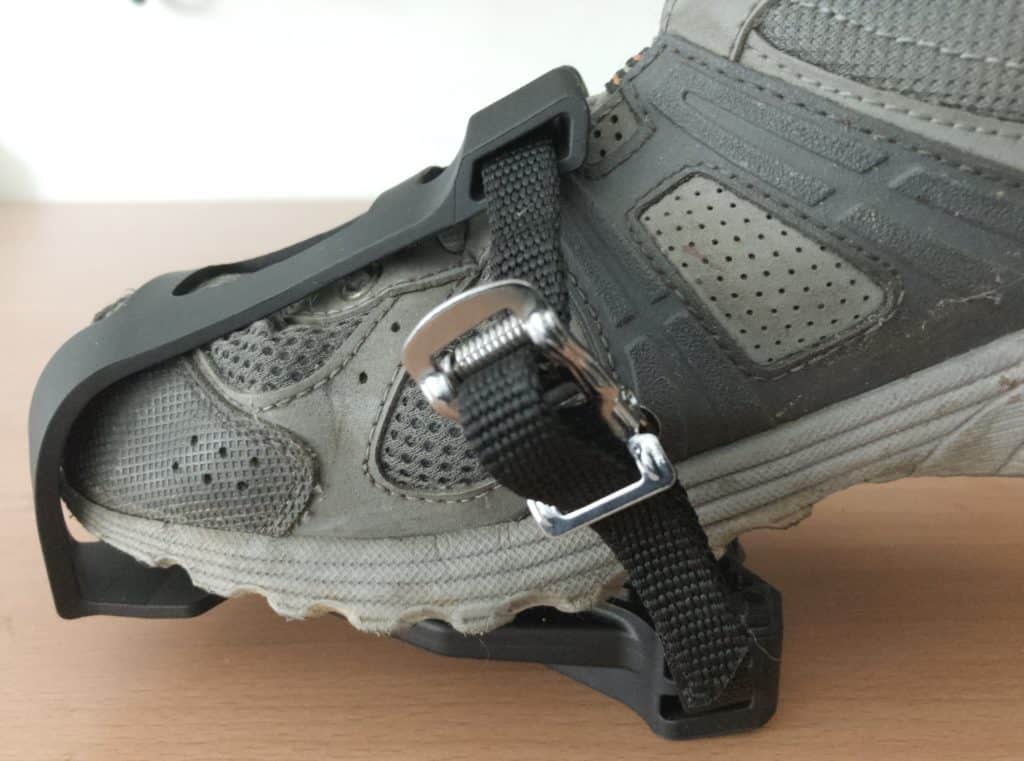
Depress the clasp, pull the strap until there’s no slack around your foot. No need to be too tight. Just enough to hold your foot firmly in the toe cage as you return from the bottom up to the top of your pedal cycle.
Also note the clear benefit of using a toe clip pedal versus a flat pedal.
You are taking advantage of that normally dead part of the pedal cycle where you push down on one side while the other free-rides back to the top to take its turn on the down stroke.
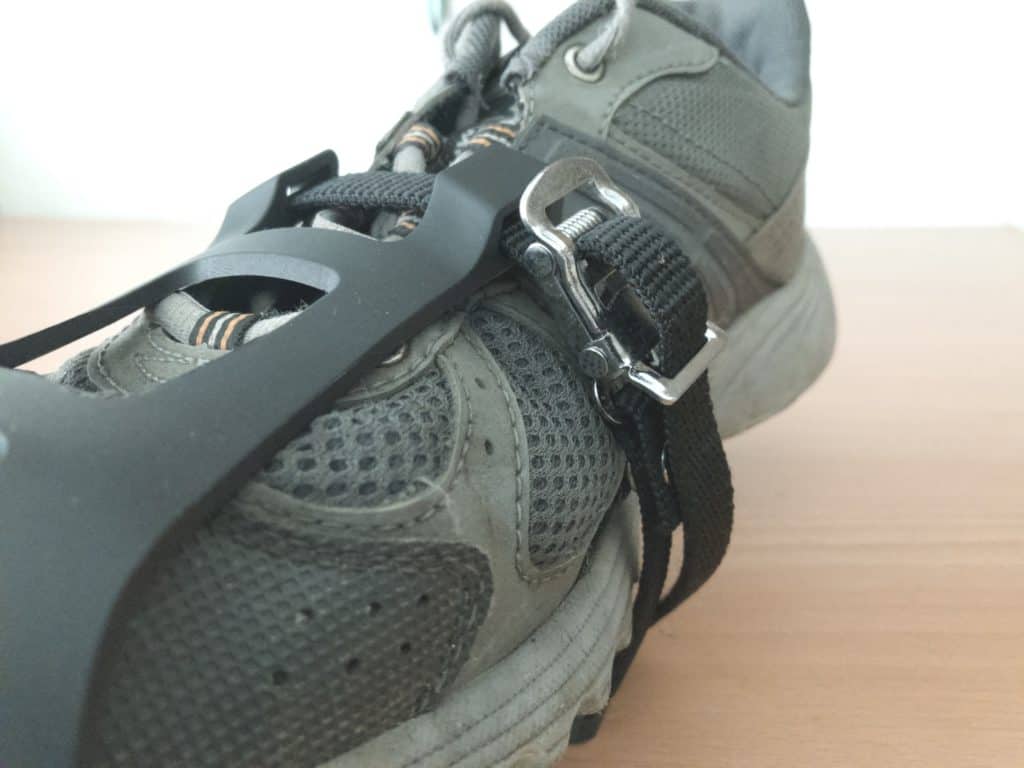
You want to fit the strap around your shoe at the narrowed mid-section which prevents you inadvertently jerking it out during an extremely energetic backstroke.
TYPES OF TOE CLIP PEDALS
Let’s take a look at a range of exercise bike toe clip pedal designs. Whilst each carries out the general task of maintaining a firm connection between your shoe sole and pedal surface, each does it in a particular way.
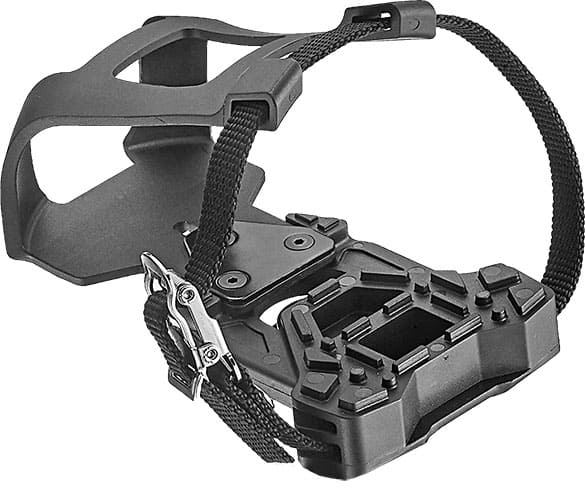
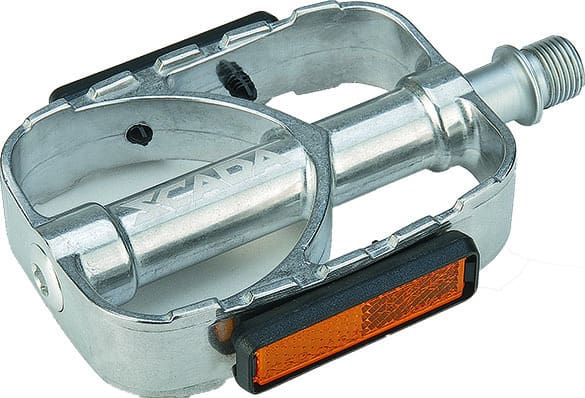
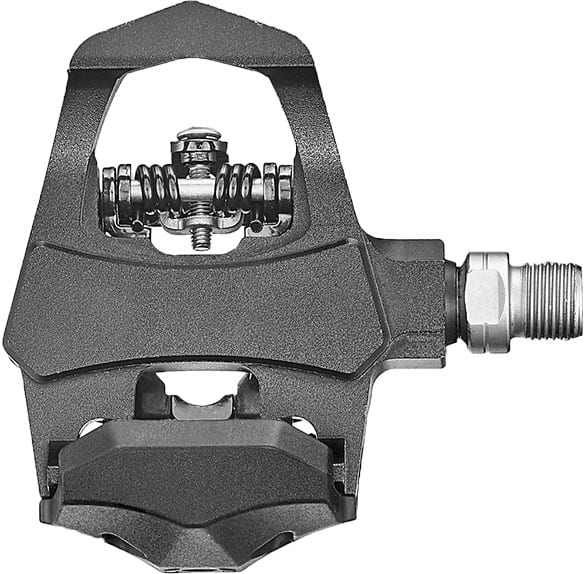
Here’s an exercise bike pedal with a unique design element.
But before we discuss that, note the pedal surface designed for grip. Your shoe sole snugs firmly into its non-slip crenelations and protrusions, extra backup in case you did not fasten your strap tight enough.
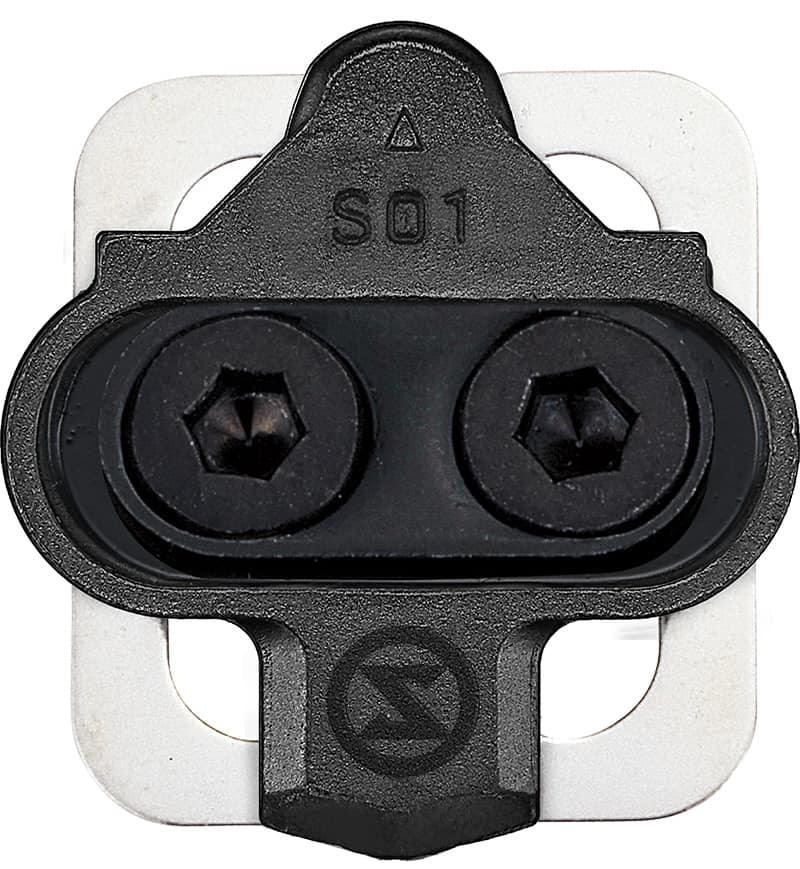
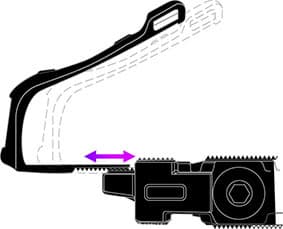
Checking out the underside, note the ratchet mechanism where the toe ‘clip’ attaches to the pedal platform.
Rather than bolt into a fixed position, you can adjust the cage to the length of your foot through loosening the bolts, then sliding the cage forward or aft.
The ratchet teeth lock together once you’ve tightened the bolts: no amount of pressure in the midst of a vigorous spinning bike workout will cause the cage to slip.
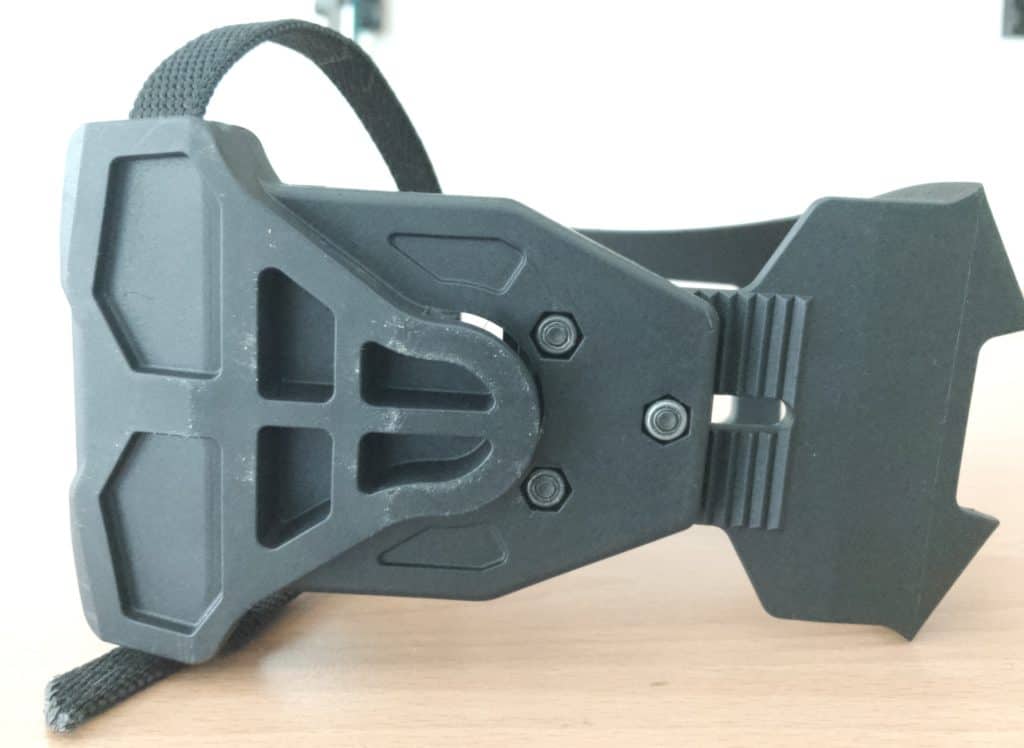
“But,” you say, “how do you attach the pedal to the bike?” Darn right! Where’s the pedal axle?
The answer’s there in the triangular ridge visible at the pedal base with its apex terminating a tad behind the cage fastening bolts.
You might recognize as a type of pedal cleat, and you’d be right. TS-S02’s design enables fitting to a clipless pedal.
If you’d like to jump ahead to the section with the details, click here.
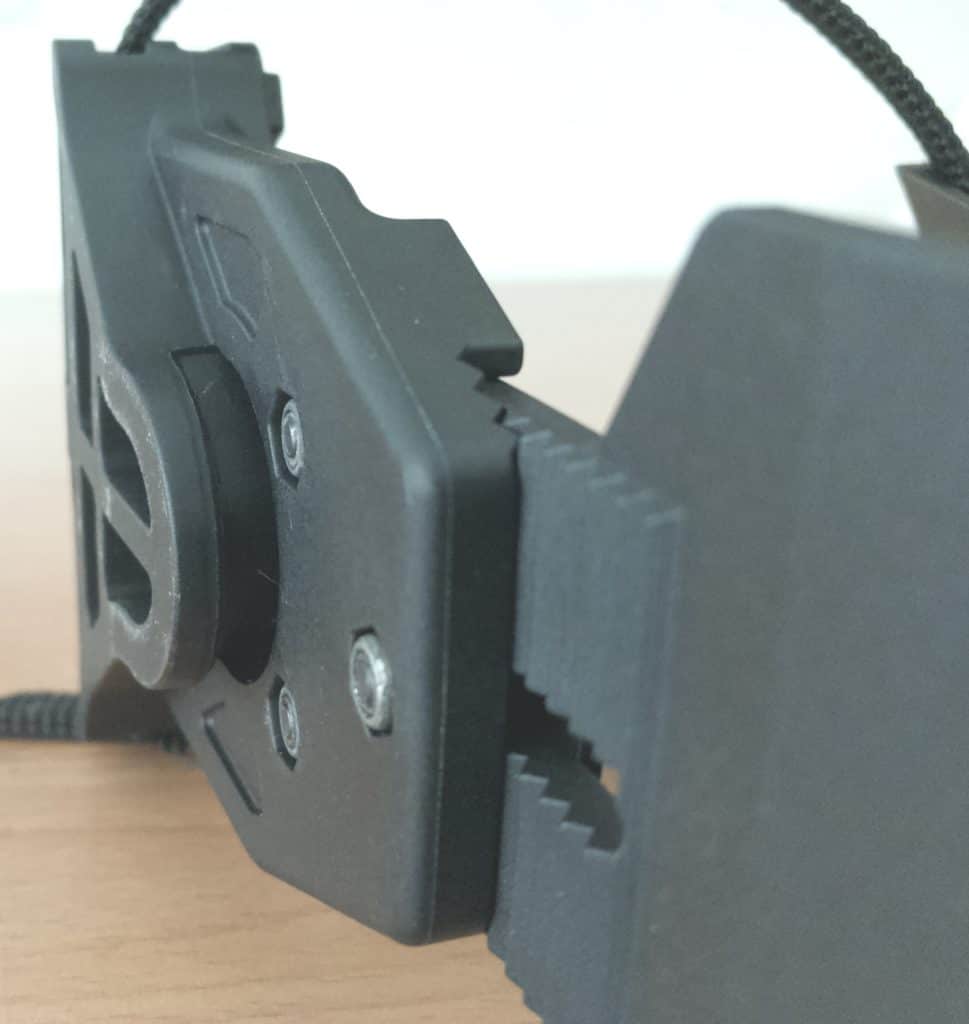
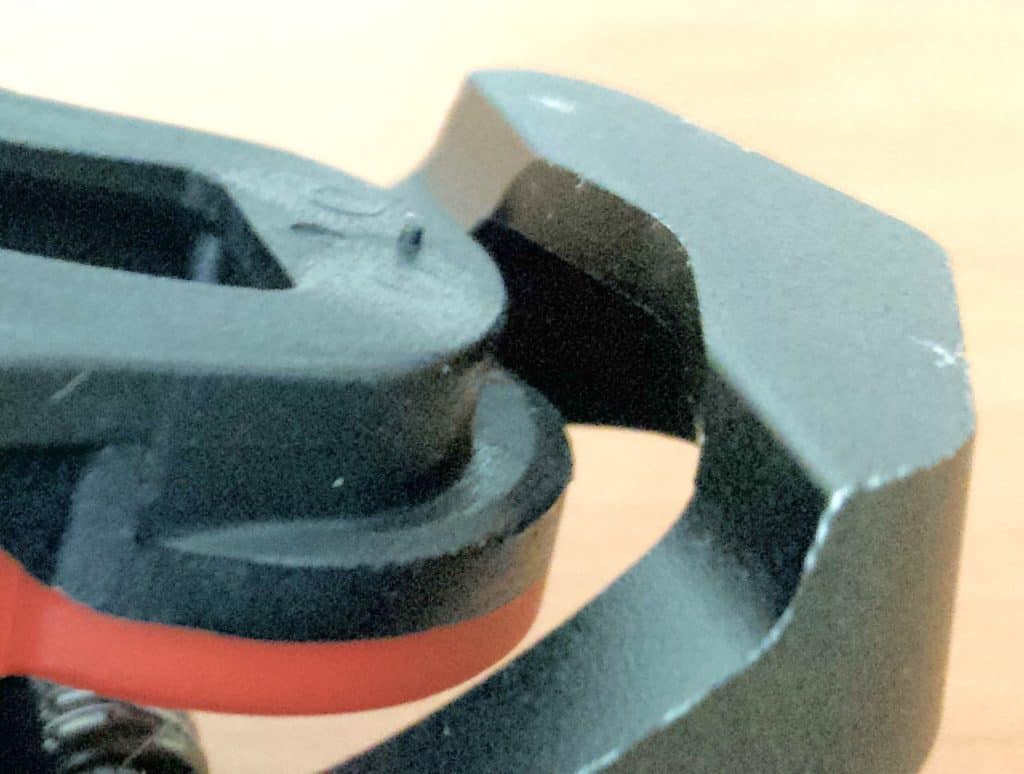
Viewing from another angle we see a recess (far left of the image) between apex and pedal platform, designed to slot into the corresponding edge on a clipless bracket. Anyhow, we’ll look at clipless pedals in detail shortly.
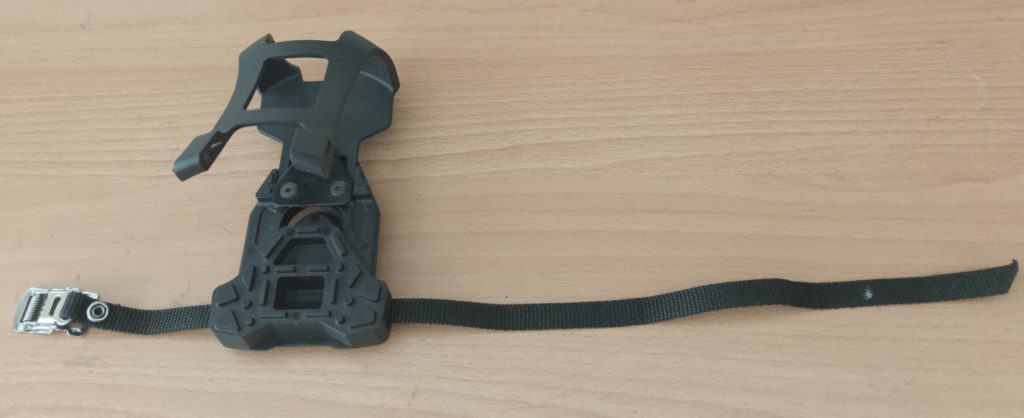
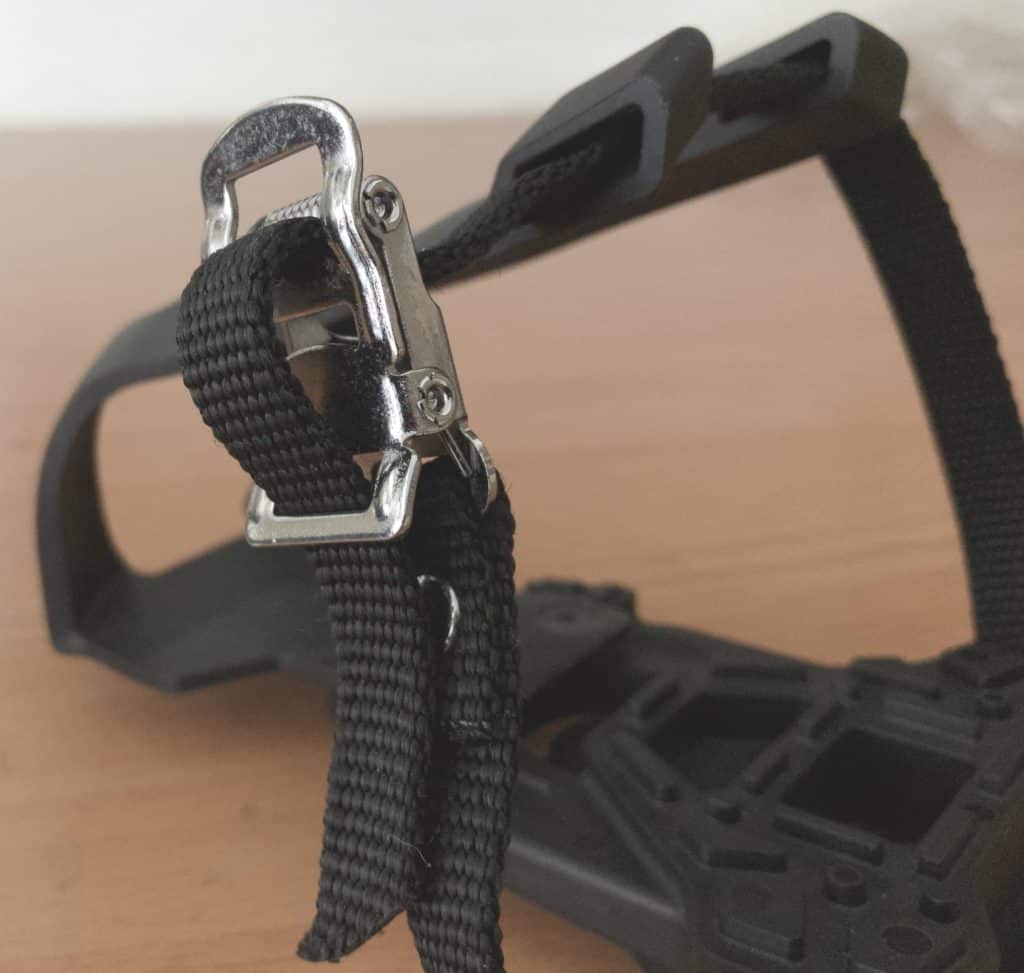
Hybrid Exercise Bike Pedals (Dual Sided Pedals)
I mentioned at the outset that hybrid best describes an increasingly common spin bike pedal design around today.
Hybrid is not an official classification, by the way, but shorthand we can use here to reference the dual nature of this type of pedal. When you hear people discussing dual sided pedals, you’ll now know what they’re on about.
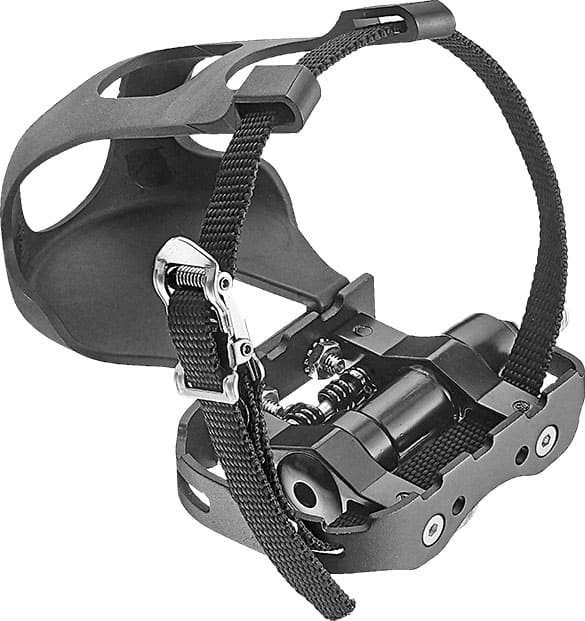
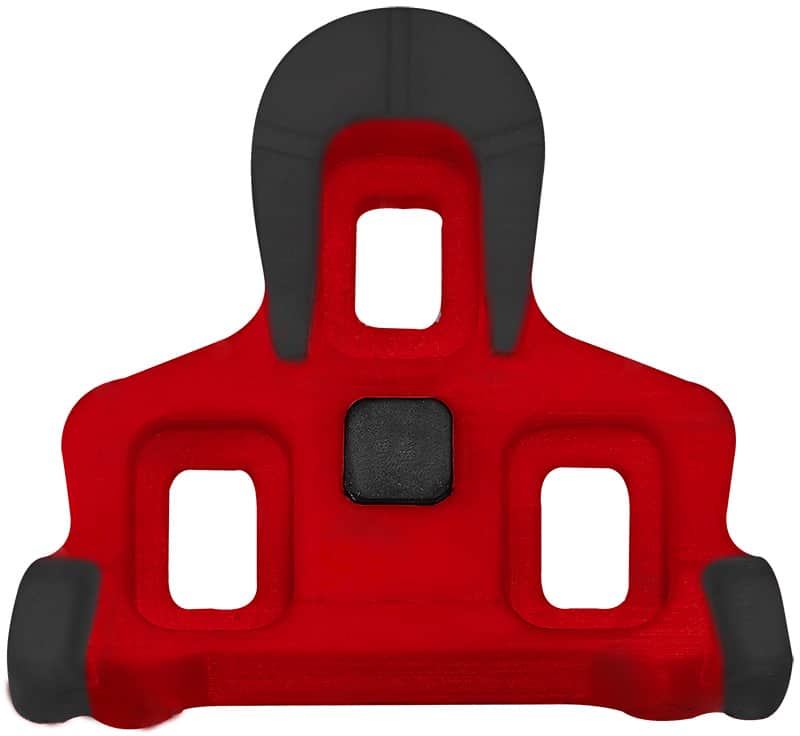
On one side of our S301, for example, you’ve got a standard flat pedal design, the kind that’s been around, well, forever.
The cage is bolted to the front of a pedal body which rotates around the central pedal axle, with a strap threading through the platform’s rear brackets, similar to the TSS02 above.
Now, suppose you are over using a cage: you don’t want to use one any more, or you want to try an alternative.
Flip over the pedal to reveal the cleat bracket on the other side. Voilà!
Wait a minute. Cleats . . . let’s clear up what they are and how you use them.
Pedal Cleats and Cleat Brackets
A cleat is a thermoplastic (the most common material) bracket attached to the sole of your shoe which presses into a corresponding spring-loaded bracket on your pedal.
Cleats come in two types: for road bikes and mountain bikes (left image). Mountain bike cleats recess into the shoe; convenient for frequent dismounts and walking around. Road bike cleats attach to the bottom of your shoe. Both types can be used for spin bike pedals. It just depends on the type of pedal you install.
Cleats are tough. They don’t break, and only wear out on longer rides where cyclists dismount and walk around on abrasive surfaces. A few months of that will chew chunks out of even the toughest.
If you’re not a ‘roadie’ adapting your cycling pedals to your exercise bike workouts, opting for a pedal/cleat combination where the cleat recesses into your shoe’s sole is probably best.
Anyway, if you use an exercise bike pedal toe clip in conjunction with your standard athletic or running shoe, flip the pedal over so the toe clip hangs beneath, facing the rear.
You’ll now need a shoe with the bolt holes to which you’ve bolted the right cleat.
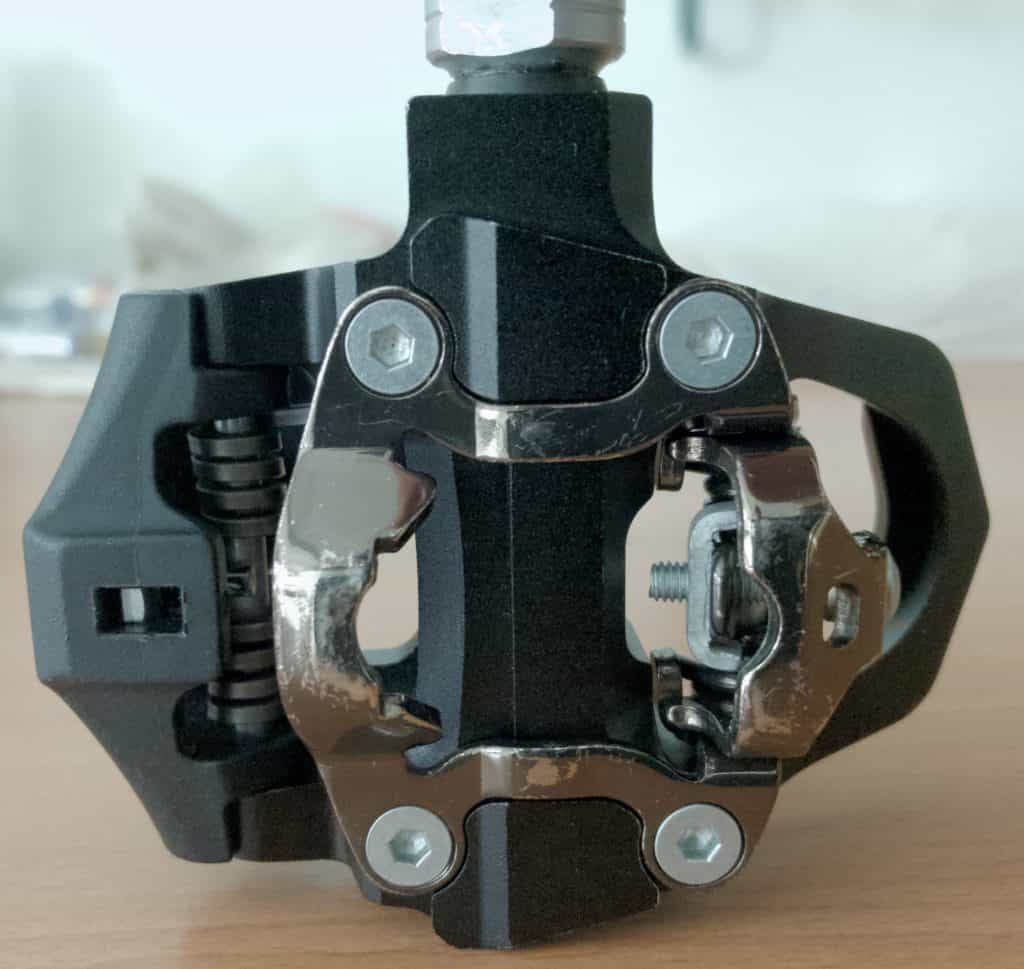
You hook cleat edge under the front of the bracket, then press down. (Image shows the clipless mechanism; the principle is the same for both).
The bracket’s rear hinge opens, then accepts the cleat with a ‘clack’ (rather than a click).
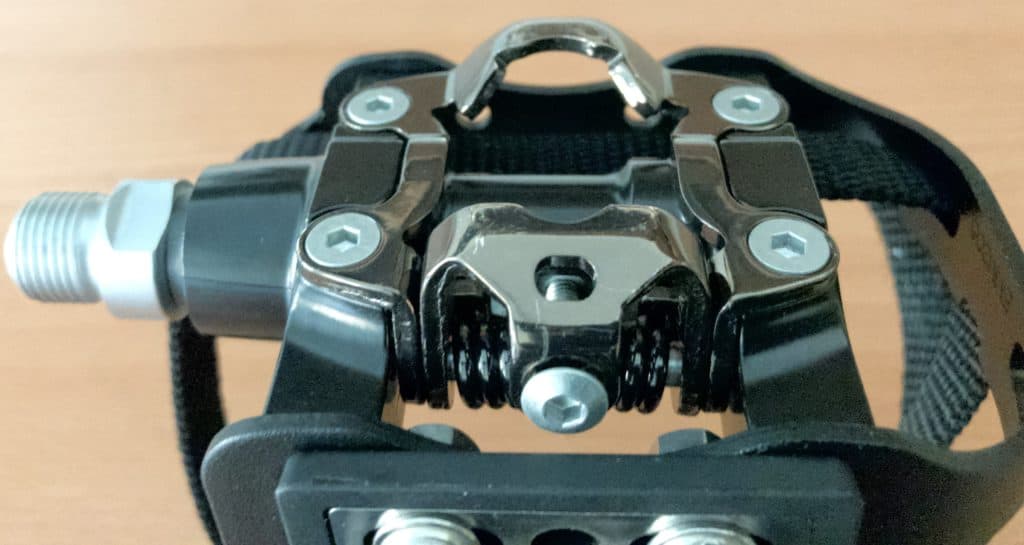
Note the spring maintaining the tension on the rear hinge.
Turning the Allen bolt with an Allen wrench controls the tension. Turning left releases pressure on the spring, thus loosening the tension, making clipping in easier. Turning to the right means you’ll need extra pressure to engage the cleat, but you get a firm, tight connection.
Looser or tighter? Personal preference decides. There’s no right or wrong approach here, although if your shoe is too loose in the pedal, the exercise routine will be hard if not impossible to complete—your shoe will shift, even rattle around, in the pedal.
Float is an important concept in relation to the degree of side-to-side movement a cleat allows relative to the bracket.
You can choose between zero degree float cleats or cleats with a limited range of float.
No side-to-side movement is possible with zero degree float. Your shoe cleat remains firm in the bracket. A small degree of movement breaks the cleat out of the bracket. All your energy, then, becomes concentrated into your exercise routine, making it more efficient.
Again, personal preference is the key here. You may like your foot anchored, or feel more comfortable with a degree of movement.
A cleat with limited float allows some side-to-side movement. You’ll need more of a twist to get the cleat free of the bracket.
If you have any knee issues, a feeling of tension in your knee when clipped in, you may find limited float is more comfortable.
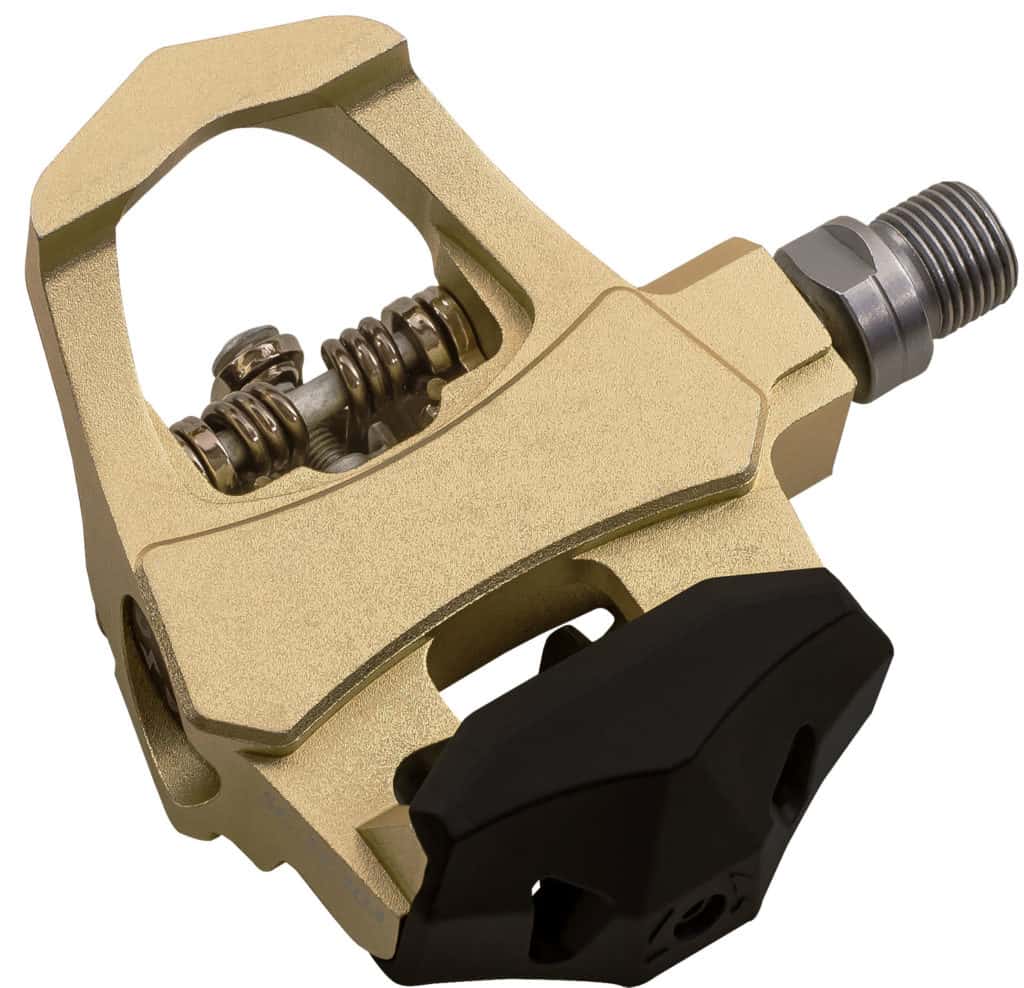
S301 Toe Clip and Cleat Combo
This design combines a bracket on one side with a toe-clip/cage on the other. The cage is also adjustable. Loosening the bolts, position the cage for exactly the right position to support your foot.
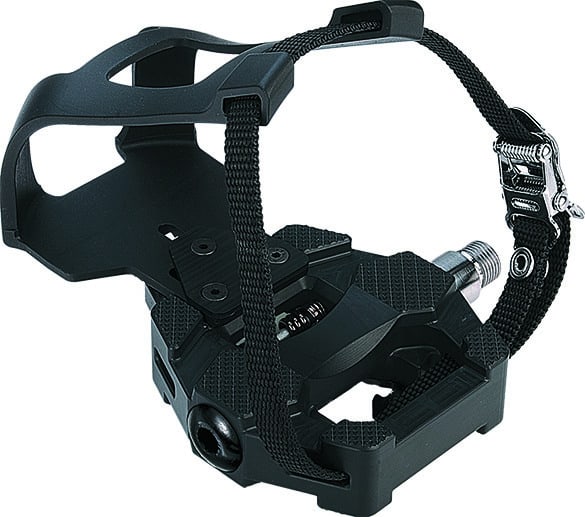
In addition, the pedal body looks less utilitarian, whilst still providing an exceptionally grippy, wide platform-like surface.
If you graduate to a cleat, flip it over for the clip-in version.
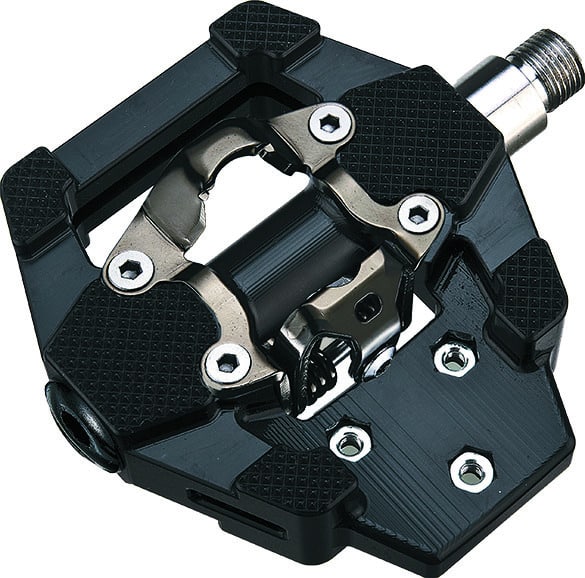
CLIPLESS PEDALS
A confounding name for pedal designed for a shoe to “clip” into it. Clip references the design preceding toe-clips, the good old flat pedal.
A clipless pedal does, in fact, clip in.
This type of exercise bike pedal suits cyclists replicating their road bike experience—this design is the one you’ll find on most road (“racing”) bikes.
Machined into the flip side, and lacking on road bike clipless pedals, is the bracket you’ll now recognize, giving you an either/or choice:
- Going with your road bike shoes
- Opting for a perhaps more comfortable second pair fitted with the appropriate cleats.
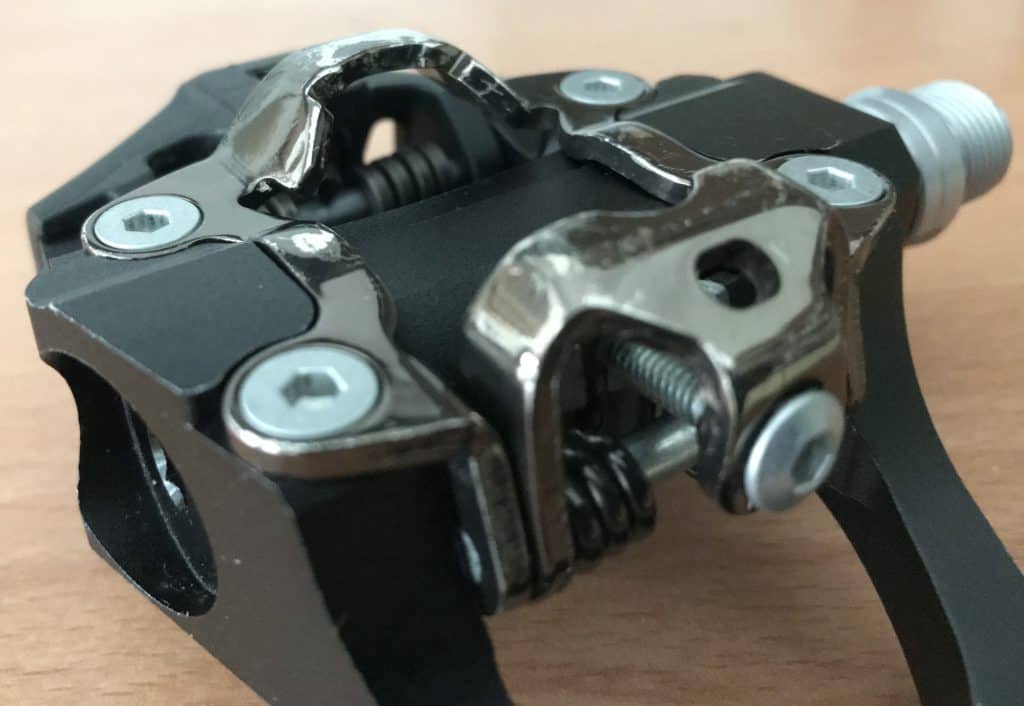
Bracket tension is adjusted in the same way as the other models.

You’ll also find the same spring tension adjustment bolt for the main surface as you do on standard road bike clip-ins for fine tuning clip-in and clip-out.
Lefty loosy; righty tighty.
WHAT ARE THE BEST PEDALS FOR EXERCISE BIKES?
The best pedal is the type that suits you best.
If you are new to working out on exercise bikes, flat pedals allow you to concentrate on exercising, rather than dealing with the distraction of this new means of continuous attachment to your pedals. Once accustomed to the experience, you can confidently graduate to a more efficient hybrid pedal design.
It’s all about your comfort zone though. Most people new to the exercise bike scene will find the toe clip models fine. You’d best try a pair out for a while. If you experience any prolonged difficulties, simply install a pair of flats.
Clipless pedals, especially zero-float models, offer quite a different experience. You’ll probably find it better to begin a spinning bike exercise career with these pedals by using cleats with a generous amount of float.
HOW DO YOU TAKE THE PEDALS OFF YOUR EXERCISE BIKE?
In this section we’ll give you the essential information for removing and installing your exercise bike pedals.
The procedure is not difficult, but you need the right tool and the right technique.
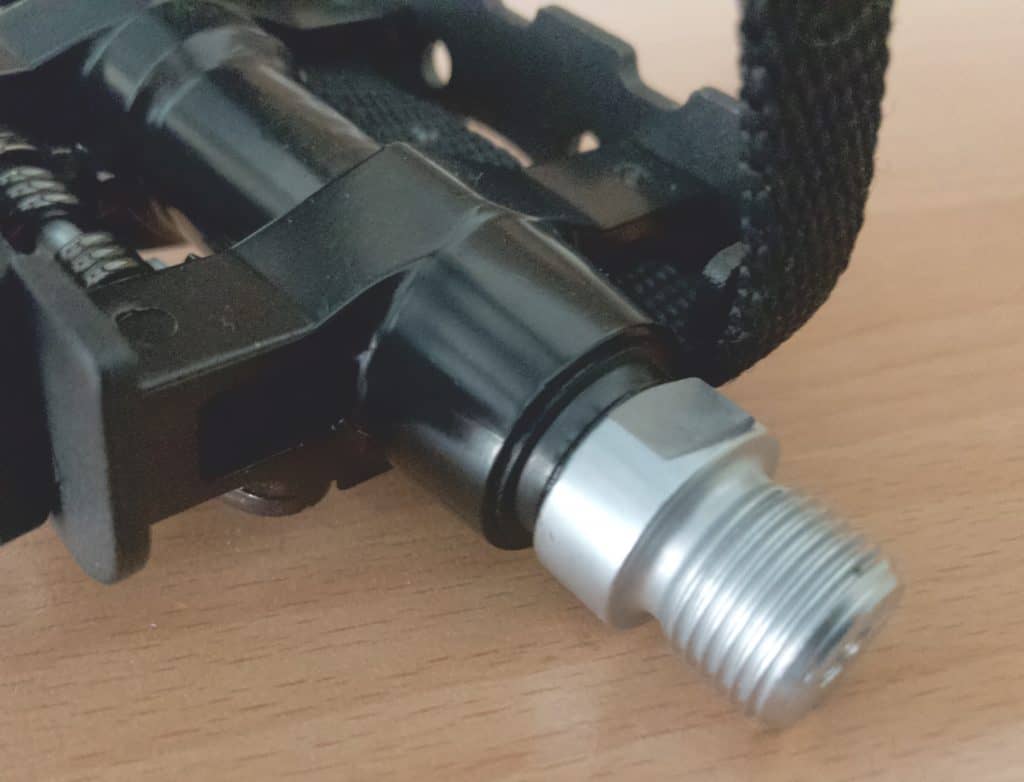
Spin bike pedal axles are the standard 9/16 of an inch you’ll find on 99% of bikes.
Pedals are always tight in the crank and break free suddenly as you apply pressure with your wrench. Managing the removal is tricky although with practice you’ll master the key skills.
As an aside, loose pedal ‘play’—with even the tiniest movement—during your spinning sessions wears out both the pedal axle and crank threads. Periodically check to make sure each side is tight without even the slightest degree of play.
Pedal Tool
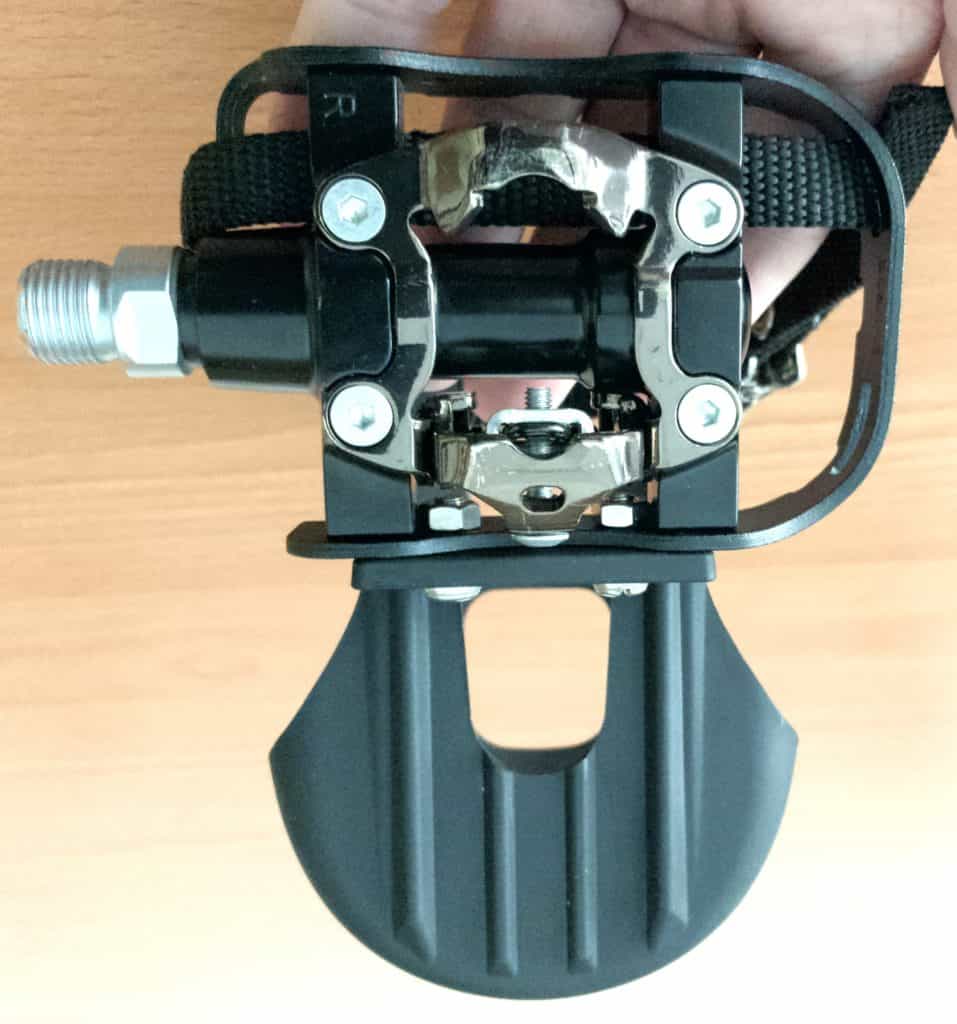
You’ll need a 15mm open-ended wrench to fit the parallel surfaces machined onto the axle between crank and pedal body.
You might consider investing in a long handled wrench since an extended handle affords extra leverage, making the removal process easier—much easier where a pedal has been on a bike crank for a long time.
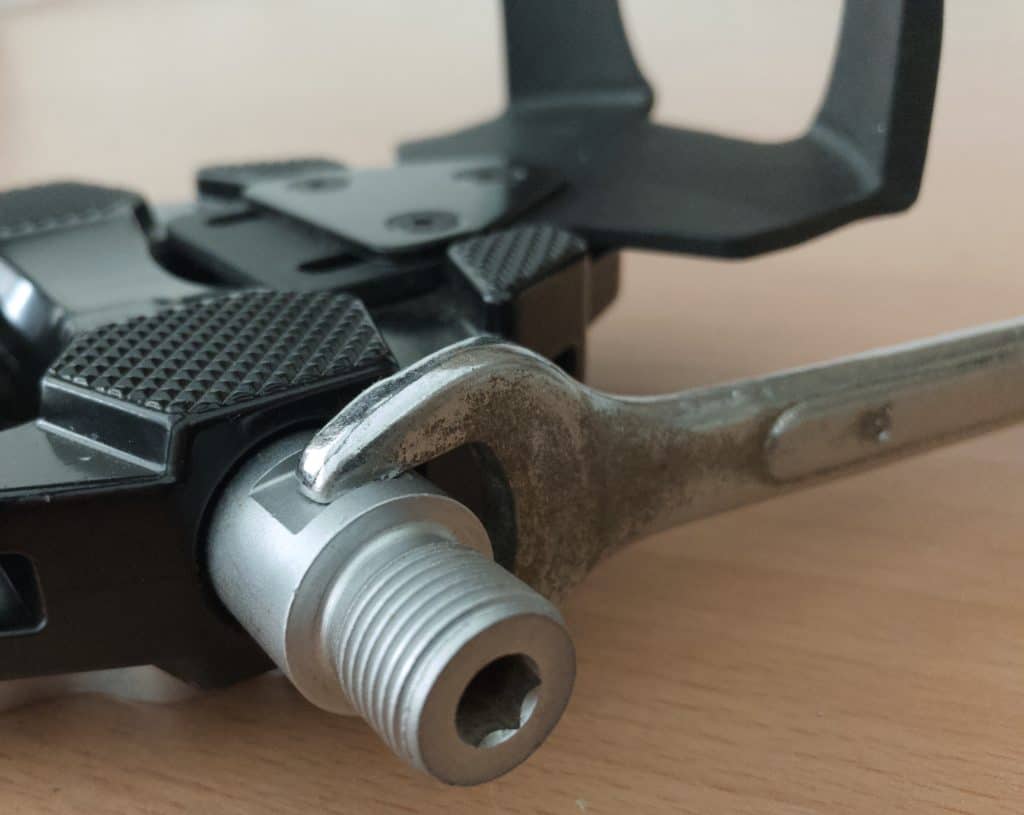
Slip the wrench onto the parallel surfaces and be prepared to use a good deal of elbow grease if your wrench is short. Extending your wrench length via a piece of pipe or even an old seat post helps removal, although requires more care and often an extra pair of hands.
Many exercise bike pedal brands also machine an Allen key socket into the axle, seen here at the end of the pedal axle in the image.
You rotate the pedal around and forward into the space below the exercise bike’s down tube, giving you a clear space to insert the Allen wrench. This way you avoid being close to the bike (seat tube and crank) which makes for more convenient removal.
Then give the wrench a sharp tap with the palm of your hand. This action breaks the pedal threads free of the the crank (arm) threads.
Technique for Changing Exercise Bike Pedals
Be aware that the pedal will likely break free from the crank threads’ grip suddenly.
Without an incremental, gradual movement, the pedal’s instant release may send your hand into the floor or back in your own direction, and the wrench flying in all directions.
So, take care; wear a pair of work gloves to protect your hand from impact abrasion.
You may find one or both pedals stubbornly resist removal.
Here’s some advice from the original bike master online, and note the importance of using good wrench technique.
Long handled wrenches increase your leverage exponentially with every extra inch of length. A particularly stubborn pedal demands a long wrench, or if you don’t have a long wrench handy, you can extend the wrench with aluminum or steel tubing (a spare or old seat post serves as an excellent extension handle by the way).
You’d also best carry out any heavy wrenching with a partner on the other side, securing the other crank, limiting crank movement as you attempt to break the pedal threads free of the crank threads.
Where you employ an extension handle, be extra vigilant when the pedal breaks free—wrench and extension handle in sudden motion adds to the potential for injury.
PEDAL EXERCISERS or Mini EXERCISE BIKES
An increasingly popular alternative to a full-sized exercise bike is a pedal exerciser or a mini exercise bike as some call them.
What Does a Pedal Exerciser Do?
Make your life much more convenient by giving you a wider range of options for exercising. Mini Exercise ‘Bikes’ are also a lot cheaper.
You could use a pedal exerciser either in addition to, or as a complete replacement for, a full-sized exercise bike.
These units can even go under your work desk—raise your heart rate the healthy way (not simply with caffeine) during the work day.
Note that mini exercise bike pedal designs are generally more simple. Most have a flat surface with a nylon strap arching from one side to the other. You slip your foot in as you would a pair of slippers; your foot wedges into the strap.
Be aware, too, that pedal exerciser workout quality won’t be up to the same standard as a standard exercise bike; there’s a reason spinning bike classes are run with complete exercise bikes and not pedal exercisers.
Which Pedal Exercisers Are the Best?
Just as with exercise bike pedals generally—and exercise bikes for that matter—your answer will change with the amount of time you’ve spent using one of these units.
A good resource which may help you come to a decision about an initial purchase is at Your Exercise Bike.
ARE PELOTON PEDALS SPD?
SPD is a Shimano proprietary design that everyone now uses when they’re talking about clipless pedals in general—a synonym for “clipless” in other words.
We classify our cleat products into SPD, on one hand, with Look’s Keo and Delta models, on the other—Keo and Delta are Look’s proprietary clipless designs.
Peloton’s stock pedals pair with Look Delta cleats.
Having said that, as we’ve explored in this post, many spin bike pedal designs are hybrid in that they have a toe clip on one side (or standard clip-in bracket), and a cleat bracket on the other.
You can swap out Peloton’s standard pedal for any other (assuming the axle’s a standard 9/16” which it most certainly will be in all but the most exceptional circumstances).
You’ve basically a choice to make, then, between SPD -style pedals or toe-clip/hybrid pedals. Each brand’s pedal specifications differ, with each producing a cleat compatible with their system.
FINAL COMMENTS
When you first start out on exercise bikes, small details such as the particular type of pedal you employ during your workouts don’t matter much.
But once you are into the regular rhythm of an exercise bike workout regime, you’ll begin to form preferences about which apparel is most comfortable, or which spinning class routine suits you best and so on.
Your experimentation will certainly extend to exploring which pedals are better suited as you progress, become fitter, and more discerning about your kit.
After reading through this post, you are now hopefully able to make a well-informed decision about which pedal may best suit your needs, whatever stage you are at in your exercise and spinning bike career.