Replacing your bike pedals is a simple procedure—in theory.
In practice, it can be a very tricky business.
There’s product choice: which type and brand do you select as a replacement for your existing pedals?
Then there’s removal and installation, both of which depend on the right tools and techniques.
Getting pedals off your bike is usually easy, but in some cases almost impossible, which points to the importance of the right tools and technically correct installation.
Installing pedals correctly at the time of installation is a huge factor in determining the outcome of removal when the time comes.
And come it will.
CONTENTS
Do you need to replace your pedals?
Replacing pedal parts
Wrenches and techniques
How to deal with seized pedals
WHEN DO YOU NEED TO REPLACE YOUR PEDALS?
The main reason for replacing bike pedals is where one or the other, stops performing in the way that you have come to expect.
The key word is “need” (nothing wrong with upgrading to a pedal that will give you better performance though).
If you’ve smacked a flat pedal on a rock while hurtling downhill, bending it off-center or worse, then it’s a straight up replacement scenario.
Otherwise it will be a case of a pedal that has become rough or noisy. Or both.
Rough
Faced with a pedal that no longer spins easily, or if it was naturally stiff—but smooth—to begin with then starts to feel ragged, a worn bearing is the most likely cause.
One or more ball bearings has disintegrated to some degree, or grit has found its way into their containing race or cage.
Noisy
Noise is the bane of the modern bicycle and finding the origin of particular clicks, squeaks, and creaks can be extremely difficult.
Here are some things to consider as you seek the source of noise.
Frame, BB, or Washer?
Scenario: one or both pedals begin squeaking or creaking.
Be aware that noisy pedals are responsible for plenty of confusion in bike troubleshooting.
Creaking or clicking sounds that start small and become louder, or just suddenly become audible, are often put down to a faulty bottom bracket.
Where a bike frame is alloy or steel, noise may be due to the frame. For example, the gussets on alloy frames which have them can move incrementally, which generates a BB-like creaking or clicking sound.
The most likely culprit, though, is a tiny bit of play between a pedal’s axle threads and the crank threads.
The pedal gives slightly under pressure during the downstroke, then clicks back into position as the pressure is released on the upstroke, producing a rhythmic clicking or creaking.
Mid to high end bikes should have a washer installed on the pedal axle between the axle threads and the pedal.
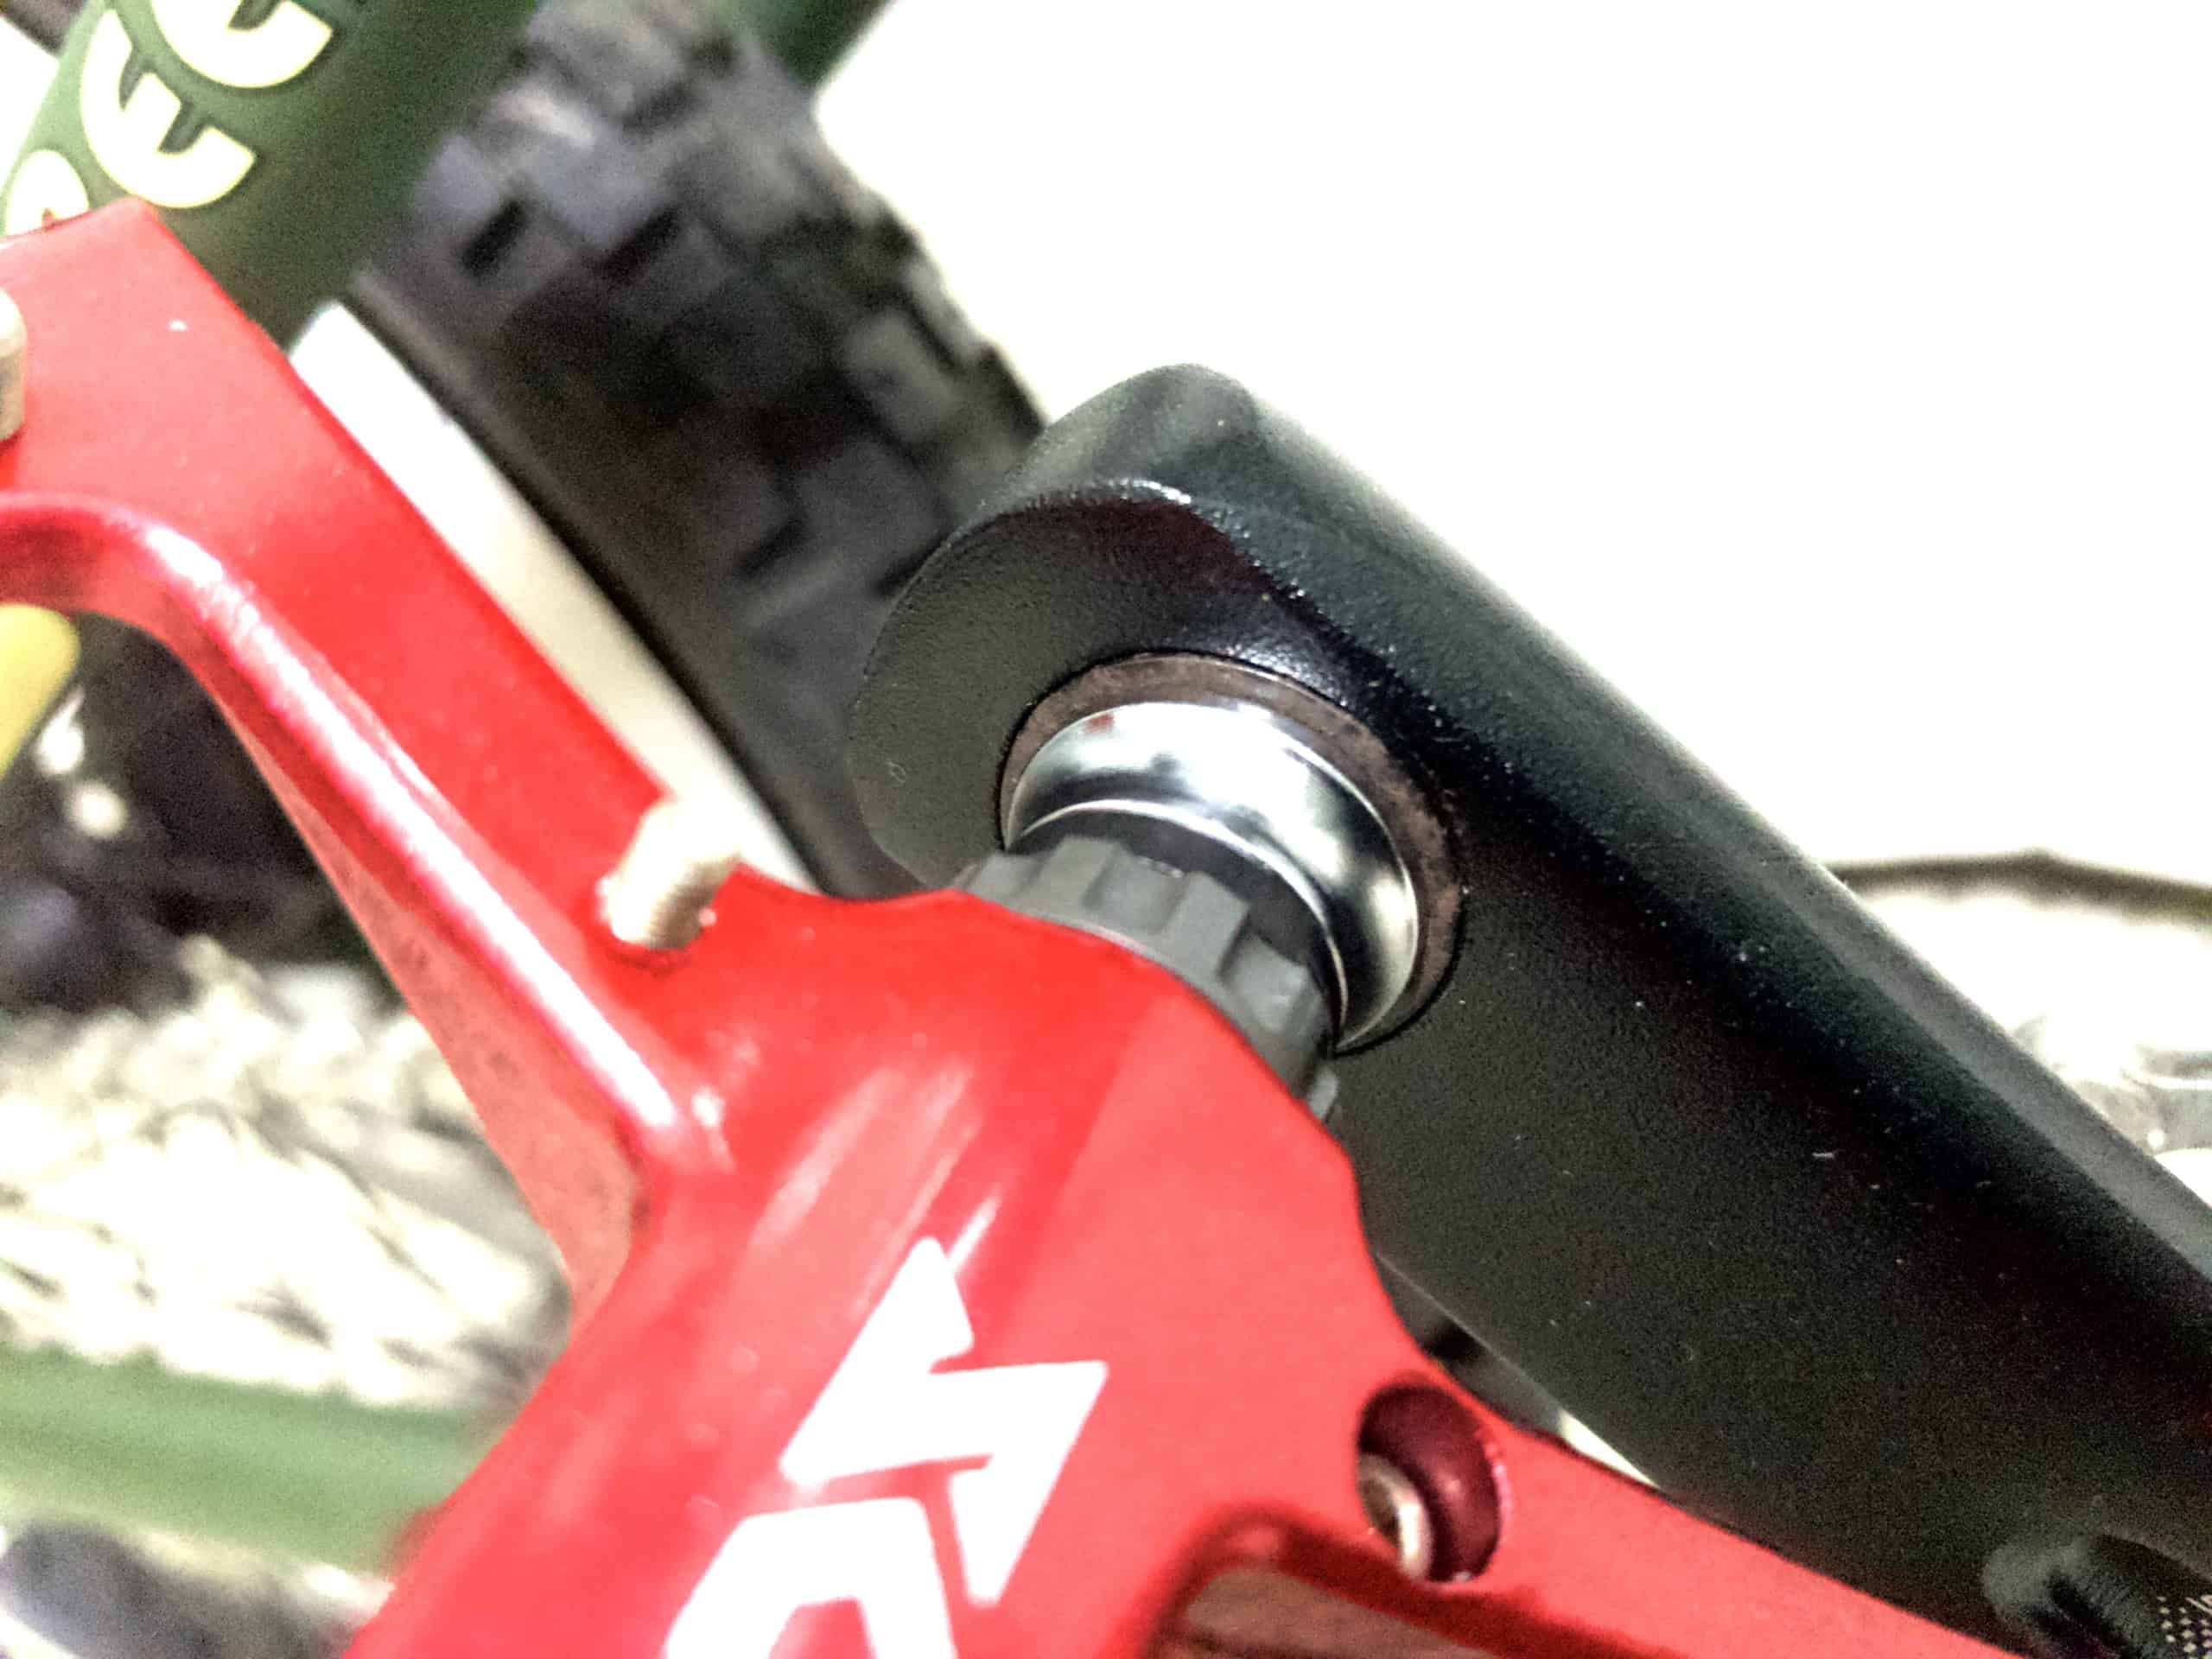
Modern cranks have a groove around the axle threads into which the washer settles as you tighten the pedal into the axle.
Two things:
- Make sure a washer has been installed.
- Make sure the washer is not sitting up on the edge of the groove—the pedal must evenly contact the washer right the way round.
Is it the Cleat?
If you are using clipless (ie. clip-in) pedals, the pedal body may have worn away a little on the front edge, which locks into the leading edge of the cleat when clipped-in.
That can result in
- a greater degree of float than you’re used to
- noise as the cleat rocks in the pedal body
Also check to see if your cleat bolts have loosened with use. (Routine bike maintenance should include a regular cleat checks).
Loose Pedal
If you use washers and have tightened a pedal well inside the minimum and maximum recommended torque tolerances, but still detect a slight movement back and forth, then you’ve probably damaged either the pedal axle thread, crank thread, or both.
REPLACING BIKE PEDAL PARTS
Pedals are made available in pairs. If one of a pair becomes unusable, you’ll probably have to purchase a new pair.
I say ‘probably’ because more and more brands are going to the source, to a pedal-manufacturer such as SCADA.
The truth is there are not many manufacturers in this business. That is, companies who do the actual, original manufacturing (OE or ‘original equipment’ manufacturing).
More and more small brands are partnering with the small group of OE pedal manufacturers that exist, like SCADA, to design and produce their own branded pedals.
Minimum order quantities can go as low as 200 pairs.
A range of parts can be put aside for quick replacement of components that arereplaceable.
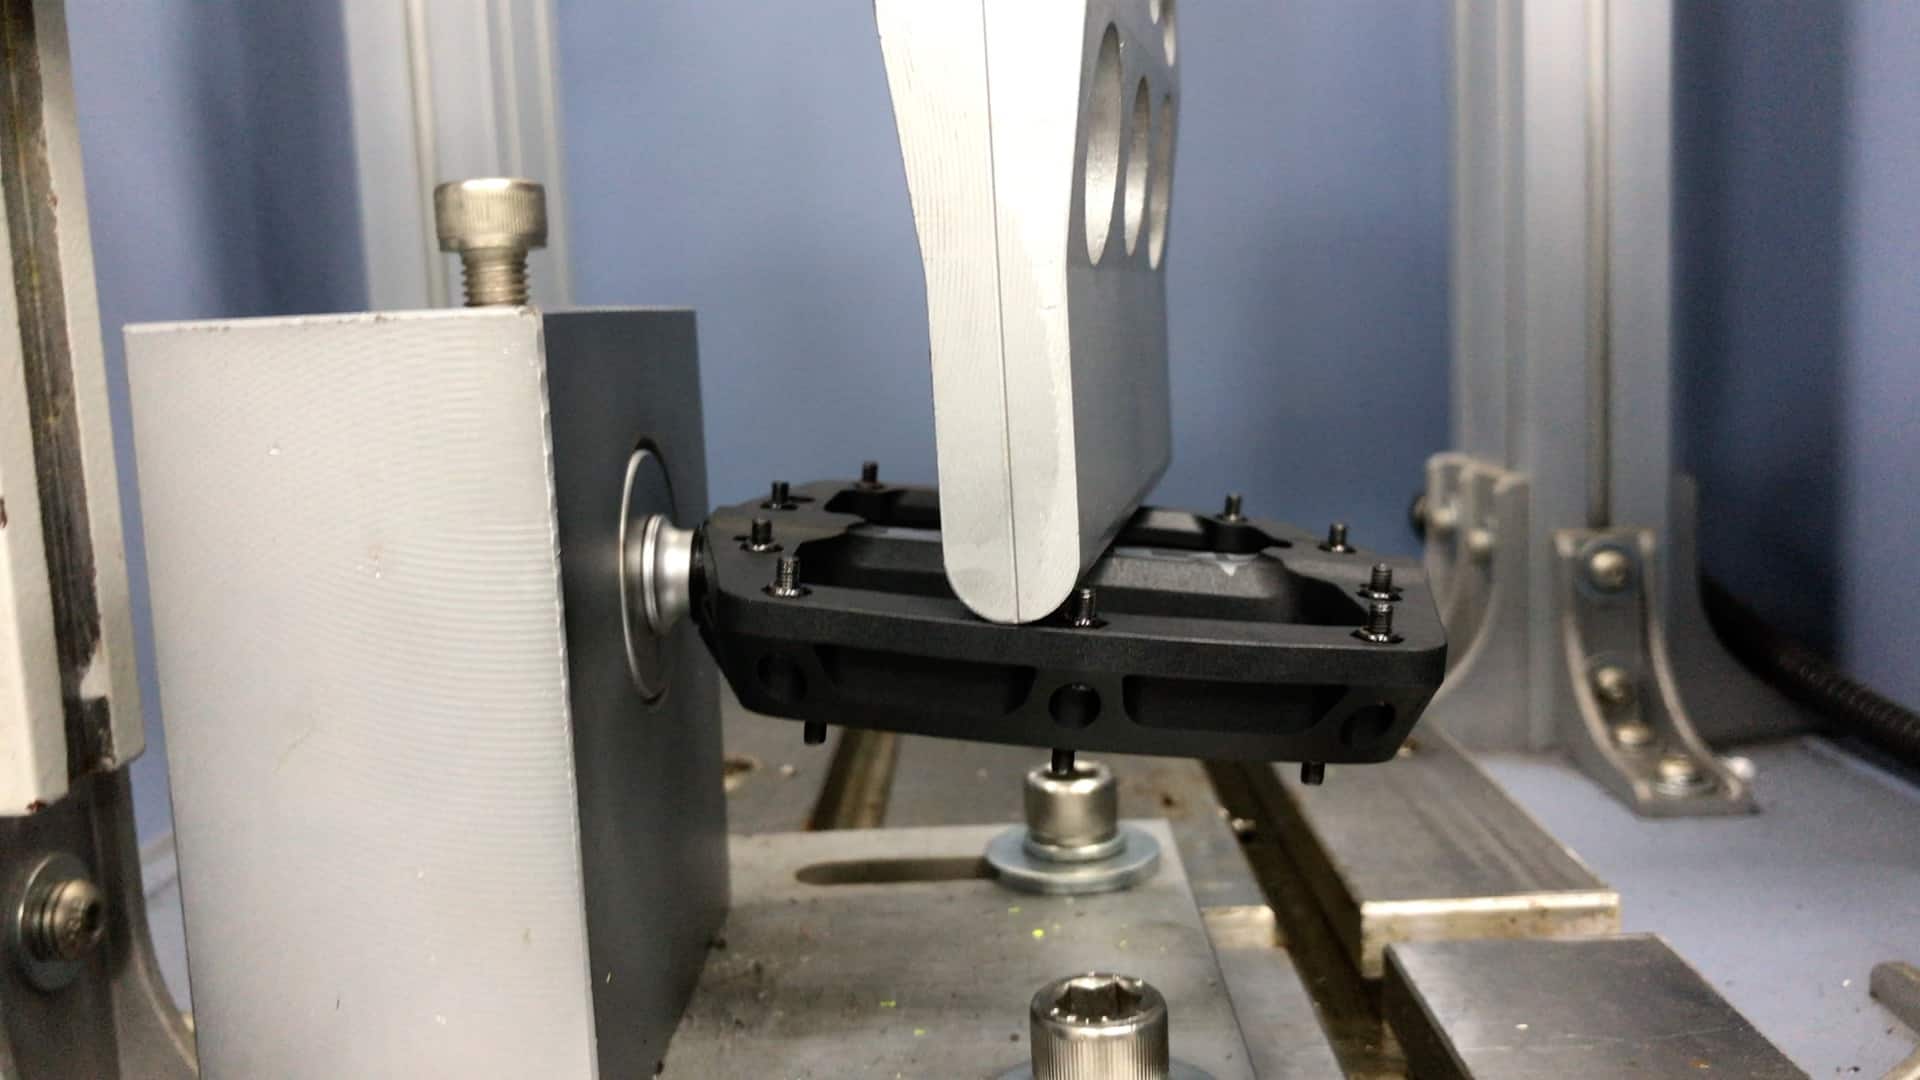
Pedal Parts
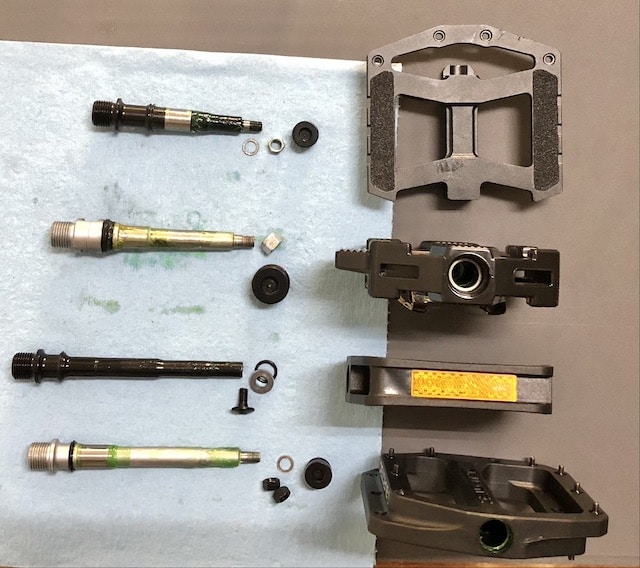
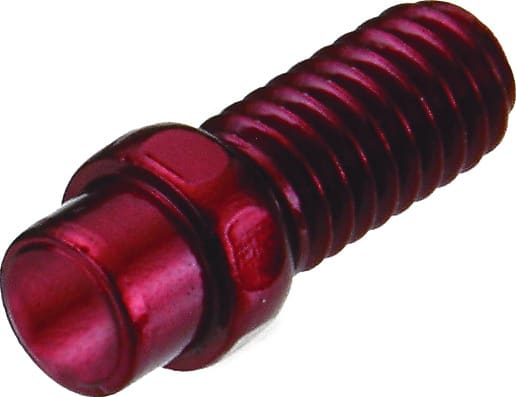
A pedal consists of a pedal body into which an axle (not a ’spindle’) is inserted.
A (normally sealed) bearing intermediates between axle and pedal body.
Each pedal body is designed for a flat shoe sole or to accept a cleat bolted to the sole.
As an alternative to replacing your bike’s pedals, swapping out a malfunctioning part, thus avoiding the expense of getting new pair, may be the best way to go.
Bearings
Older pedal types are built around loose bearings, allowing the replacement or the re-greasing of bearings or axles.
This video clip demonstrates servicing bearings on one of these older models.
Replacing loose bearings are fairly straight forward.
Remove the bearings, clean them, add the grease, then replace.
Sealed bearings are easier and harder at the same time.
A faulty sealed bearing is better replaced—removing the seals and the bearing cage, then cleaning and re-greasing is possible, but without specialist tools, knowledge, and experience, disassembling and reassembling a sealed bearing will likely ruin its integrity.
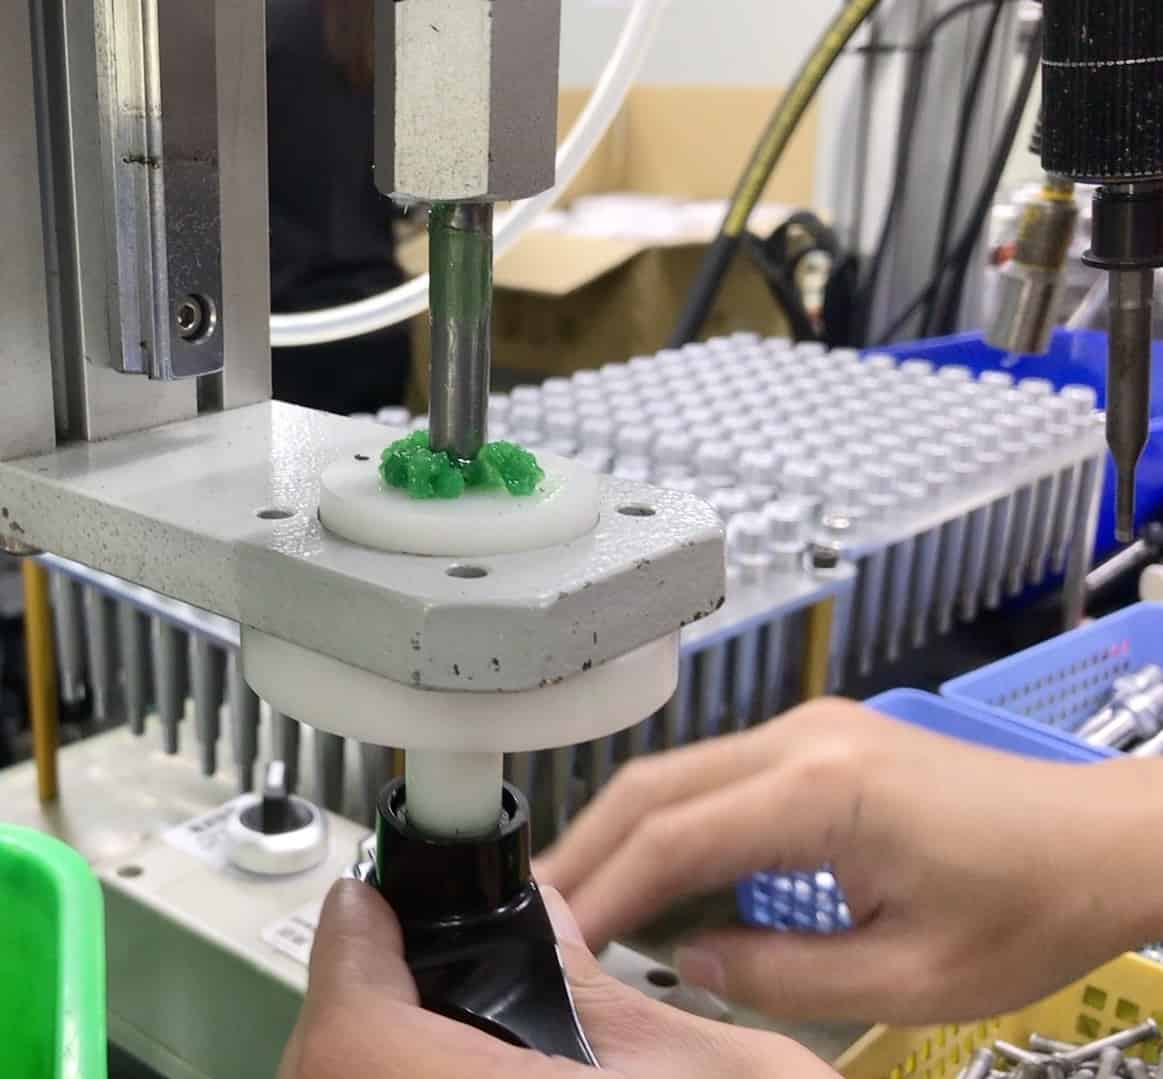
However, replacing the small-diameter sealed bearings you find in pedals is not easy.
They are originally installed with a machine that presses a sealed bearing unit into place, which making it difficult—if not impossible—to get them out, then back in.
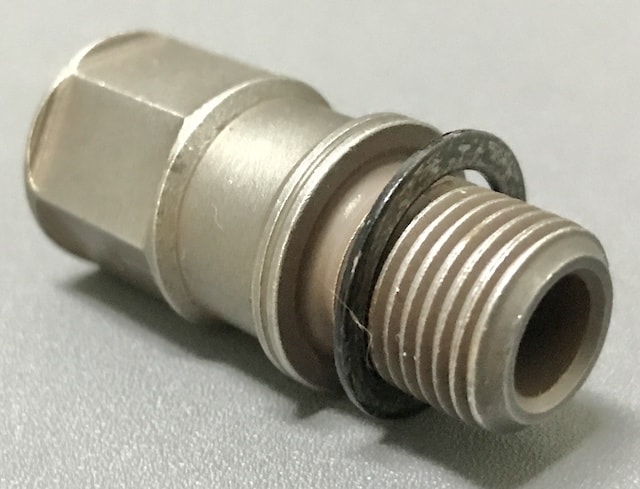
Axles
The technical replacement procedure is simple.
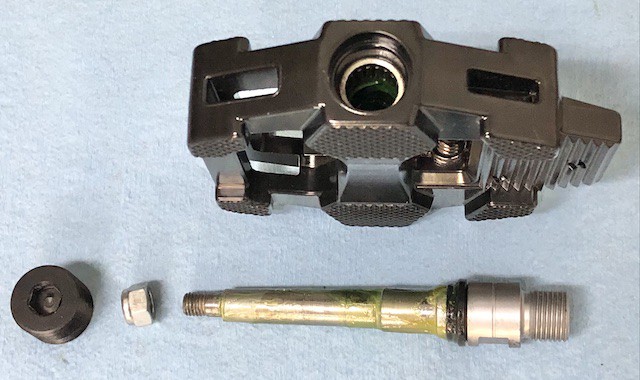
Modern pedals have an outer ‘dust’ nut which seals the bearings and axle within a greased cocoon.
Removing this nut allows access to the axle nut which holds the axle to the pedal body.
Removing the axle nut allows you to extract the axle from within the body.
If your axle is damaged—which would most likely mean damaged axle threads—you need to obtain the right replacement axle since axles are specific to pedal models.
Brackets and Cleats
If you’re using a clipless pedal, damaged brackets can be substituted for new ones. You’ll be routinely replacing cleats of course.

A pedal bracket is one of the final additions to a pedal body in the manufacturing process.
Damaged brackets are easily removed; a replacement bracket can be quickly fitted into place.

The units are fixed to the pedal body with Allen bolts.
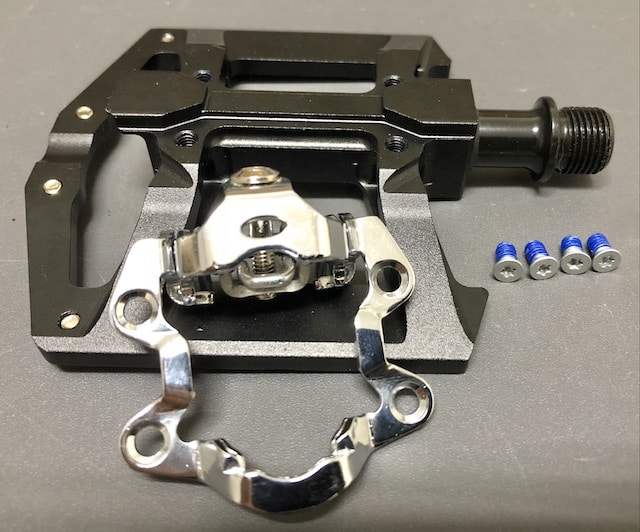
Loosen and remove the bolts with an Allen wrench.
Reverse the procedure to install a new bracket.
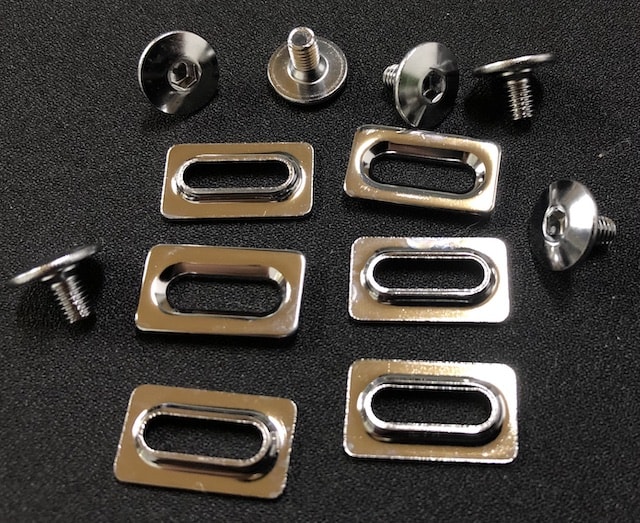
Cleats are all about the bolts.
Periodically check cleat bolts for tightness.
Changing cleats is as simple as removing the bolts then installing the new cleat with its new bolts.
Pins
Pins which screw into a pedal body can bend or break under extreme duress.
There’s nothing you can do if a pin forms a part of the pedal body as on lower- end pedals. And it probably does not matter much anyway.
The pins on higher end pedals either thread directly into the pedal body or connect to a bolt through from the opposite side.
Easy to replace as necessary.
PEDAL WRENCHES AND TECHNIQUES FOR REPLACING BIKE PEDALS
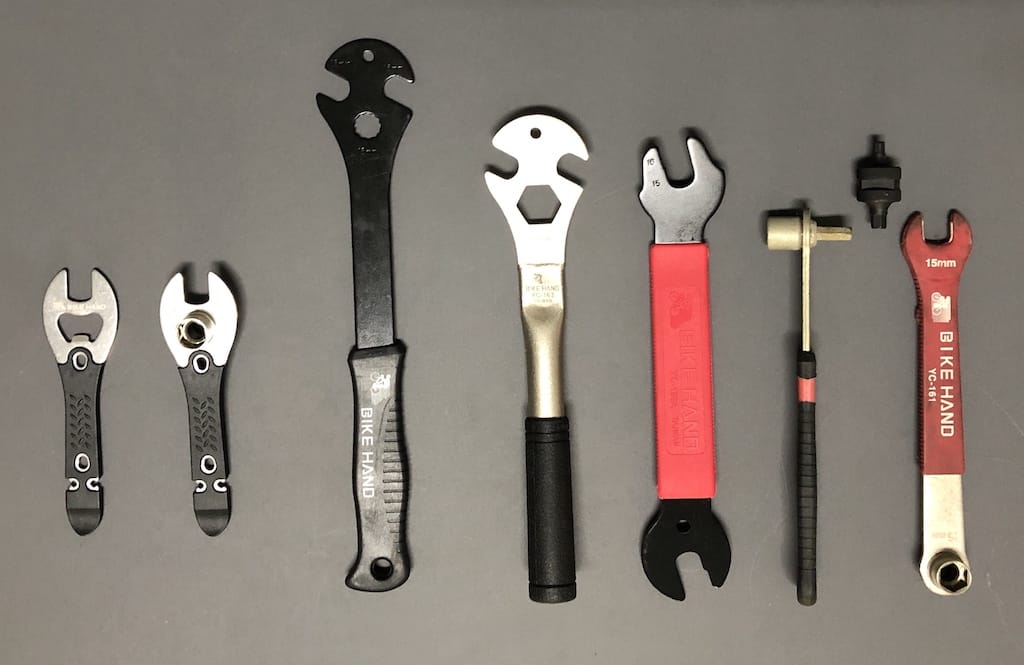
Tool selection for replacing bike pedals has two requirements:
1. a wrench that fits 2. leverage.
The best wrench based on those criteria is #3, the long black one: the jaws fit and the extra leverage reduces the effort required to break pedal threads free from crank threads.
Nevertheless, the other choices will be right depending on the situation.
You may be told that you don’t need a specialist wrench; a 15mm open ended wrench that just about everyone has lying around will do.
Here’s the thing: a specialist tool makes a tough job much easier.
Hopefully you’ll never experience the physical pain (when the tool slips and you lose skin from your hand) and mental pain (‘this thing just won’t budge…!) stemming from not having the right wrench at hand.
Replacing a pedal on a bike not consistently maintained, where the pedals were not installed properly at the start, poses various degrees of difficulty on a sliding scale when the time comes to replace one.
The challenge is—each and every time—to break the pedal threads free of the crank threads.
The longer your lever arm, the easier exerting the force required to overcome the resistance becomes.
Pedal size is measured relative to the axle diameter with pedals measuring either 9/16 or 1/2 inch, 9/16 being the most common.
If your crank is integrated (2 piece) or 3 piece they’ll take 9/16” / 15mm; one-piece cranks normally take 1/2” pedals.
Removal Technique
We put together a detailed post on all aspects of bike pedal removal.
In brief, pedals install by screwing the pedal into the crank towards the front of the bike—on BOTH sides (the drive side is a left-hand thread).
Remove a pedal on either side by turning the pedal towards the rear of the bike.
Standard Pedal Wrench
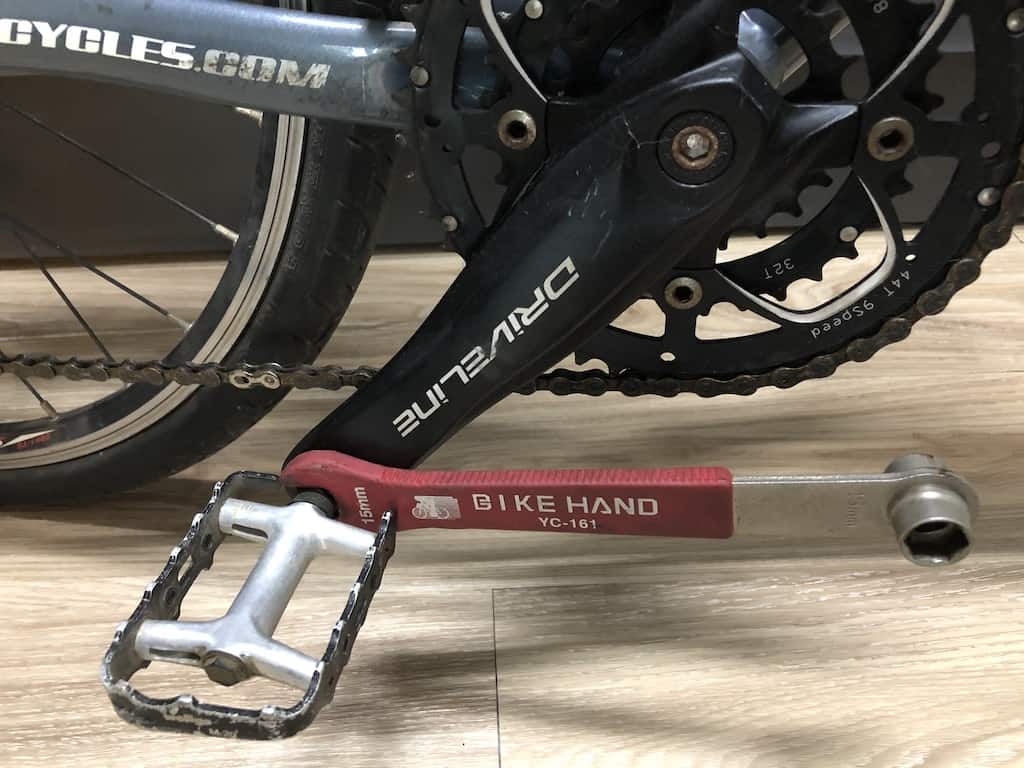
A pedal wrench with 15mm jaws is a handy addition to a bike toolkit.
The handle is long enough to give enough leverage for tightening or loosening properly installed (ie. a smear of oil or grease on the threads at installation), and consistently maintained, pedals.
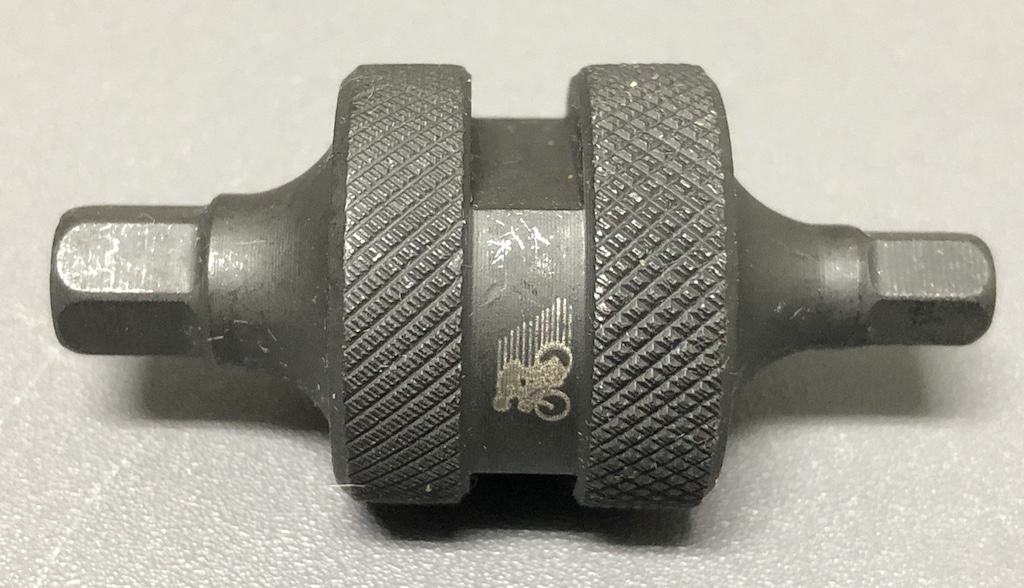
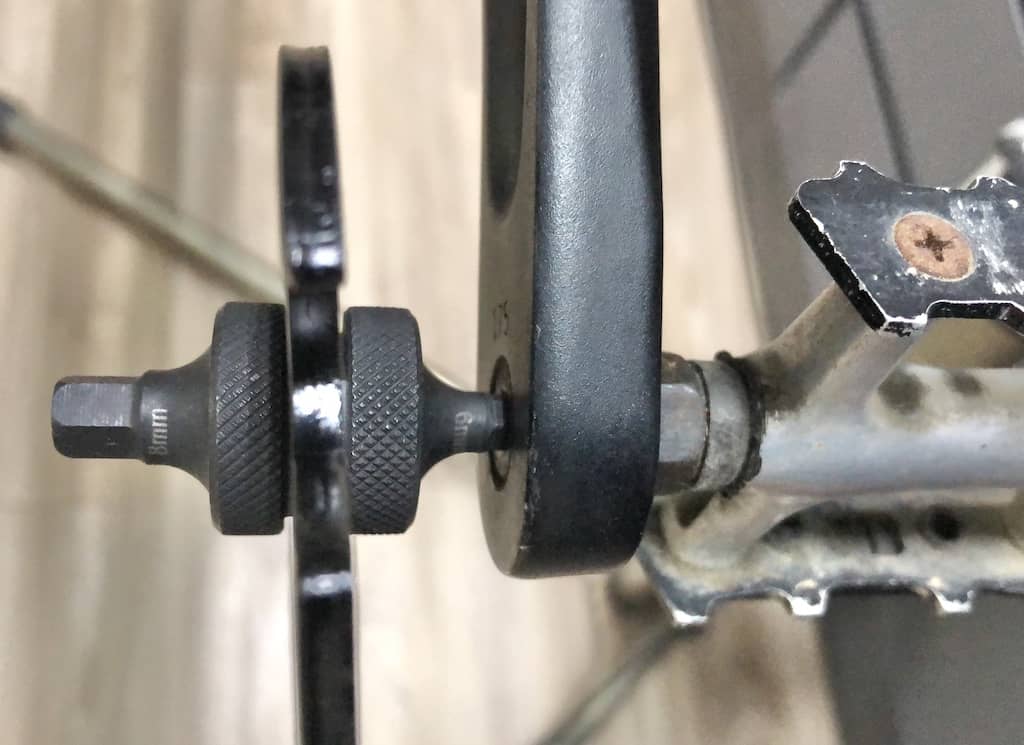
Allen wrench

Mid to high-end pedals have an Allen wrench socket machined into the axle’s crank end.
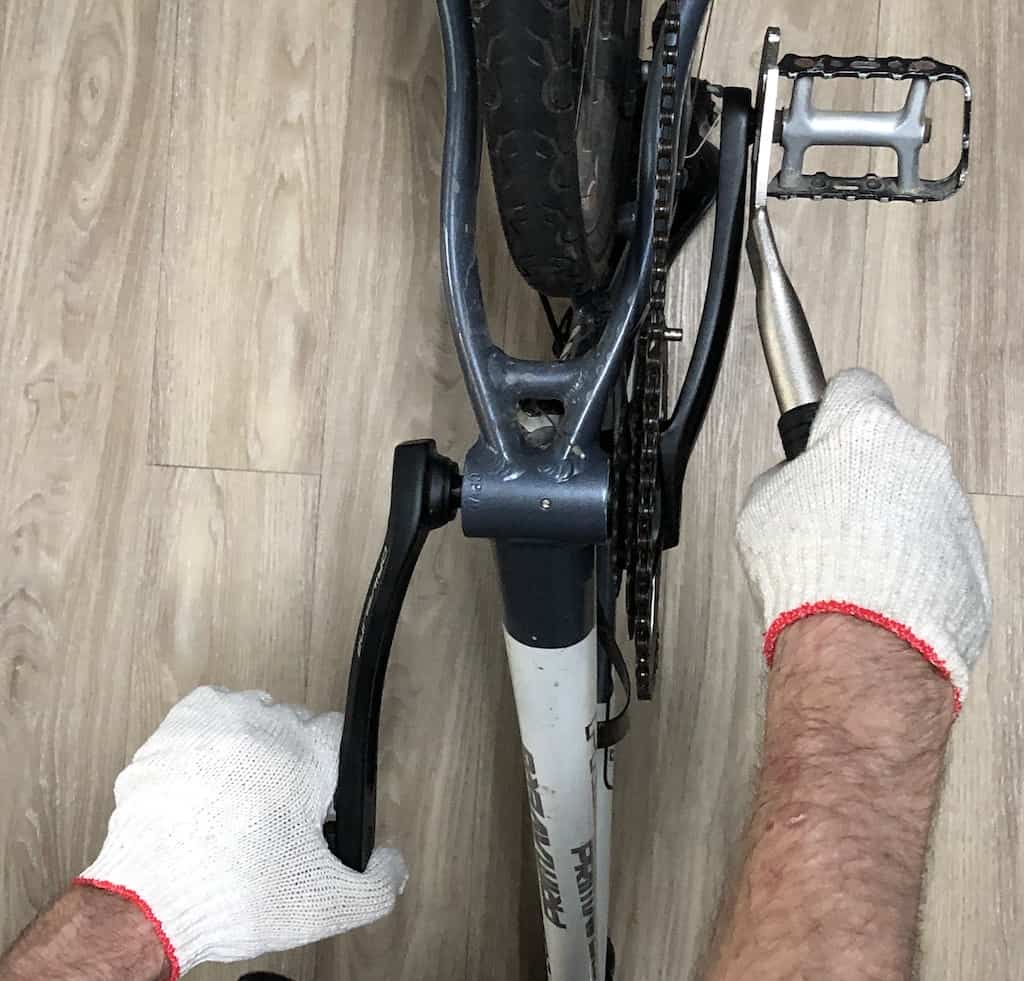
Insert the Allen wrench, steady the crank, then swiftly strike upwards with the palm of your hand; a quick, sharp blow should break pedal and crank threads free from each other.
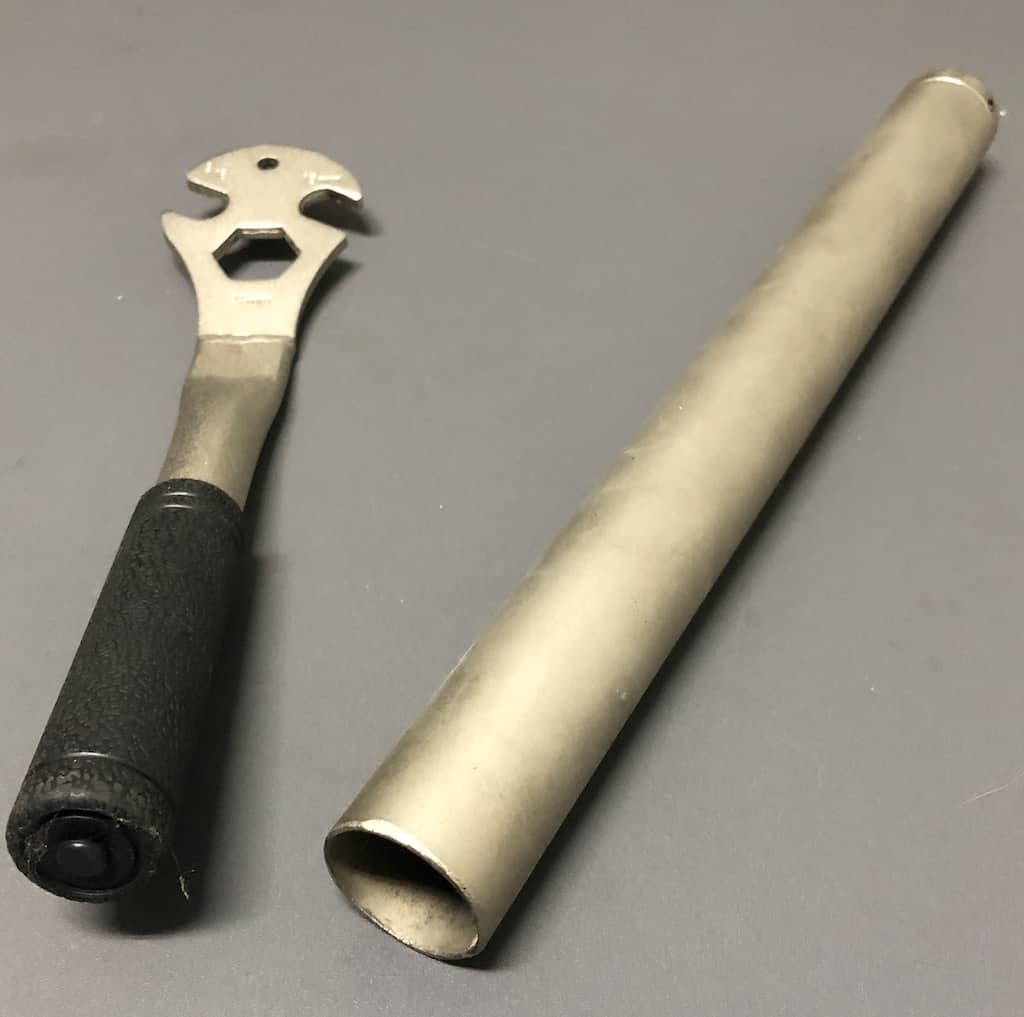
To obtain extra leverage, slide tubing over the Allen wrench. An old seat post works well.
The key is stopping the crank from moving as you apply force to the wrench.
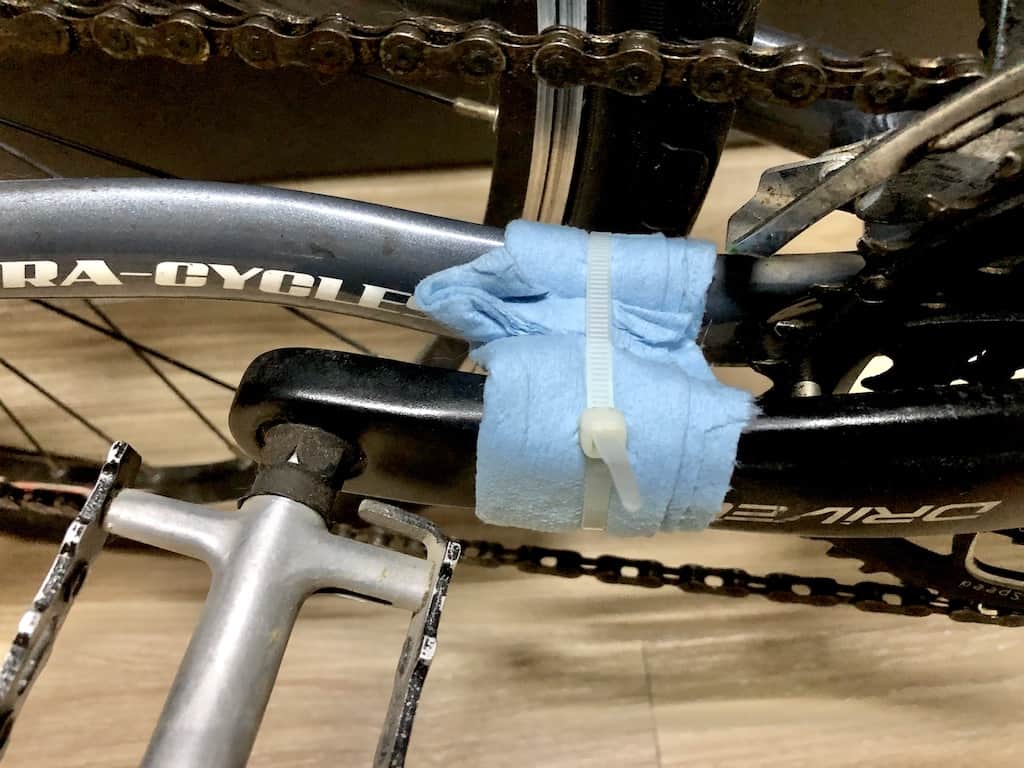
Fastening the crank to the chain stay with a zip tie can work, although the nylon stretches under intense pressure.
Long-handled wrenches
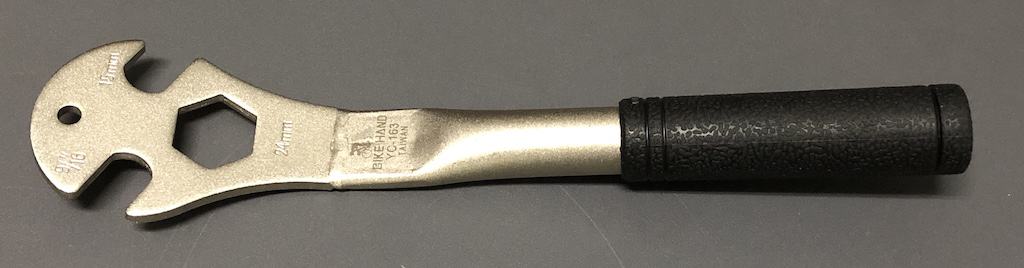
With a longer handle than an Allen wrench, a dedicated pedal wrench makes removing a stubborn pedal MUCH easier.
The angled jaws keeps the handle away from the bike frame. If you slip, you’ll less likely injure hand or arm.
Extending the handle is also easier with this type of wrench, which increases leverage even more should you need it.
Portable wrench

Replacing bike pedals on the trail is highly unlikely.
But if you are heading out for an extended tour of rugged country, a portable tool is easily brought along together with a spare pedal.
These sort of tools are multi-purpose: you have the 15mm jaws, spoke nipple jaws (many multitools don’t have them), a socket…and bottle opener!
The problem is leverage. The technique to apply is to load your body weight onto the handle; stiff arm it from above using your whole body as a lever in a sense.
This requires someone steadying the opposite crank, keeping it fixed firmly in order to get that leverage.
Still, the tool does not weigh much, so why not include it.
HOW TO DEAL WITH SEIZED PEDALS
The worst case scenario when replacing bike pedals is where a pedal is seized onto a crank.
That is, the pedal threads have become fused to the pedal threads, most likely due to rust.
NOTE: You’ll never have this problem if you:
- grease or oil pedal threads on installation
- routinely remove pedals then re-install with grease or oil (especially important if you live close to the beach).
- never expose a bike to the rain
In some cases, though, removal is (almost) impossible.
You will not be able to replace the pedals without replacing the cranks.
Brute force and creativity is the only way to deal with these extreme cases.
Naturally, apply WD40 or if in Australia, Penetrine is an ancient but effective solution, literally. (Some suggest a kerosene and diesel mix…not sure…never tried it).
Allow plenty of time for the juice to penetrate and dissolve the bonds cementing the threads together of course.
This Allen wrench extension works with a longer-handled pedal tool giving the extra leverage that a tool alone may not be able to supply.
This type of extension is also the solution if the edges of the pedal nut are rounded making it hard for a standard wrench’s jaws to find purchase.
This video demonstrates a last resort, last ditch effort to separate a fused pedal from a crank.
You may need to come up with your own creative take on this technique if you ever face a case of ‘pedal impossible’.
FINAL THOUGHTS
Replacing a bike pedal will either be routine—or very hard.
Avoid the situation in the first place by following best practice installation procedures: use washers, grease, or oil.
Get yourself a long-handled wrench for making routine maintenance removal and installation MUCH easier. It’s essential where a pedal is seized on the crank, and even then, there’s no guarantee you’ll remove it anyway.