Bike pedal parts are the essence of our business so in what follows I’ll describe the key elements making up a modern bike pedal
We are qualified to talk about these like no other since we manufacture bike pedal parts for a large number of bike brands.
A pedal’s key parts are the:
Axles
Platform
Bearings
Cleat Bracket & Screws
Cleats
Grip – Pins, Sandpaper, Toe Clips
Other Parts
Pedal Extenders
Power Meter Pedals
PEDAL AXLES (Essential Bike Pedal Parts – 1)
The platform or body of a pedal along with its axle define the core of a pedal.
Just a quick note about axles and spindles in bicycle mechanics. Axles remain stationary whereas spindles rotate.
Thus your bike’s wheels have axles that secure into the frame’s dropouts around which the bearings with the hub, spokes, and rim rotate.
Same with pedals: the pedal axle secures into the crank and the pedal body rotates around that.
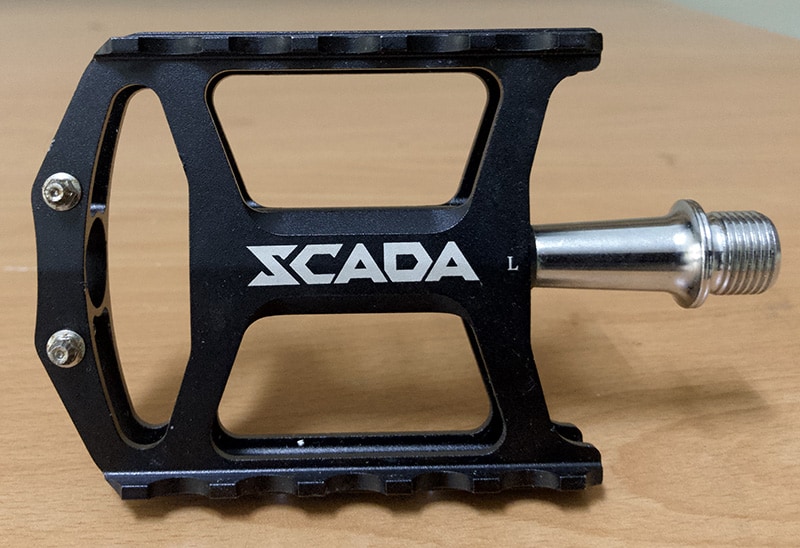
Many factors determine the exact length and shape of pedal axles, but the core design is in the form of a tapered rod: wide at the ‘base’ closest to the crank; narrowest at the opposite end furthest from the crank.
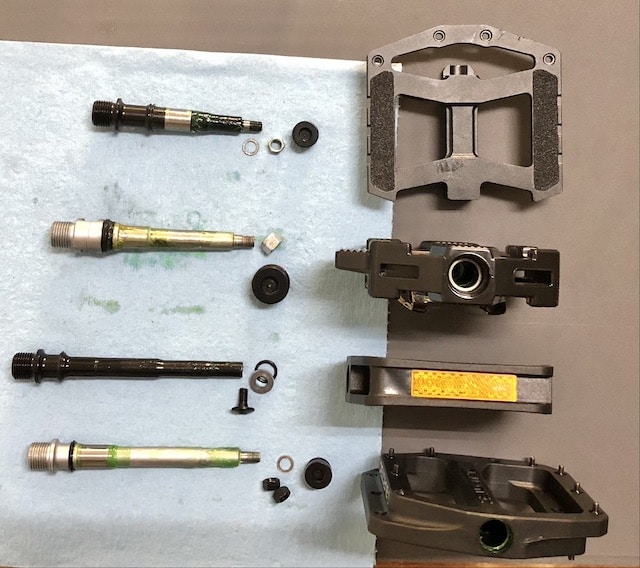
The image shows just a few possibilities across a range of pedal styles and axle lengths.
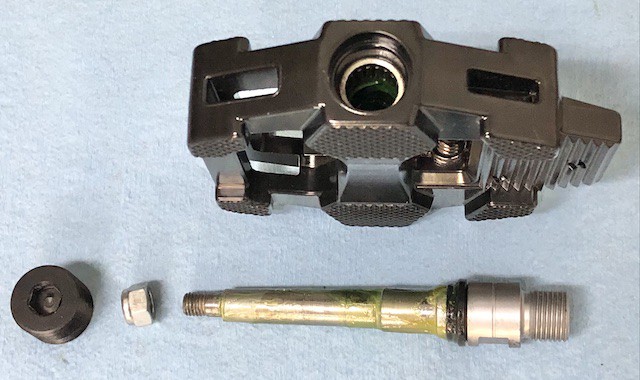
The bearings allowing a pedal to rotate are pressed into the axle cavity, forming part of the pedal body or platform.
The (liberally greased) axle installs into its cavity at a pedal’s center axis, nesting into the bearings.
It is secured in place at the end opposite to the crank with a nut or a bolt.
This is the most common setup: a nut tightens onto the end thread which seats the axle firmly against the bearings also creating a seal on the crank side.
The large nut secures to its matching threads on the end of the axle cavity, sealing that end.
You use an Allen wrench to loosen/tighten the large nut, a socket for the small nut.
The longest pedal axle in this bunch uses an Allen bolt which screws into threads machined on the inside of the axle rather than a bolt threaded onto the outside.
PEDAL PLATFORM (Essential Bike Pedal Parts – 2)
Every pedal has a platform as the foundation for the shoe.
A trend over the last 10-15 years has been towards broader platforms away from the narrow design of yesteryear.
When the only bike pedals were road bike pedals, platforms were narrow; they stayed narrow when toe clips arrived and also with the advent of clipless pedals.
Clipping in, strictly speaking, only requires an axle connected to a contact point securing the bracket that shoe cleats slot into.

That’s still a valid setup and Crankbrothers eggbeater is probably the perfect example of this minimalist approach.
CNC machining of aluminum alloy eroded the dominance of cast pedal bodies over time and became increasingly sophisticated.
Extremely wide platforms are now possible that contain a minimal mass of alloy—a broad yet lightweight pedal is the result.
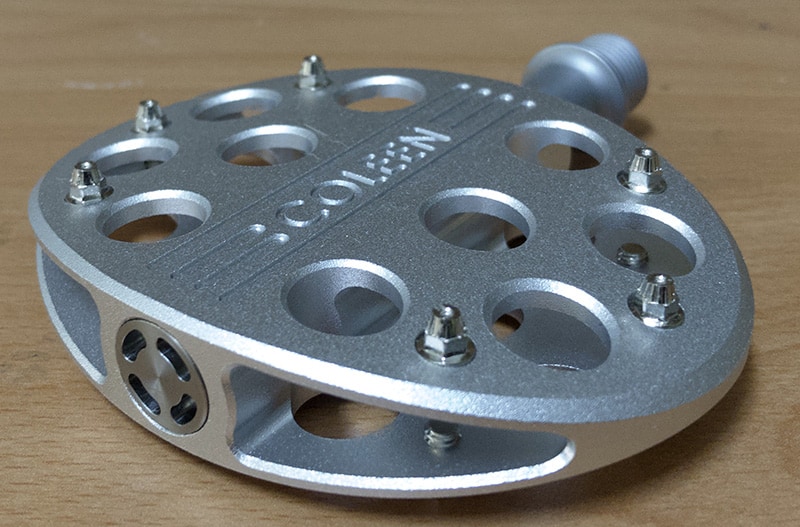
An elegant city-bike design requires minimal complications or, in other words, minimal structural supports.
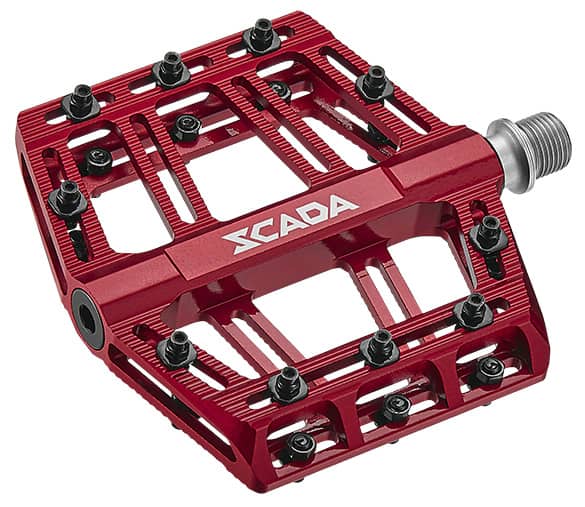
At the other end of the spectrum, a pedal platform can be constructed entirely from precisely machined struts.
The two levels built around the axle in this model work in tandem to provide stability with the platform’s mass distributed across the supports.
With ebikes, though, weight is not an issue meaning that form dominates function. You can have any shape you like without worrying about a weight penalty.
BEARINGS (Essential Bike Pedal Parts – 3)
One aim of this article on bike pedal parts is to give the reader an appreciation of the wide range of design possibilities for pedals depending on the particular sub-niche of the market a brand is targeting.
A key decision is what type of bearing setup to use.
Pedal bearings come in the following forms and can be used in any combination depending on price point and target market:
- Loose, installed in cup and cone configurations
- Sealed
- Needle or Roller bearings
- LSL bushings
- Nylon bushings
Loose Bearings in Cup and Cone

By “loose” I mean ball bearings not contained in a cage or, further, embedded in the protective cocoon of a sealed bearing (see next section).
Liberally greased ball bearings are contained in a classic cup-and-cone structure: the cup is the inner race; the cone is the outer race.
The cone holds the bearings in tension, tight enough so there’s no play, loose enough so that the pedal body spins freely around the pedal axle.
A locknut tightens onto the cone holding it in position and preserving the tension against the cup.
Steve covers the bearing installation procedure in excellent detail.
Sealed Bearing
Wherever bearings are required in modern bicycle components, they mostly come in the form of sealed bearings.
Sealed bearings are more durable than loose bearings because they live within their races, protected from most of the impurities which more easily penetrate cup and cone bearing assemblages.
Ball bearings are installed into a cage which fits into a precisely machined three-sided container, or are held in tension between the precisely machined inside and outside races.
The closed side recesses into the body of the component, which for pedals is the pedal axle cavity
The outward facing side is covered with a removable rubber seal where the sealed bearing is in the form of a three-sided container. Otherwise the other open side is also capped with a rubber seal.
Removing the seal exposes the bearings in their cage for cleaning and re-greasing.
When bearings wear out, it’s often easier to replace them than disassemble, clean, re-grease then reinstall them in their cup or container: just replace a worn sealed bearing unit with a new one.
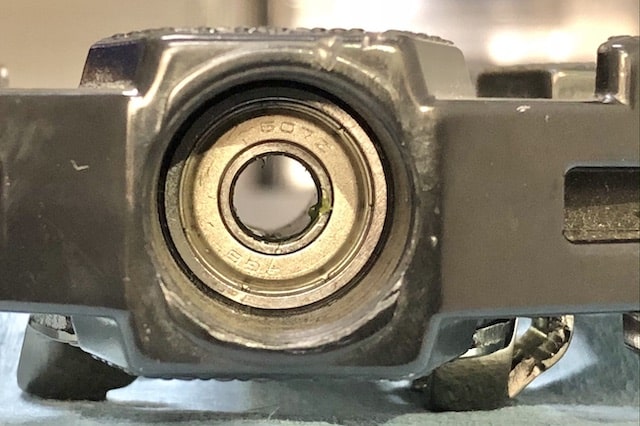
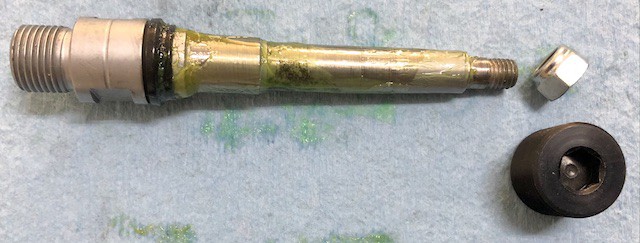
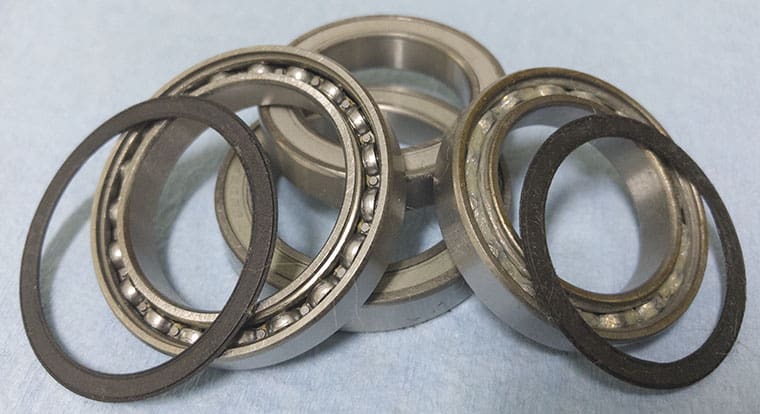
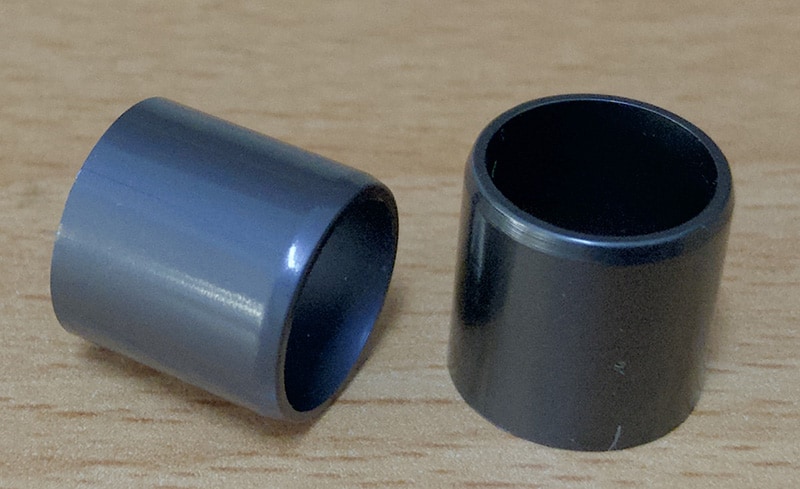
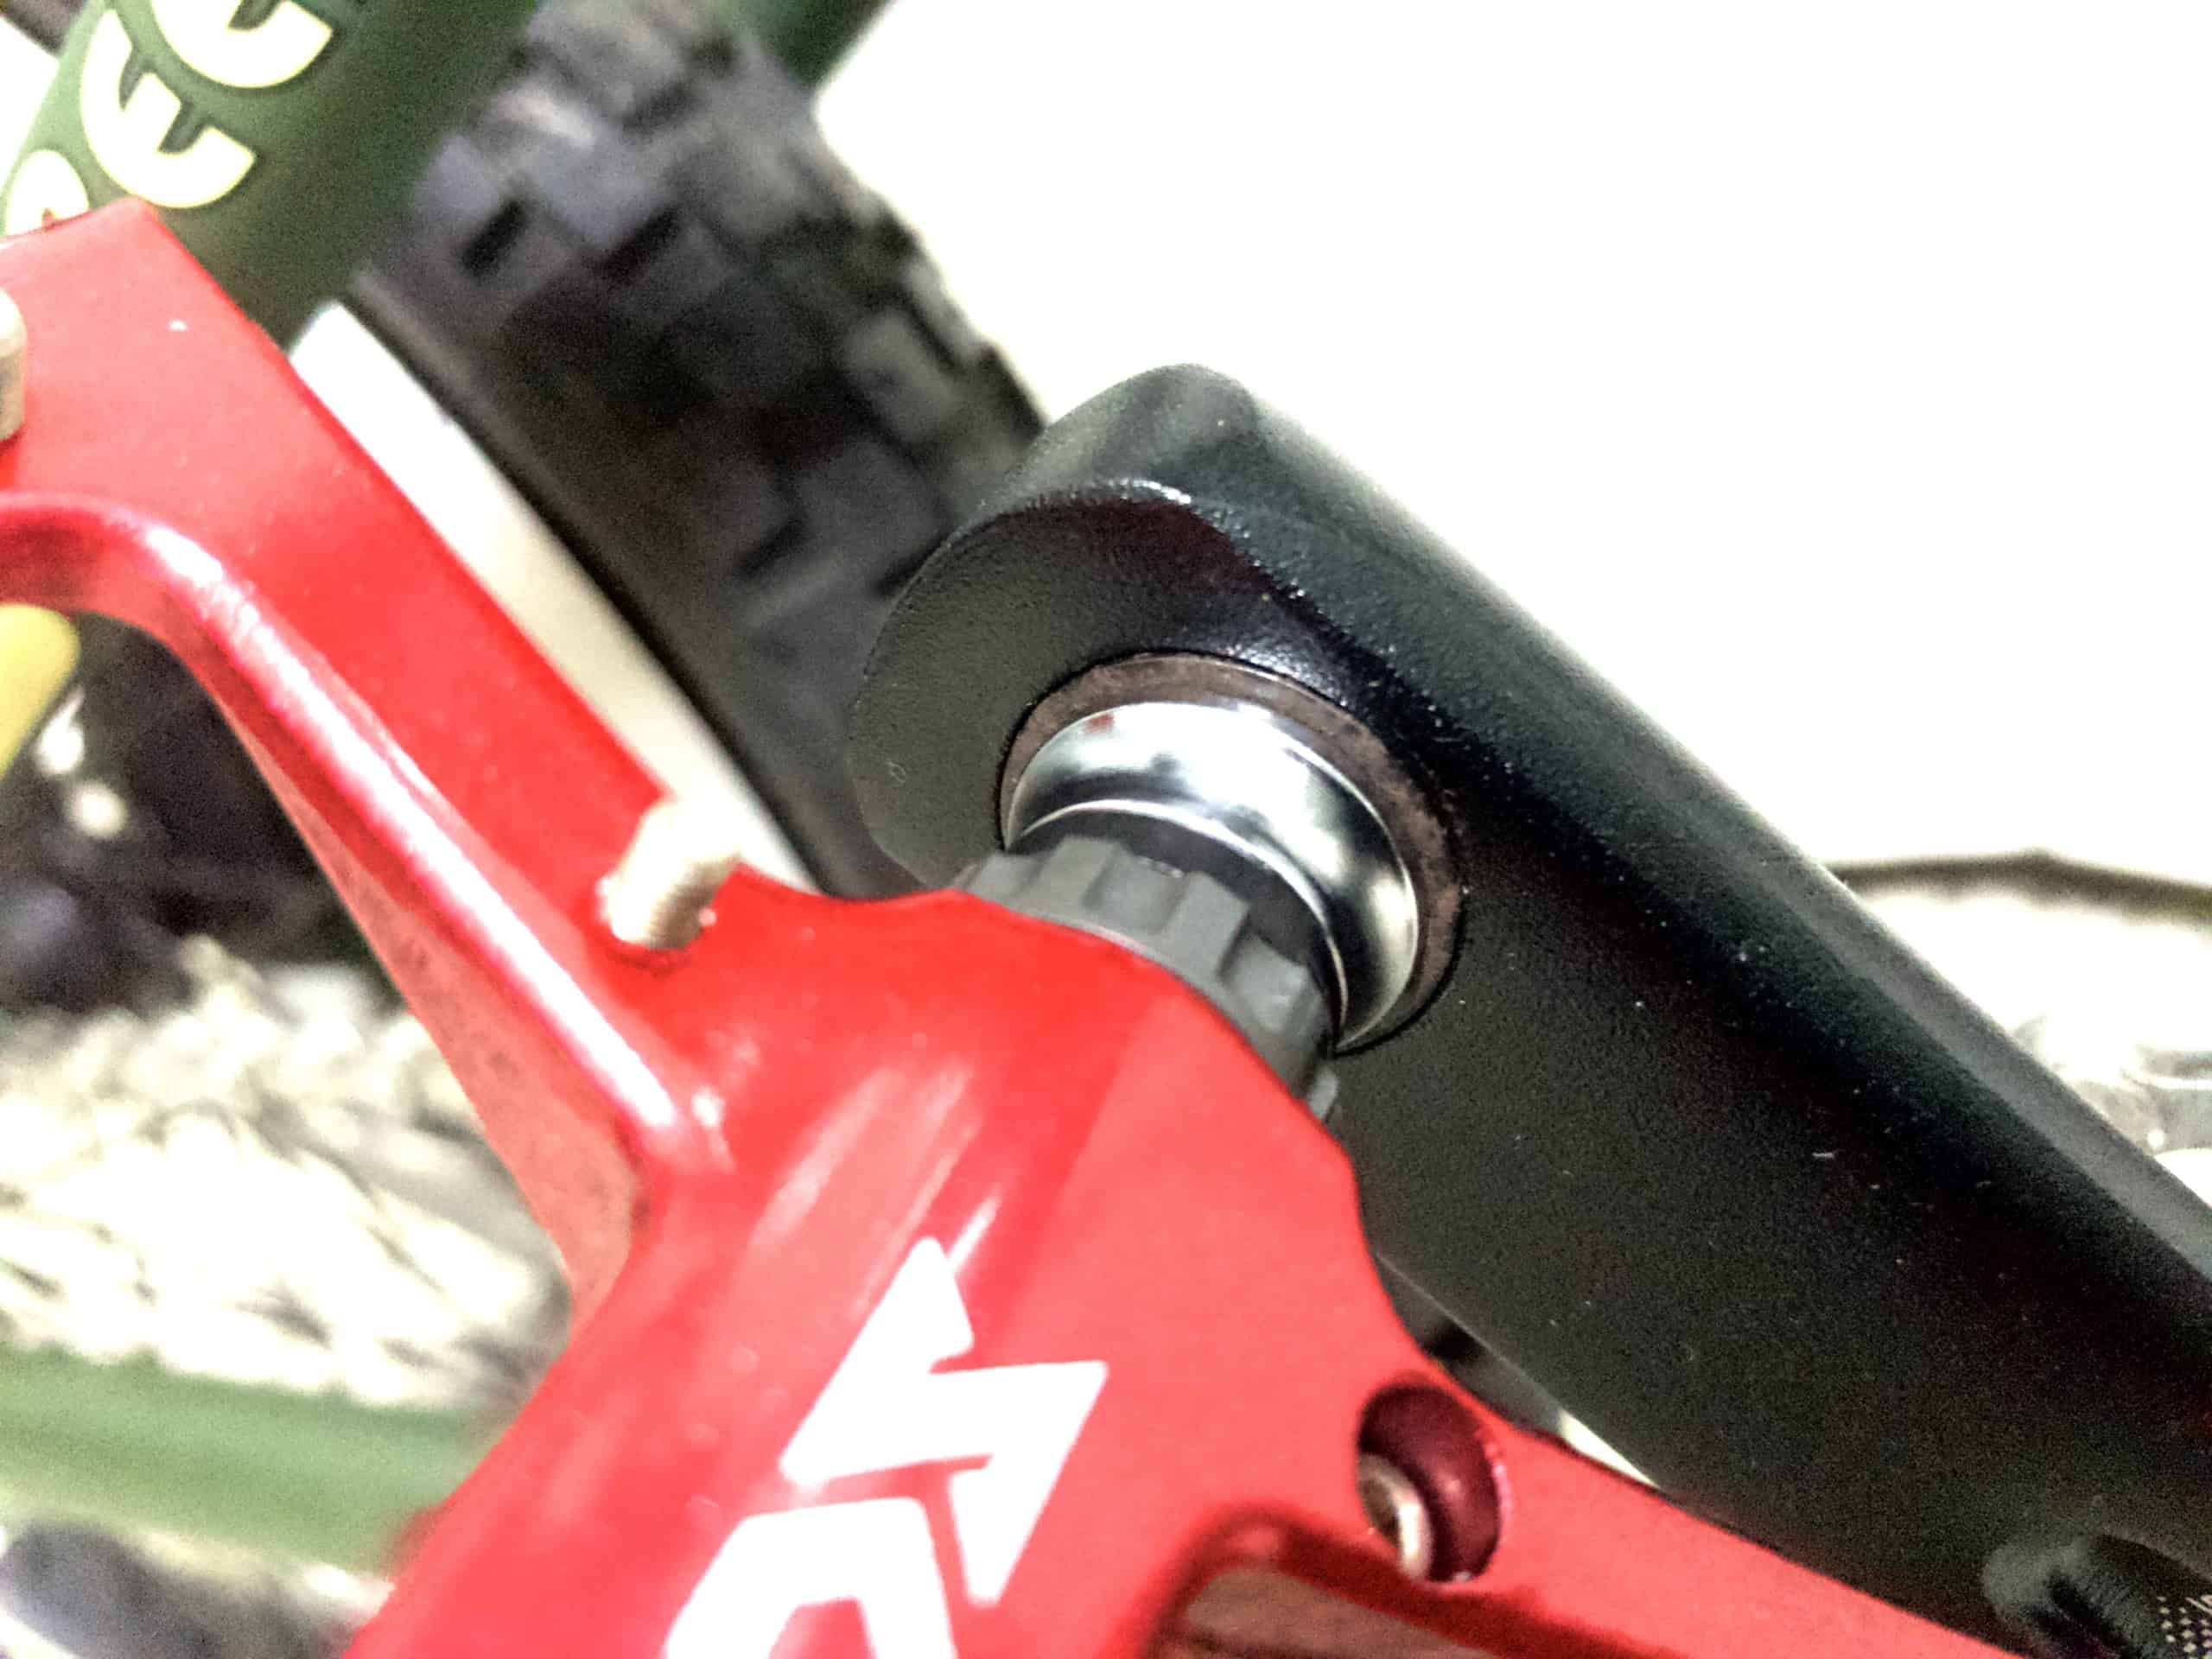
The sealed bearings used in pedals are more compact than standard sealed bearings though.
They have a much smaller outer diameter than those you’ll find in bike bottom brackets or headsets.
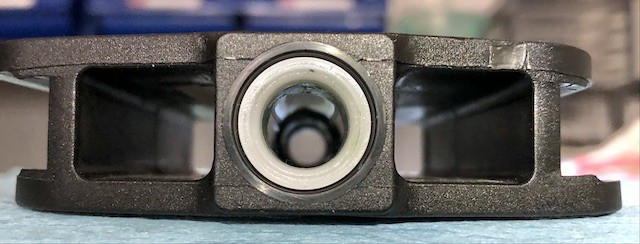
They are installed on either the crank end of the axle or on the outer, tapered end, as in the pedal in the image above.
This bearing, in the context of this particular pedal design (for a spinning or exercise bike), is paired with a roller bearing at the crank end which functions as the main bearing.
Needle/Roller Bearings
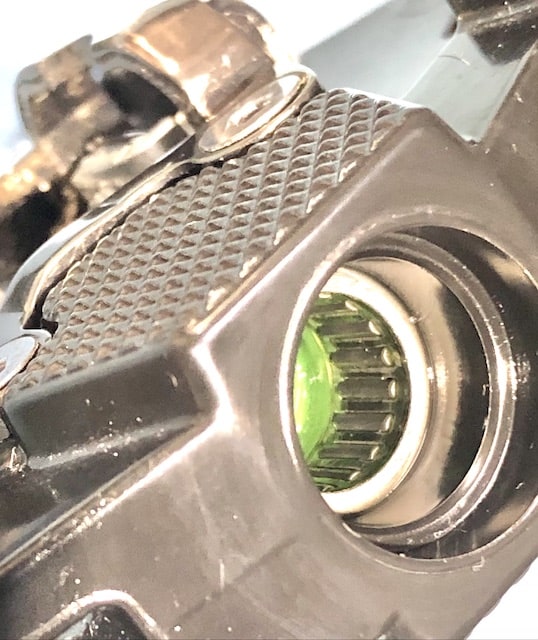
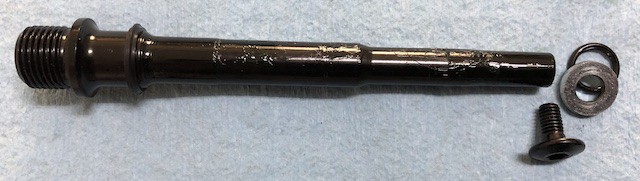
Needle bearings are elongated cylindrical rods loosely contained in a cage which is also the (outer) race, as an alternative to a sealed bearing or an LSL bushing (next section).
I’ve cleaned the grease away from this one so you can get a clear view.
The section of the axle left of the nut forms the inner ‘race’ for the bearings as the pedal turns.
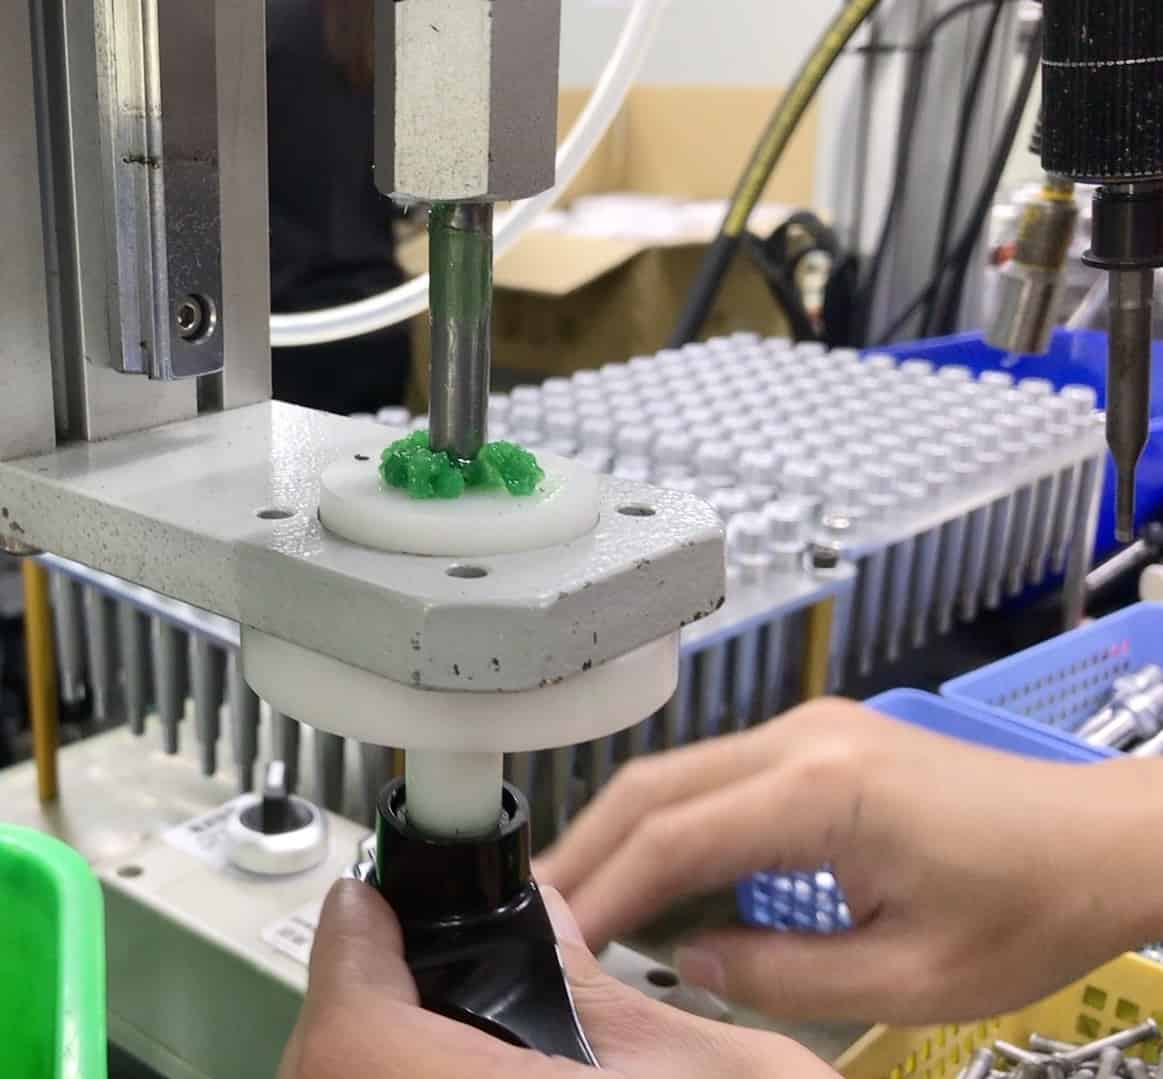
A liberal shot of grease is injected into the axle cavity during axle and bearing installation on the production line ensure there will be sufficient lubrication for the life of the pedal.
Locking the large nut into position seals the bearing and axle from dirt, mud, or grit.
LSL Bushing
An LSL bushing is a Light Self-Lubricating bearing and can be an excellent, durable substitute for a sealed bearing where the context permits.
Sealed bearings work well but a brand looking to reduce cost can confidently rely on LSL bushings to perform reliably for the life of the pedal.
Nylon Bushings
Pedals at the cheaper end of the market rely on nylon bushings.
Although the friction coefficients are higher, nylon is tough and does an excellent job.
CLEAT BRACKET and SCREWS (Essential Bike Pedal Parts – 4)
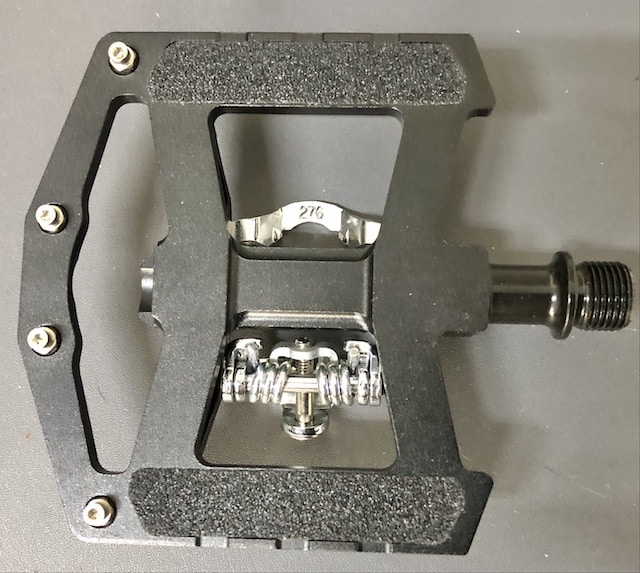
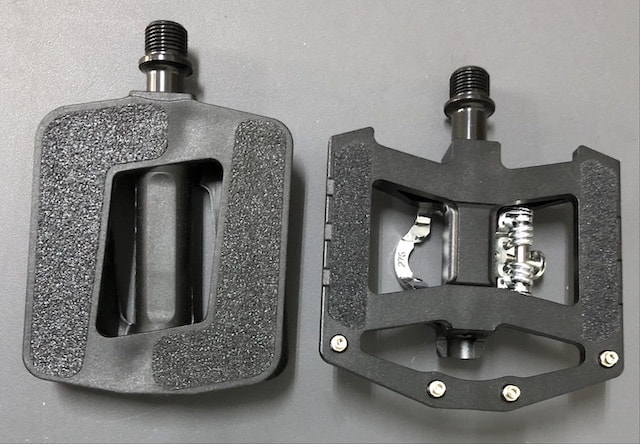
Although flat pedals without clips have become increasingly popular in the last decade, clipless pedals are still widely used.
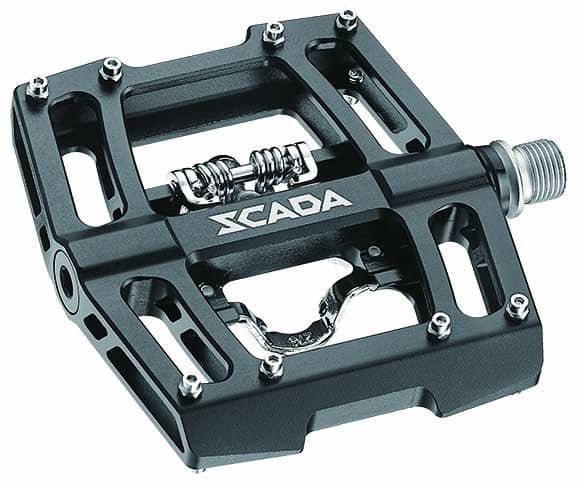
Also increasing in popularity are models that combine broad platforms with clip-in systems: a bracket for the pedal cleat on one side, flat with pins on the other.

The brackets which cleats clip into are manufactured by specialist suppliers according to the specifications we require for each pedal design we are contracted to produce for our brand customers.
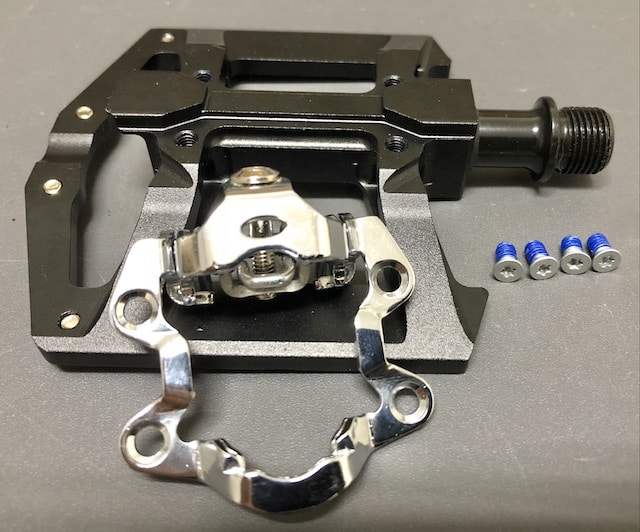
Each bracket is firmly anchored to the pedal body by means of Allen bolts.
Where a cyclist is extremely dedicated to keeping their kit in top condition, for a thorough clean or to replace a faulty bracket, removal is as easy as undoing the bolts.

Fine tuning the tightness of the cleat in the bracket is via the bolt which manages spring tension.
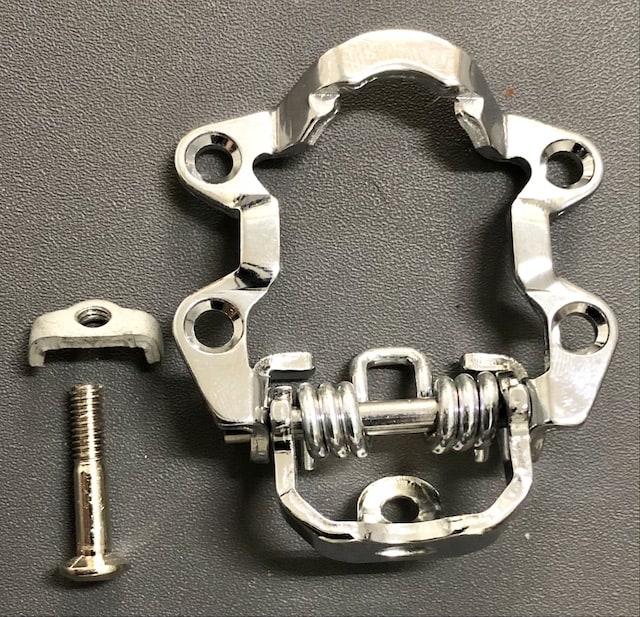
The setup works the same across most brackets. Tightening the bolt pulls the opposite ends of the spring together making it more difficult to push the shoe cleat into the bracket.
Pedal Washer
If you take a close look at your crank you’ll see a groove encircling the threads into which you screw the pedal.
All decent quality cranks have these grooves at any rate.
Installing pedals without washers is overlooked by too many cyclists.
A common cyclist complaint is creaking or clicking noises from what cyclist often think is the bottom bracket.
Without washers, clicking is most likely to result from the slight movement of the pedal threads against the crank threads: the pedal gives at a certain phase of the stroke (when pressure is released on the upstroke I have found).
The coating of light oil or grease applied to pedal threads on installation mitigates this.
However, the washer is the crucial variable. It fills the space between crank and pedal axle enabling an incremental tightening of the pedal against the axle greatly reducing the possibility for movement.
CLEATS
Cleats are the bridge between shoe and pedal but belong firmly – literally – to the pedal.
Each cleat is molded to fit a particular pedal model and works though engineering the leading edge to catch under the front of the pedal body.
The rear pushes against the bracket spring until it snaps into position over the cleat’s rear lip.
Manufacturers mainly use thermoplastic to produce cleats, since it is one of the toughest and durable of the heavy-duty plastics.
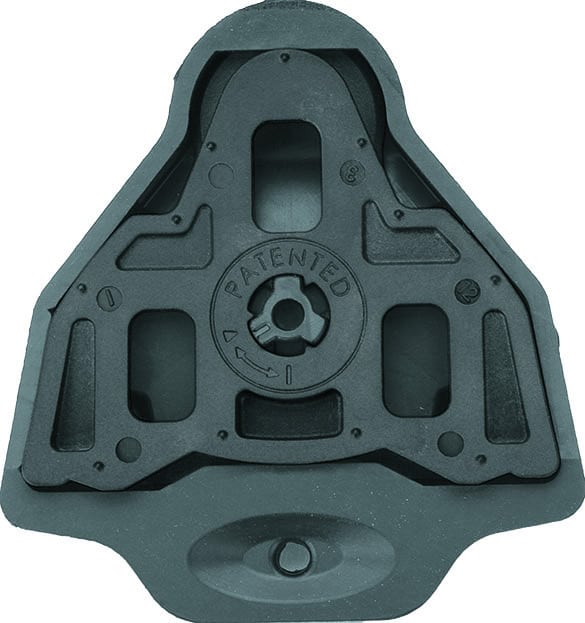
As Look pioneered the use of ‘clipless’ pedals with the use of cleats, their Delta and Keo systems are still in use today.
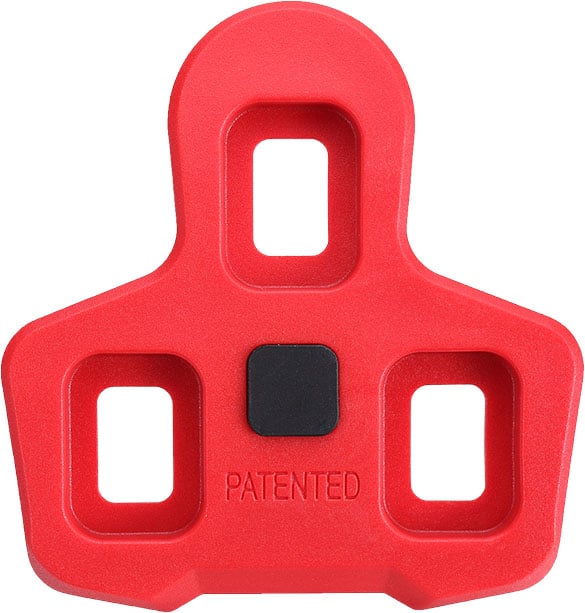
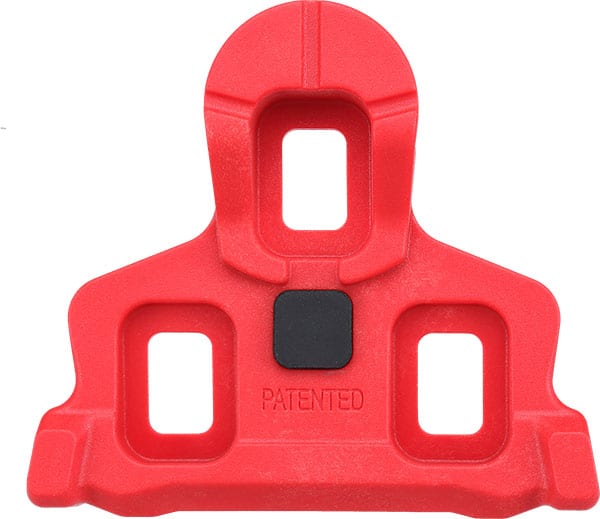
A Delta cleat made with a 6° float (movement from side to side).
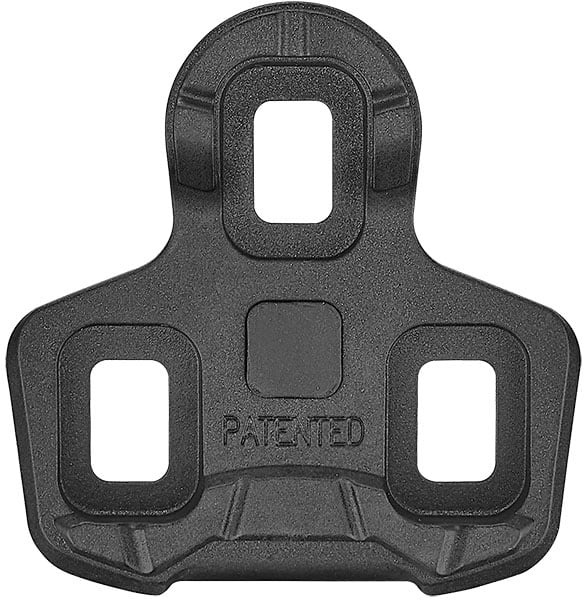
A Keo cleat with zero float (models with 7° of float are available).
“Patented” here refers to the rubber block in the center which presses up against the sole of the shoe whilst the cleat is locked into the pedal’s cleat bracket, eliminating any movement and ensuring a maximally efficient pedal stroke.
The Shimano SPD system has been widely adopted in the time since cleat systems appeared.
Mountain bike cleats and clipless pedals are designed differently. We manufacture two types for brands around the world.
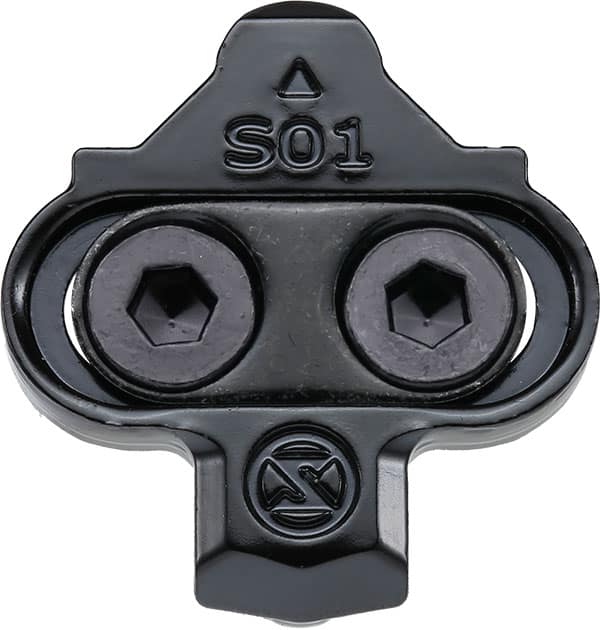
A single direction release mountain bike cleat.
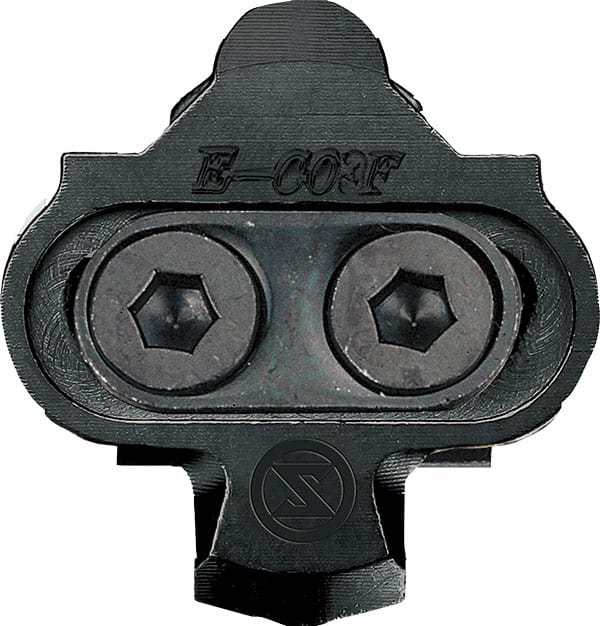
A multi-direction MTB cleat.
Cleat screw and washers
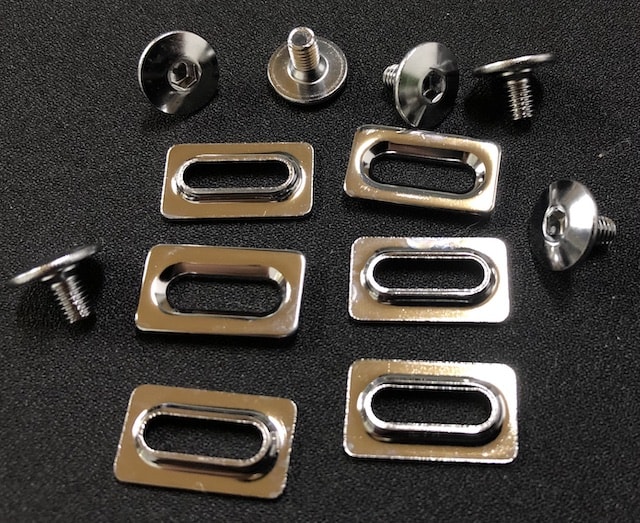
Cleats are tightly connected to the sole of a cycling shoe with M4 Allen bolts and elongated washers which allow fine tuning of both the angle of the cleat, and how far forward or to the rear you position a cleat.
Positioning cleats is entirely personal with the angle often being a crucial variable since that can affect the knees.
The bolts and washers which come with every pair of cleats allow cyclists to perfectly customize positioning to their needs.
Walkable Cleats / Cleat Covers
Of all the bike pedal parts the covers cyclists can use to protect cleats having dismounted from a bike during a break, for example, are most overlooked.
The main wear-and-tear on cleats is regular contact with the pavement.
There is nothing to be done where cyclists must unclip then place a foot on the pave when they have to stop.
But in other circumstances, such as taking a break from a long ride, cleats can be preserved by slipping a walkable cover over them where practicable, .
The safety factor is also important since cleats are deadly on wet, slick surfaces, particularly tiles in restrooms. Insulating cleats with covers on slippery floors massively reduces the risk of a fall.
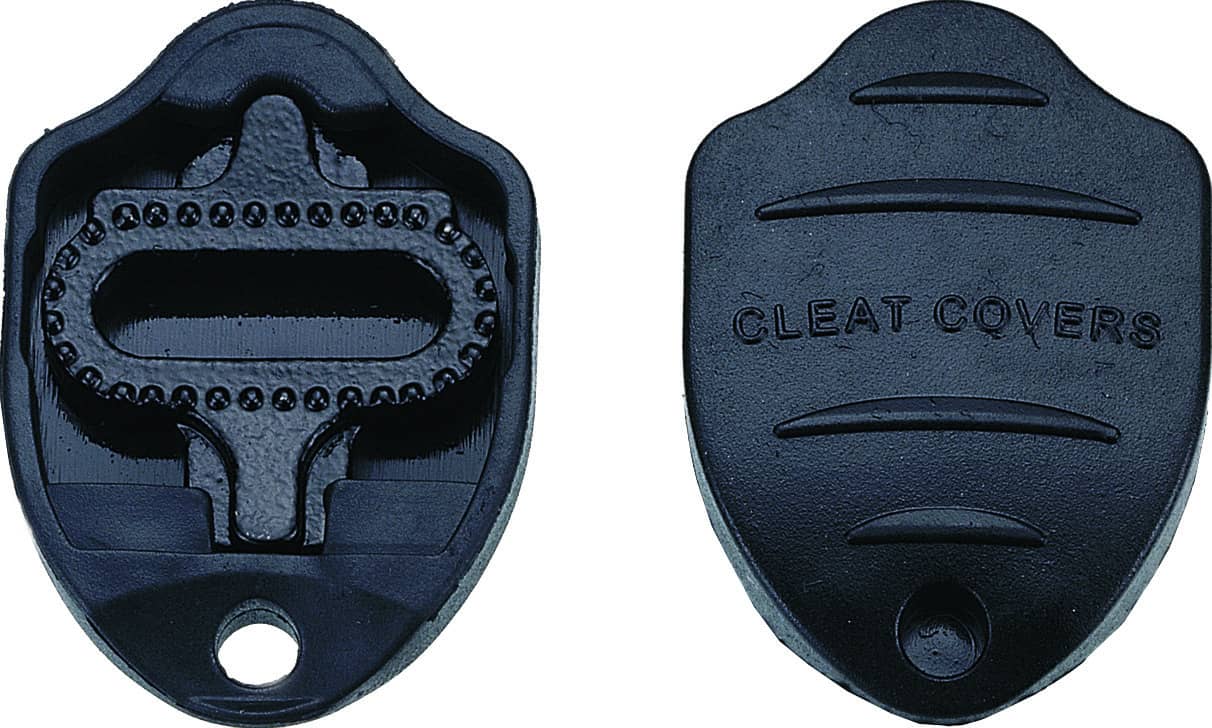
Cleat covers for mountain bike cleat.
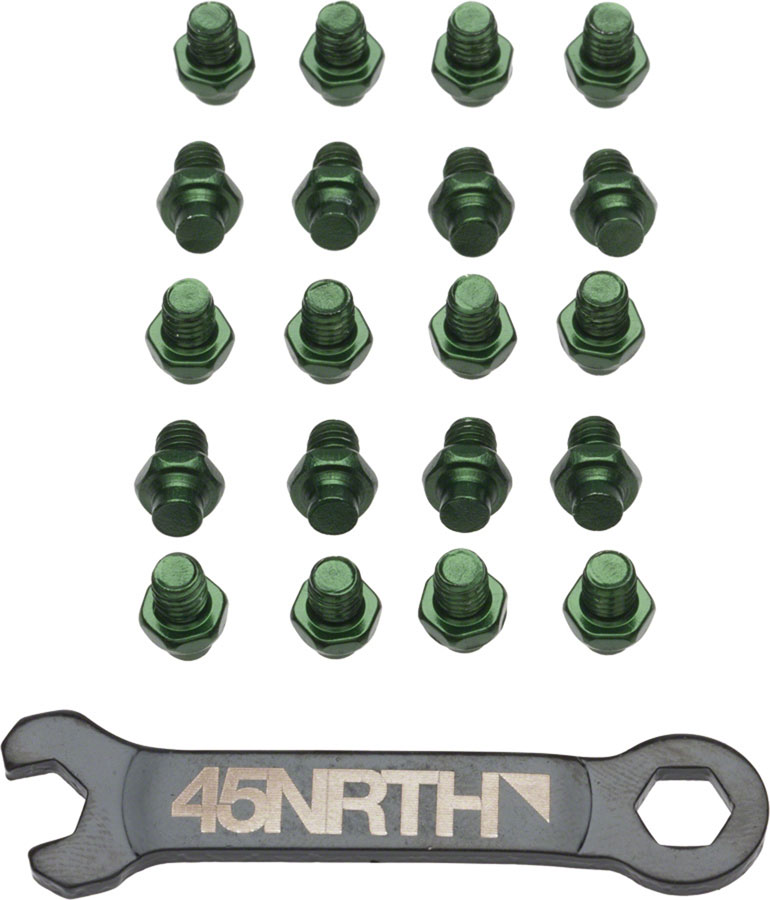
Traction Pads / Tread Contact Sleeves
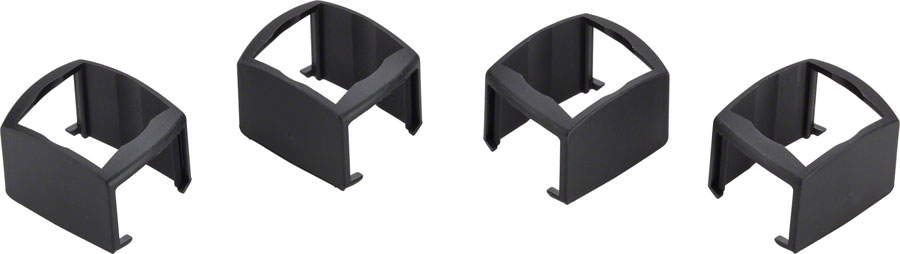
Crankbrothers Traction Pads improve the traction of shoes on pedals by eliminating looseness between shoe-sole and pedal.
There’s a tendency to not get fully into a cycling session, to hold back where you have movement.
But inserting polyurethane pads that have a defined traction pattern ensures zero movement (if fitted properly) with any shoe.
This traction pad kit has eight 1mm traction pads and eight 2mm traction pads.
GRIP — PINS, SANDPAPER, & TOE CLIPS
Wherever clipless pedals are in use on either road or mountain bikes, shoes remain firmly connected to pedals.
Where cyclists are using platform pedals, however, a continuous connection is not guaranteed—a shoe can more easily become detached from a pedal platform.
Two ways to minimize a shoe from losing grip is by means of pins or sandpaper (or even both together as with this model).
Pins
Pins are designed to screw into the platform as an effective – although crude – means of anchoring a shoe to a pedal not fitted with a cleat-and-bracket system.
They can be made out of steel or aluminum.
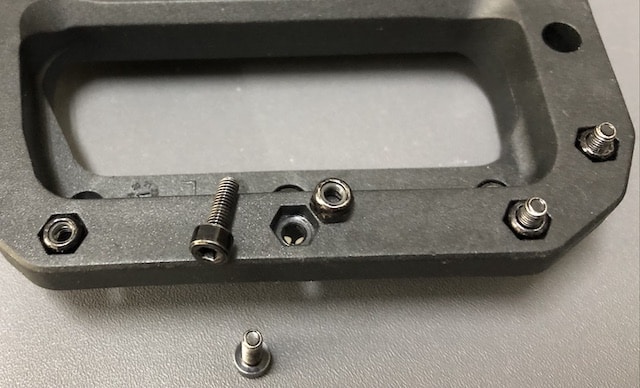
Some pins are molded into a pedal platform although many pins screw directly into the them, or, as with the pedal in the image, they slot into a bolt recessed in the pedal body.
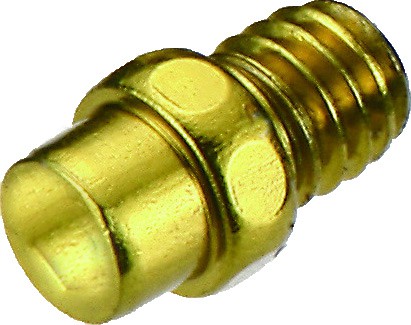
Short or long pins, depending on the pedal specifications.
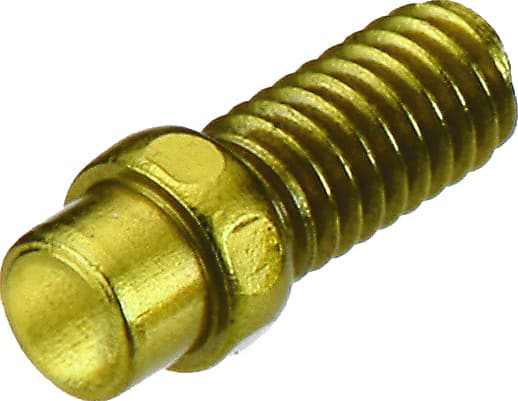
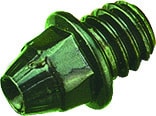
Different shapes are available, again, depending on a pedal’s design specifications.

Pin Wrench
A pin wrench is a good addition to a bike mechanic’s tool kit, although most pins can be removed and installed with a 2 mm or 2.5 mm Allen wrench.
Sandpaper
Kids skateboarding in the 1970s discovered that glueing medium or course grit sandpaper to the decks of their scateboards made for a super grippy surface.
Sandpaper also works very well on pedals, although the material is a composite plastic, rather than ‘paper’ per se.
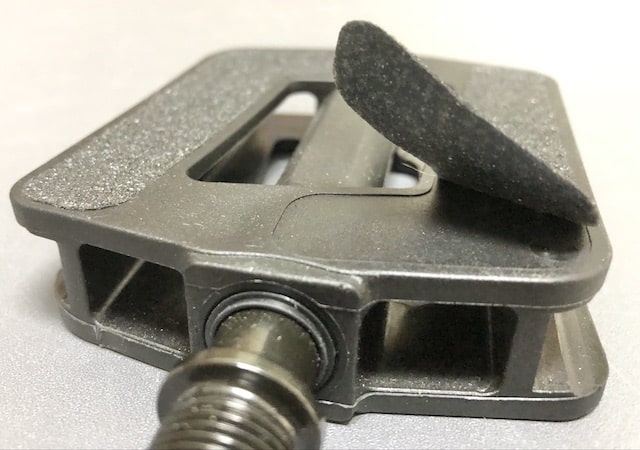
Sandpaper strips are stuck to the platform, or in some designs, the strips fit into recessing machined into the pedal’s surface.
Toe Clips & Toe Straps
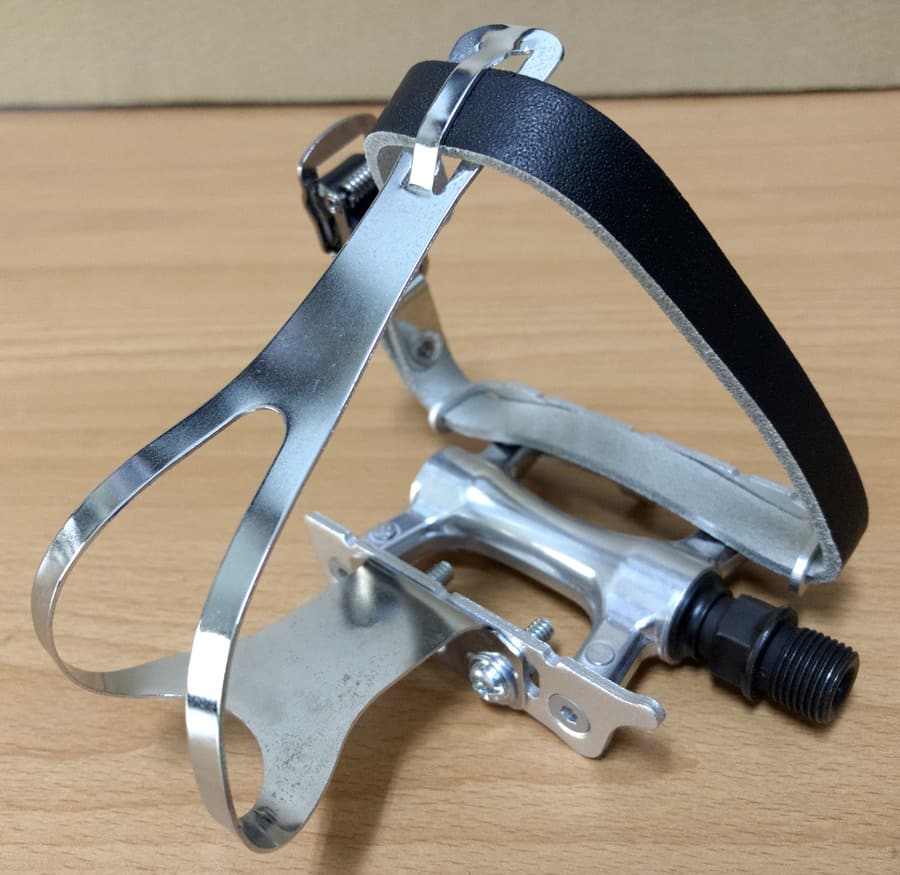
Toe clips are an elegant means of securing a foot to a pedal and are a popular addition to city bikes or fixed gear bikes.
The toe clip frame catches the front of a shoe. The strap holds a shoe square in the frame without being pulled too tight.
OTHER BIKE PEDAL PARTS
BIKE PEDAL EXTENDERS

These optional additions to a pedal increase the distance between a pedal and the crank to which it’s attached.
Why would you use one? The reasons are to assist with a physiological problem and/or to improve cycling performance.
Although the cycling action is naturally therapeutic for knees – and is a prescribed form of physiotherapy for knees in many cases – some cyclists experience pain due to the angle of their knee in relation to the pedal.
That angle can be made less acute by moving a cyclist’s foot out and away from the crank.
PEDAL DISPLAY STAND
If you operate a bike shop, you’ll want to prominently display the pedal models you sell.
This stand accommodates five models and can be placed just about anywhere.
POWER METER PEDALS
The increasing use of power meter pedals in the last five years introduces the complexity of integrating complex electronics into this most fundamental of bike components (excluding mid-drive or hub motor ‘enhancement’ of bottom brackets).
The video displays the main components used in one of these high-tech pedals. Impact resistance and reliable bluetooth connectivity compactly packaged is the technical challenge in building quality power meter pedals.
FINAL OBSERVATIONS
Taking a superficial view, a bike pedal is not a complicated component, merely consisting – fundamentally – of an axle and bearings, like a wheel hub.
But having had a look at the parts that each bike pedal can potentially incorporate, and taking into account the wide variation in design of each of those parts, it’s clear that pedals are not simple components.
Discerning cyclists demand that their bike fit them perfectly down to every detail.
At SCADA, we work carefully with brands to ensure that their discerning customers get technically sophisticated pedals dialed in exactly to the type of riding they prefer.
If you are a brand looking for a way to realize your vision of the perfect pedal, then let us know what you have in mind: we’ll certainly be able to help.