Bike pedal removal can be hard.
You want to get it done quickly, easily and conveniently.
And if you don’t do it right, you may cause costly damage to your bike—replacing a crank stripped of thread is expensive.
In this guide I’ll show you:
- how to remove your old pedals
- some (unique) tools to make the job easier (tools many bike shops won’t know about)
Prevent your bike pedal removal experience from becoming a nightmare by paying close attention to the tips and techniques here.
CONTENTS
Positioning Your Bike
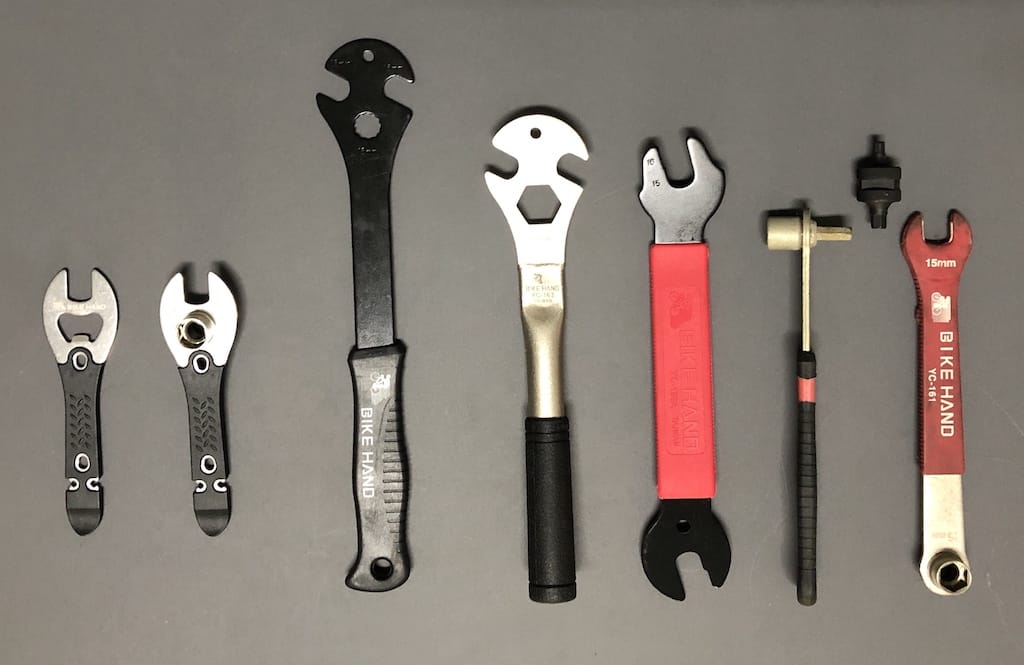
5 Bike Pedal Removal Tools & Techniques
1. 15mm Wrench
2. Double Ended
3. Medium Length Handle
4. Heavy Duty Pro Tool
5. Allen Wrench (8mm)
6. Allen Wrench Extension
7. Portable Bike Pedal Wrenches
How To Prevent Stuck Bike Pedals
YOUR BIKE PEDALS
To understand your pedals, you need to understand your bike’s crank.
And that’s not crank arm by the way. The lever bridging the distance between your bottom bracket and your pedal is an arm, yes.
But it’s also simply the crank that takes the force applied by those leg-pistons of yours to the pedals, then channels it into your bike’s drive train.
The crucial part of the crank is that lateral hole at the end into which the pedal threads are cut.
The goal is to protect those threads during pedal removal or installation, because if you damage them, you’ll have to replace your crank.
You’ll probably have to replace the pedal as well. But that’s not going to hurt as much as the crank replacement.
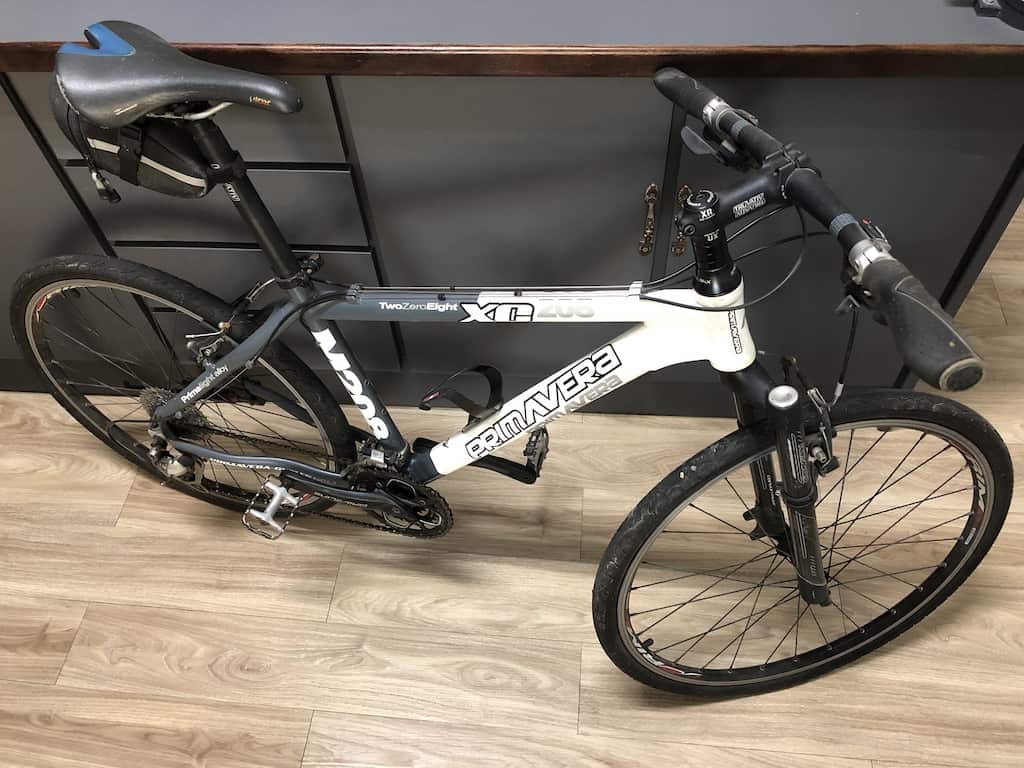
POSITIONING YOUR BIKE
There are hard ways to go about maintaining your bike, and easier ways, especially when removing your bike’s pedals.
Getting leverage is key to a smooth removal.
How you steady your bike to attain that leverage, when attempting to loosen or tighten a pedal onto the crank, determines whether you succeed or not.
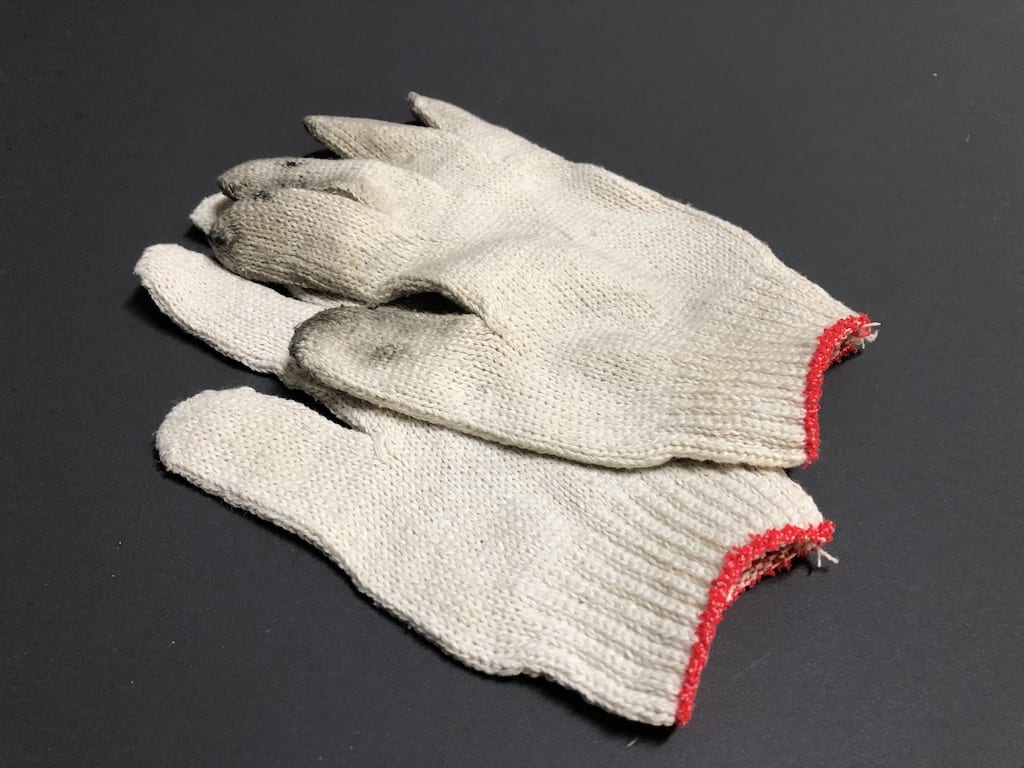
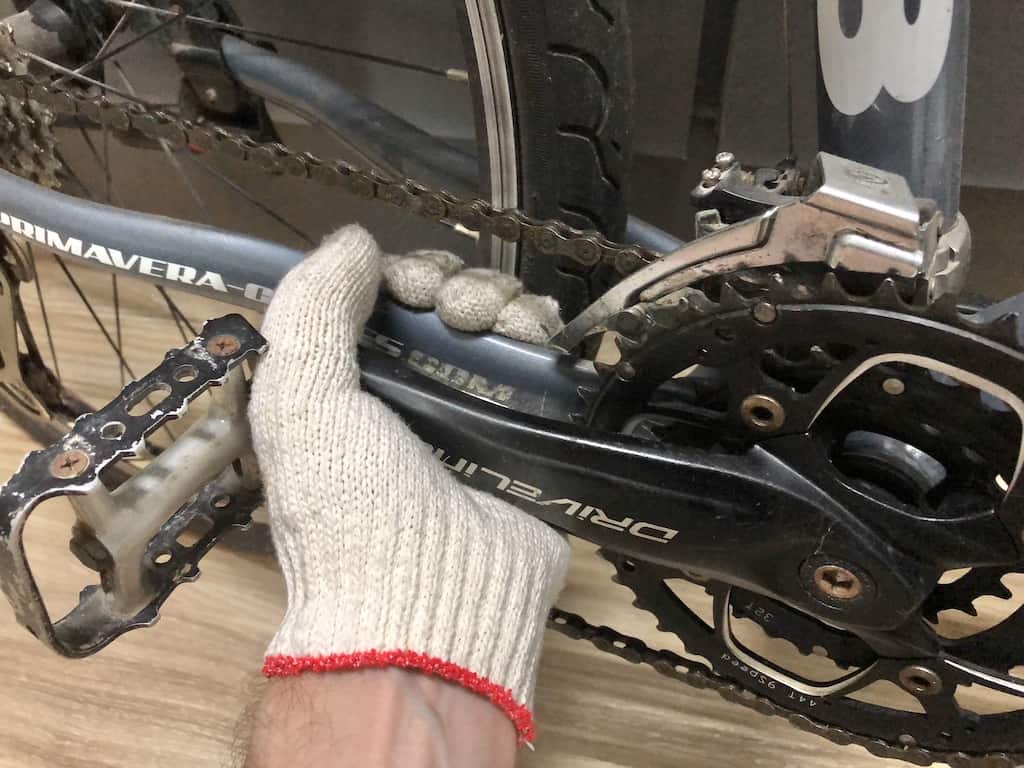
Get some sort of work gloves as well, to protect your hands from inadvertent tool slips and to give you a better grip on bike surfaces, components and the tools.
You’ve got four positioning choices:
- Lean bike against a solid surface
- Upside down—seat and handlebars
- Floor stand
- Bike repair & maintenance Stand (highly recommended)
Lean it up against a solid surface
This is probably the worst position to work on your bike.
But if space to work on your bike is limited, you will be most likely be able to both remove (and install) pedals, as long as they can take an Allen wrench (where they screw into the crank), even if they are very tight.
Adapt the following steps to your situation to see what may work for you.
With your bike’s drive-side against the wall, you’ll be working in the space between top tube and forks.
Turn your handlebars a little more to increase the gap if there’s not enough room.
Then rotate the crank until parallel to the ground.
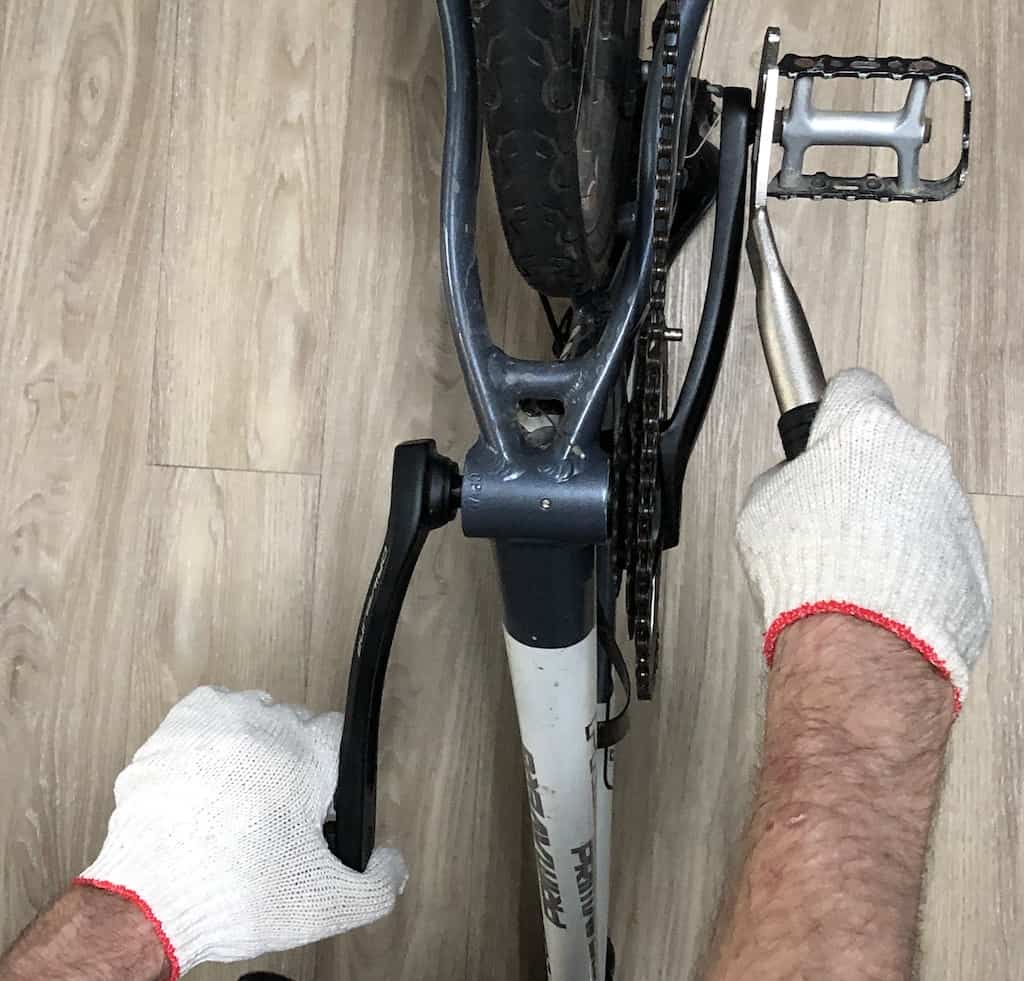
Slot the Allen wrench into the pedal so that it projects forward, pointing forward, away from the crank so that it appears to be an extension to the crank.
With your left hand, grip the crank to steady it, or take hold of the drive side crank (one way may work better than the other for you) and as quickly as you can strike up against the Allen wrench.
If the pedal is not too tightly fastened into the crank, holding the (non-drive side) crank itself will probably be enough.
Note: the non-drive side pedal is a left hand thread—it tightens to the left, loosens to the right. As a general rule, remember the pedal loosens in the direction OPPOSITE to crank rotation.
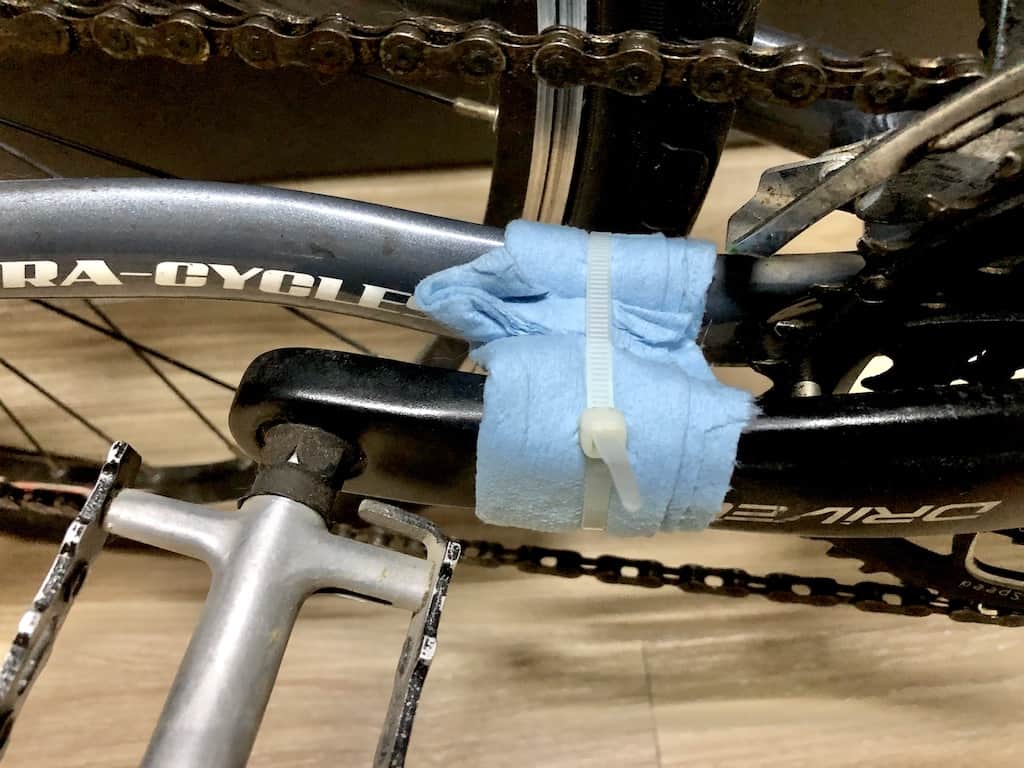
Some methods suggest securing the drive side crank to the chain stay. A zip tie will do it, but be sure to insulate both crank and chain to prevent the zip tie cutting into them.
Zip ties are strong but give and stretch under extreme strain. A stronger leather binding, a small belt fashioned for the purpose for example, will hold steady.

Learning the striking technique takes practice. The quicker you strike, the sharper the blow—it’s the shock of the blow that overcomes the pedal axle’s resistance in the crank.
If the pedal is too tight, requiring more than 35 Nm or so to break it free, striking won’t work and you’ll need to use one of the methods and tools described in the following sections.
RJ The Bike Guy’s technique is to use a block of wood to brace against the seat tube and the crank. Check out the whole video. It provides plenty of good info.
You would not, of course, use the wood technique on a carbon frame.
Upside down resting on seat and handlebar
The default way all kids once worked on their bikes.
The disadvantage is that stability comes from the handlebars’ lateral spread on the ground; a bike can topple over too easily.
The main advantage is that you have much more room to move, making it much easier to increase the leverage you can bring to bear on the pedal.
Floor stand
A floor stand is an essential accessory for any bike owner.
You can store your bike compactly against walls for one thing, quite apart from the convenience aspect when working on a bike.
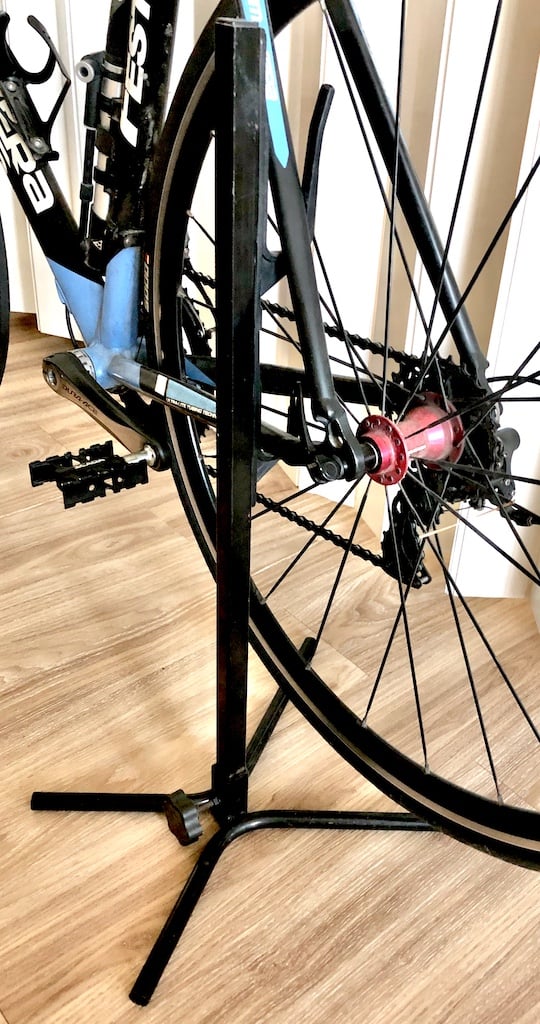
The stand raises the back wheel off the floor allowing it to free wheel, which is great for derailleur tuning.
A freewheeling rear wheel is a problem for bike pedal removal though. You need to hold the crank securely as with leaning your bike against the wall.
Repair and Maintenance Bike Stand
If you have the room, investing in a bike stand will pay dividends for years to come.
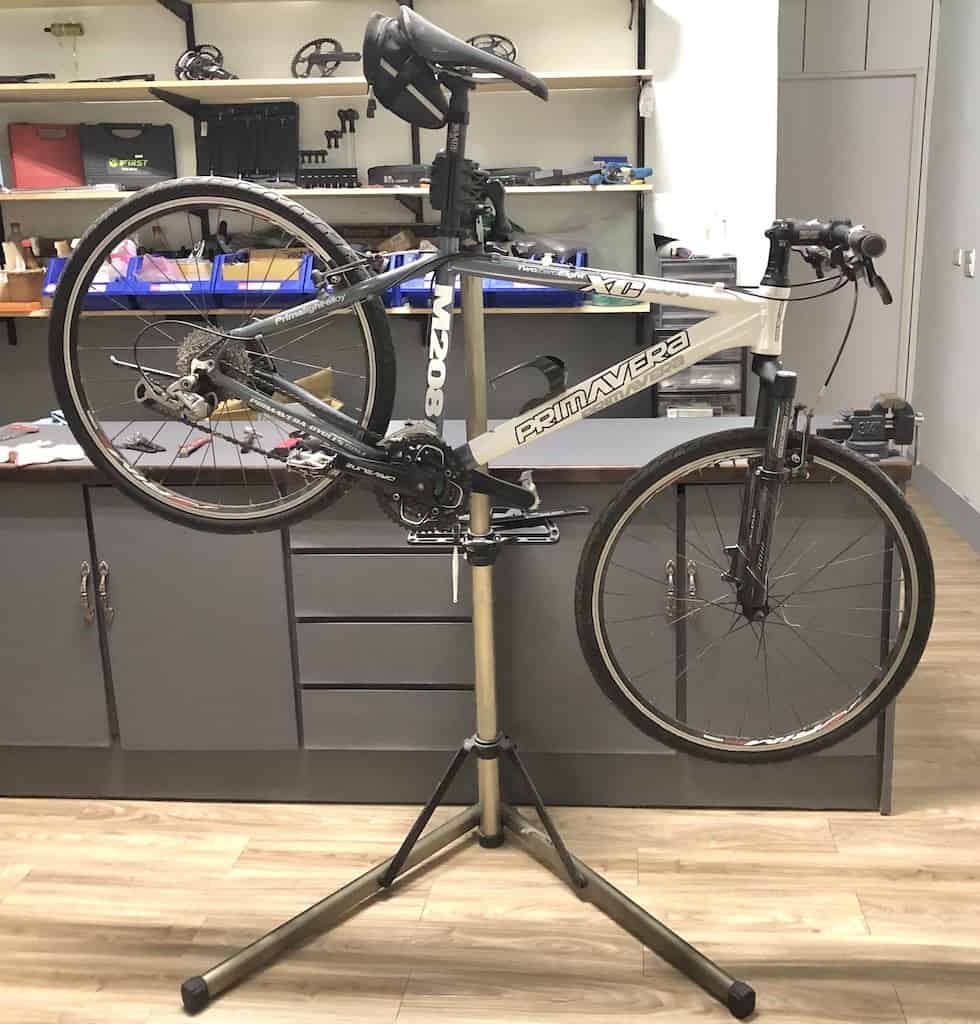
You can fine tune the bike’s height above the floor and rotate it to any angle.
Combining height and rotation with the tool tray makes working on any part of your bike a breeze.
A stand like this one is also portable. Fold it up and store away in between bike jobs.
The next section illustrates various tools and techniques for bike pedal removal, giving you a clear picture of a repair stand’s convenience for this sort of task.
7 BIKE PEDAL REMOVAL TOOLS — WRENCHES & TECHNIQUES
Technique for removing bike pedals with a wrench is less important that getting leverage. Leverage is the key.
Or perhaps we can say that the key technique is gaining enough leverage.
Generally speaking, a lot of of force is required to remove an old pedal and then properly install a new one.
In this section I’ll cover a number of bike pedal removal tool designs from Bike Hand who produce a range of OE tools and Own Brand models.
I haven’t covered all the variations, of which there are many. But one model could be your main removal and installation tool with perhaps one more to offer an alternative if your go-to choice does not work out.
Bike maintenance and repair often requires creative solutions to seemingly simple problems. Having a variety of tools on hand makes those solutions possible.
Tools divide into two categories: short handled and medium-long handled. The longer the handle, the more leverage of course. 15mm jaws is the standard size across the board.
“Better” in relation to bike pedal removal tools means increasing the ease and convenience of pedal removal. Depending on the exact context of use the best tools have:
- longer handles
- insulated grips
- angled heads
Straight 15mm Wrench

This basic wrench with 18cm of leverage length—although lacking grip insulation at the socket end exactly where you need it—is enough for most pedal removal jobs.
The 14, and 15mm sockets are a handy addition as well.
The method for using this is the same as with the Allen wrench described earlier—a swift strike with the palm of the hand to break axle and crank threads free from each other.
Or take a firm hold of the broad surface and with your body behind the motion, wrench the crank and pedal threads free of each other.
Double Ended
The 15mm jaw you’ll make use of 99 times out of 100, is at both ends. One end has a 16mm jaw added; the other, 17mm.
The 15 or so degrees of angle relative to the grip puts space between hand and bike frame, so when it slips—sooner or later it will if you’re dong this often—you’re much less likely to tear a chunk out of your fingers.
Having a rubber padded grip is essential since all the energy that goes into removing a bike pedal is expended breaking the pedal threads free from the crank threads.
Together with your glove, the rubber insulates your hand from the stress. The tool’s edges would cut into exposed flesh making the pedal impossible to budge.
The 19cm from the wrench jaws to the grip point next to the opposite end provides enough leverage except in the case of a pedal fused to the crank, assuming you can steady your bike to ensure leverage in the first place of course.
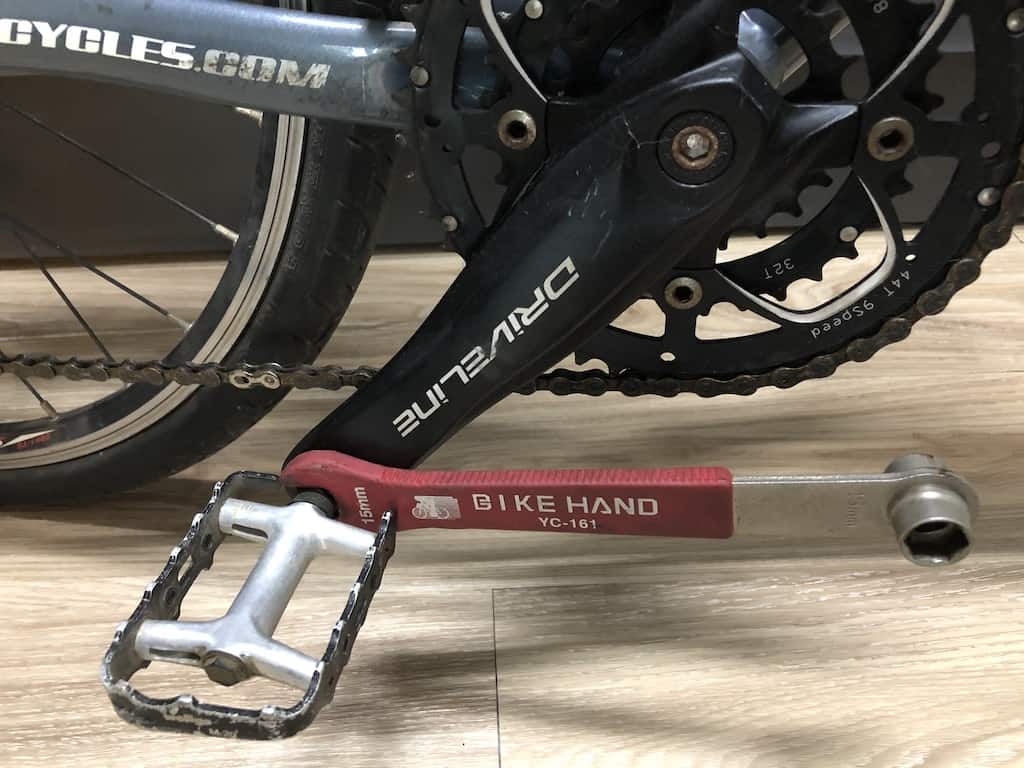
Medium Length Handle
The 25cm between the non-slip insulating grip and the pedal contact point, together with the angled pedal contact puts this one a level above the previous model.
You can also extend the handle, although you’ll hardly ever have to do that given the sheer length—no pedal on a stand-suspended bike will hold out for long.
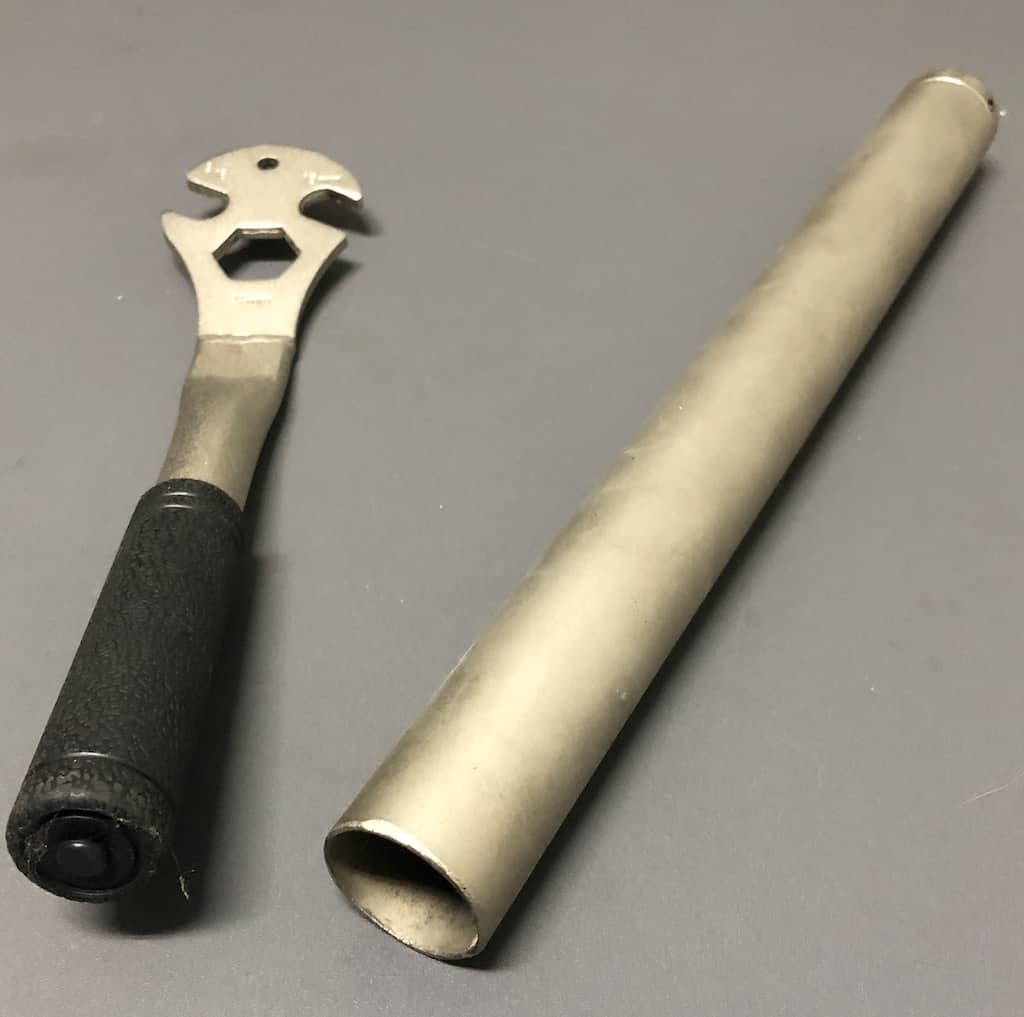
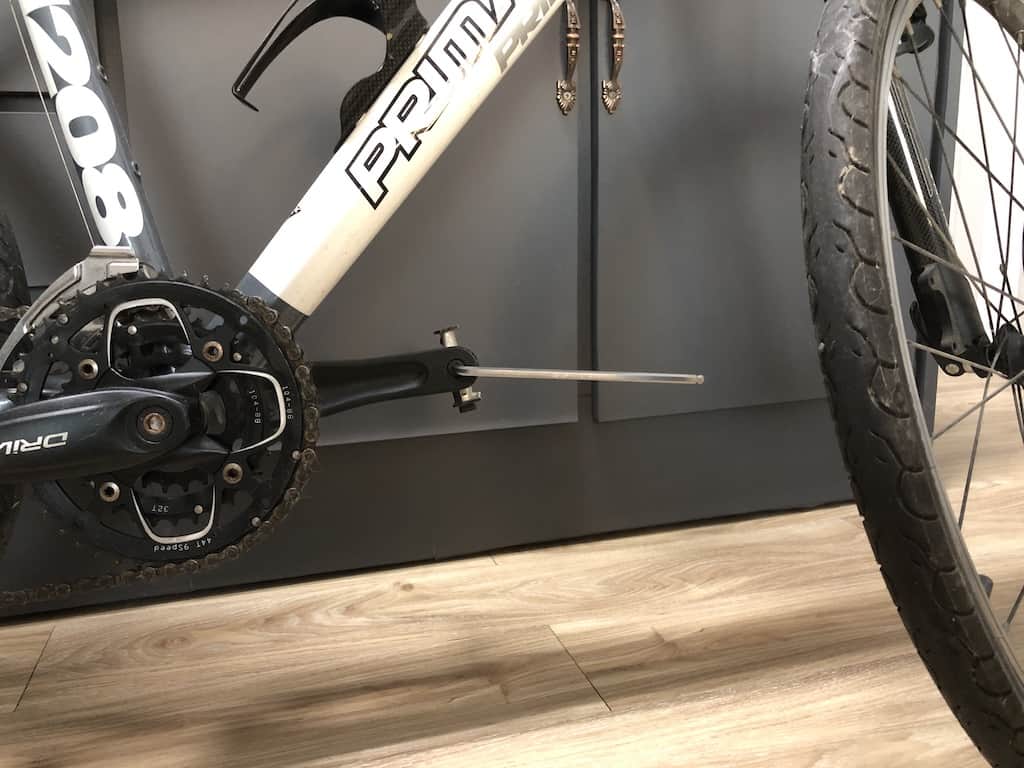
The option to beef up leverage where pedals are really stuck comes from using a length of pipe. An old seat post also does the job. Here we’re using a crown race driver.
This method is best applied when a bike is suspended in a maintenance stand.
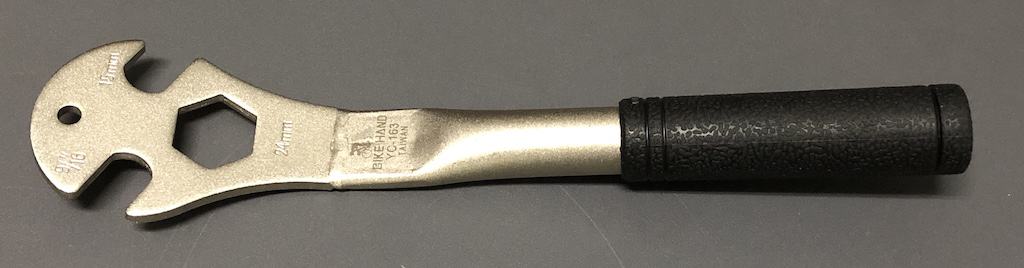
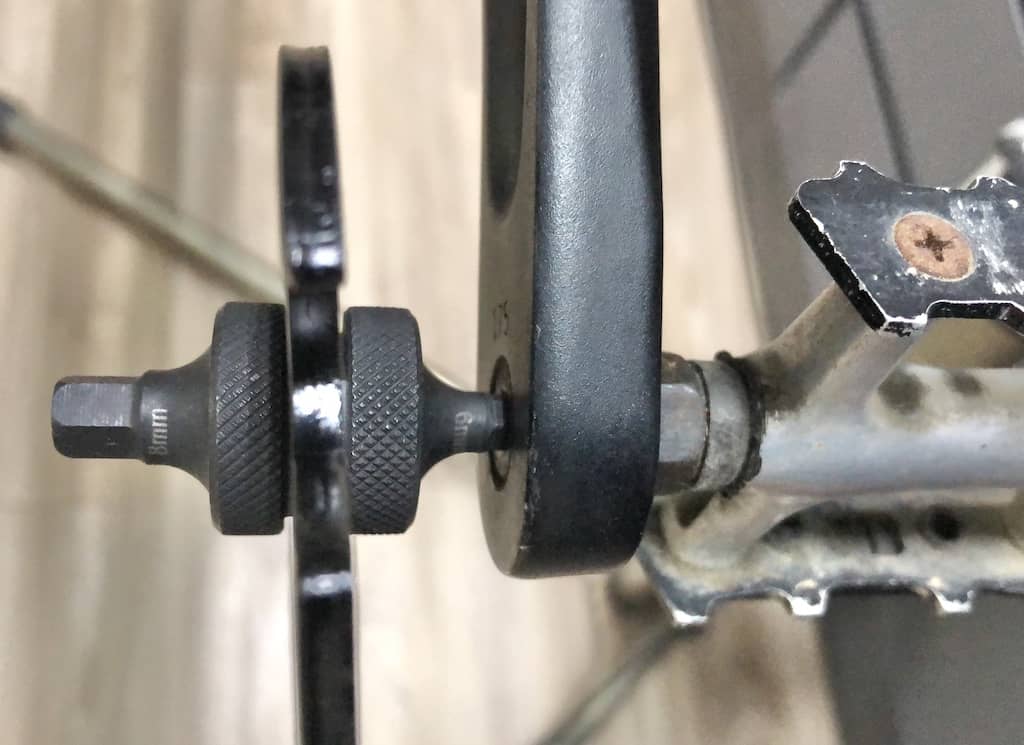
Allen Wrench
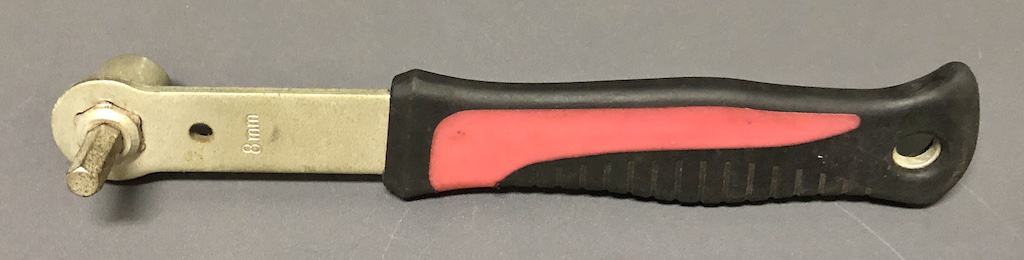
For pedals that take an 8mm Allen wrench, this is the go-to tool.
A firm grip in the right position gives you the leverage you need to break a pedal free.
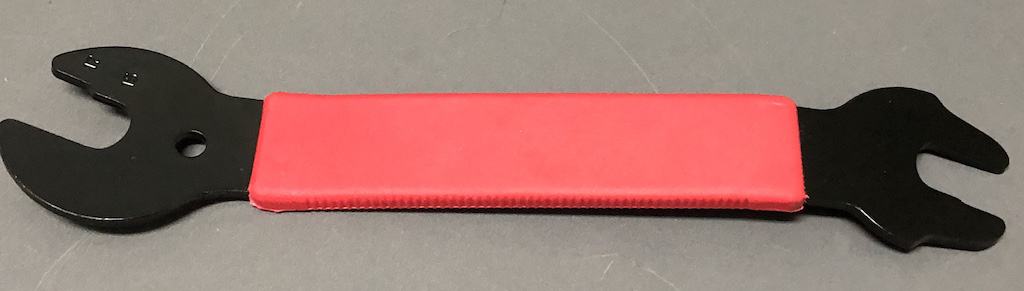
Heavy Duty
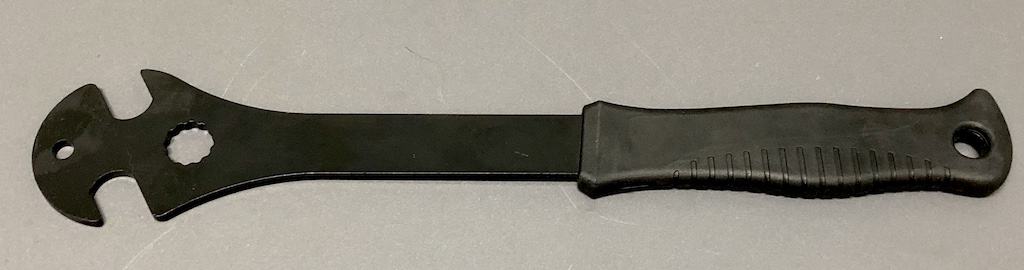
And by heavy duty I mean professional shop tool.
A hand molded grip on a 1ft handle makes short work of bike pedal removal.
Again, it’s best applied to a bike suspended in a stand, since you don’t have an angled head to work with making it easy to keep your hand and fingers out of the impact-the-frame zone.
15mm jaws on both sides increase the convenience of fitting the jaws onto the pedal at awkward angles.
Allen Wrench Extension
This piece allows to turbo-charge Allen-wrench leverage and is best used with the longest handled wrench available.
An extra few centimeters exponentially increases the leverage you can apply. Only pedals rusted into the crank can resist.
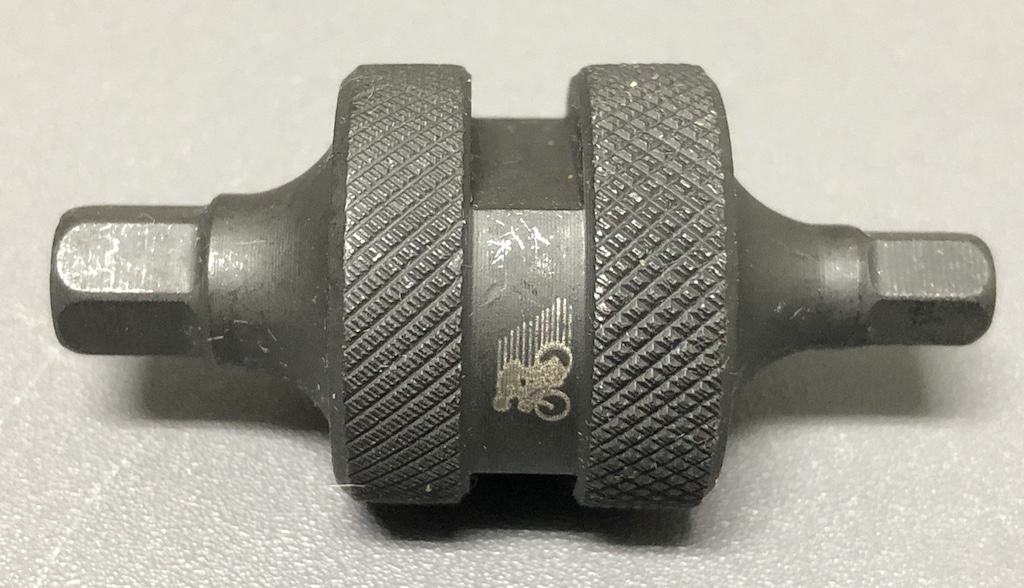
Apart from very entry-level models, most pedals will take an Allen wrench at the crank.
Most are 6mm, with the very high end, Dura Ace clipless pedals for example, take an 8mm wrench.
This Allen wrench extension has an 8mm head on the left and a 6mm head on the right.
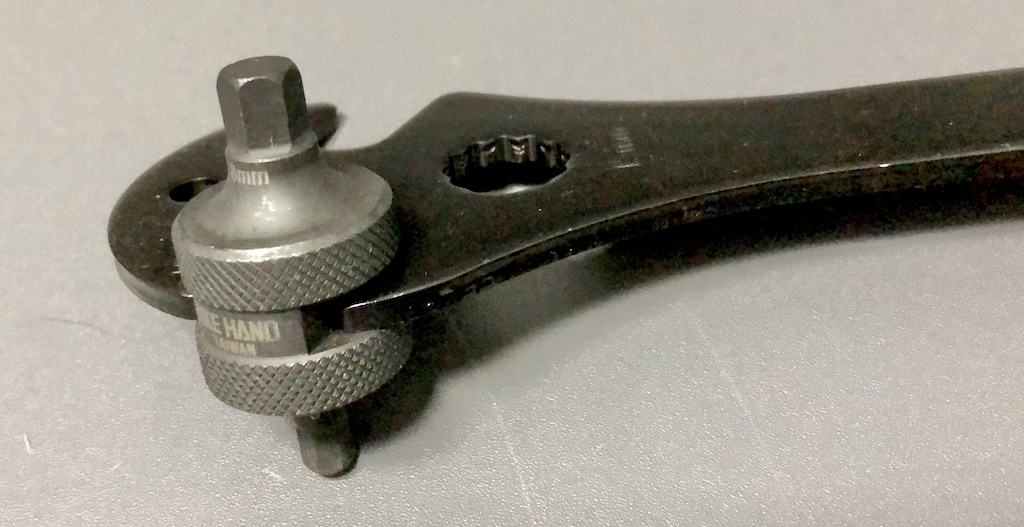
The center has two parallel machined surfaces to fit a 15mm wrench.
Coupled with the Heavy Duty Pro wrench with its 22cm of leverage and hand-molded grip, only pedals fused to the crank can resist the torque you can exert on them using this method.
This wrench and the previous are most conveniently used where you have space to work. Either one will do if your bike is suspended from a stand.
Portable Bike Pedal Wrenches
There should never be any need for bike pedal removal or tightening out on the road. Correct installation at the right torque (35+ Nm) makes it unnecessary.
But there may be contexts such as on a group ride having one handy may be useful. Here, then, are two possibilities.

Both work on the core assumed need for a tire lever and spoke adjustment functions in addition to the 15mm jaws.
You could opt for the 14 and 15mm sockets.
Or go for the bottle opener. Taiwanese tool makers often include bottle openers on all sorts of bike tools; relevant for a very small minority of beer drinkers, but not for many other category of cyclist you would think.
Nevertheless, you would have nothing to lose taking one out on a group ride.
HOW to REMOVE (& Avoid) STUCK BIKE PEDALS
If a bike’s pedals resist all attempts to remove them, you need:
- chemical help
- more leverage
If the bike is old, check the pedal-crank connection before trying to remove them. If caked in rust, then you know you are in for a hard time.
Apply WD40 many days ahead of time to give it time to penetrate and break down the bond between the pedal’s threads and the crank’s threads.
Avoiding stuck pedals is easy.
A light coating of sewing machine oil or bike bearing grease on the pedal threads before installing them almost guarantees you’ll be able to remove them with ease.
Storing a bike out of the rain when not in use reduces the chance of rust fusing the threads together.
A simple bike cover will do if you cant stow your bike inside a building or under the eaves. Durable, cheap covers are a dime a dozen on Amazon.
And consider this novel method of pedal removal using lengths of wood and woodworking clamps. Complicated, but worth a try if pedals are really stuck.
FINAL COMMENTS
Pedal removal should be the most technically simple repair or bike maintenance procedure.
If pedals are installed correctly, with lubricant, and the bike stored away from continual exposure to moisture a simple 15mm wrench is all you need.
Otherwise you may need to look at one of the other techniques covered in this article.
If you are a serious biker though, getting yourself a pro pedal removal tool and bike repair stand will pay dividends for years to come.