Having the right pedal wrench for removing, installing, or adjusting the connection of your pedals to their cranks makes what can be a difficult job much, much easier.
Breaking a pedal’s threads free from a bike crank’s threads is often the most difficult pedal replacement or maintenance procedure.
Many types of pedal wrench are available to make it easier.
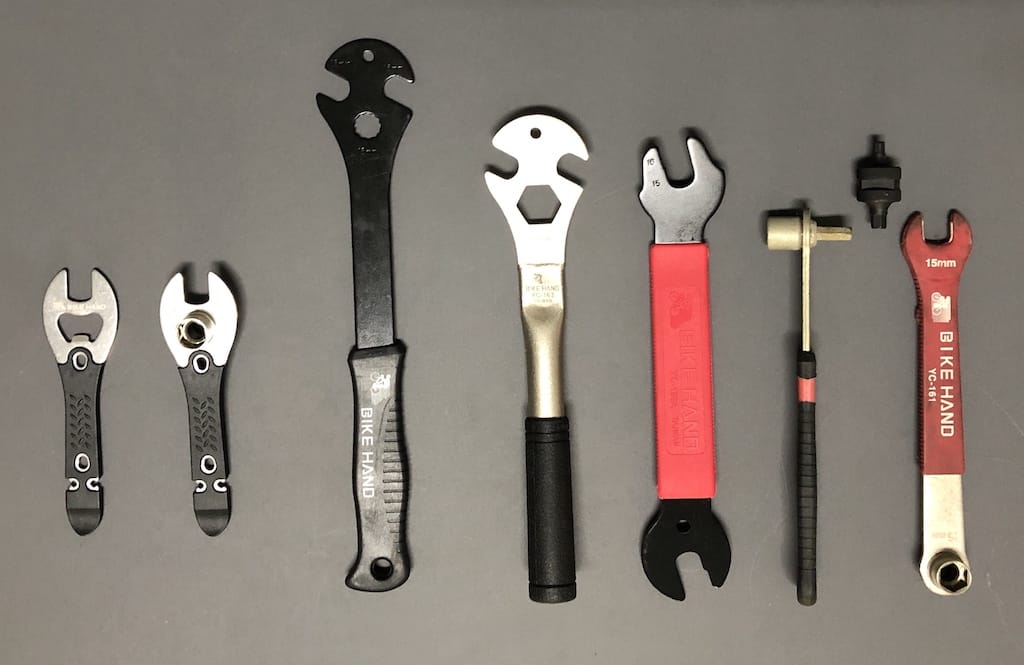
Some, like these, are specially designed, just to fit most pedal types.
However there are only two categories of pedal wrench overall:
- for removing, installing, or adjusting the connection of your pedals to their cranks (as above)
- for opening up and working on the parts inside a pedal
The second category of pedal wrench consists of basic tools and wrenches already in use for many purposes around the house.
You’ll need at least one wrench from the first group, and you’ll already possess some, if not all, from the second.
1. For most pedal jobs, you can get away using a basic an open ended 15mm wrench, a 15mm Allen wrench, or a 6mm (sometimes 8mm) Allen wrench.
But there are many dedicated pedal wrenches available today that are cheap and easily obtainable locally or online, and which make a potentially impossible task not only possible, but even easy.
2. Working on a pedal’s internal parts involves loosening the nut(s) to access the bearings, and pedal axles using tools you’ll most likely have anyway.
Opening up then sealing a pedal is not hard. Loose bearings can be replaced and greased, and even faulty axels, although most pedals contain sealed bearings which are generally machine installed, making replacement either difficult or impractical.
CONTENTS
REMOVING, INSTALLING ADJUSTING
15mm Open-Ended Wrench
Allen Wrench Technique
Long Handled Pedal Wrenches
Other Pedal Wrenches
WORKING ON A PEDAL’S INTERNAL PARTS
Vise
A Socket Set (with Allen Wrenches)
1. REMOVING, INSTALLING, or ADJUSTING
As a general rule, the longer the handle the more leverage and thus the easier to tighten or loosen pedals, especially break them free from the crank.
These tools are placed in order from least convenient to most convenient.
If all you’ve got is an open ended wrench, then that will probably do.
15mm Open Ended Wrench
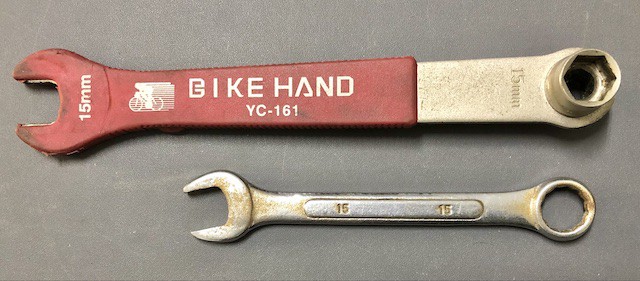
You’ll probably have a set of open-ended wrenches with either an open-ended opposite end, or a same-sized ring.
If you don’t have a set yet, then get one, especially for a cheap bike, like a kid’s bike.
The ring makes loosening or tightening seat post bolts (hex bolts on higher end bikes), derailleur bolts (again hex bolts on higher end bikes), quill stem bolts, handlebar stem bolts, and wheel nuts, a breeze.
The fit of an open-ended wrench’s jaws on the nut depends on the quality of the tool.
You don’t want the jaws to slip from the nut as you apply pressure to loosen or tighten it; the more precisely the jaws have been machined, the less likely they are to slip.
The main problem with this type of generic open-ended wrench is leverage.
Many bike professionals recommend a pedal-in-crank torque of around 35 Nm—that’s tight.
35 Nm is the recommended torque for most threaded bottom brackets, a tolerance achieved by using a long-handled wrench.
The longer the lever, the easier the job of loosening or tightening
What about an adjustable wrench, then?
An adjustable wrench’s jaws are often too wide for many types of pedals; they jam against the inside edge of a pedal’s platform and the crank, and won’t engage with the nut at all.
Even though you can exactly adjust the fit to the pedal axle nut (where the jaws are not too wide), a crescent wrench does not make an ideal pedal wrench.

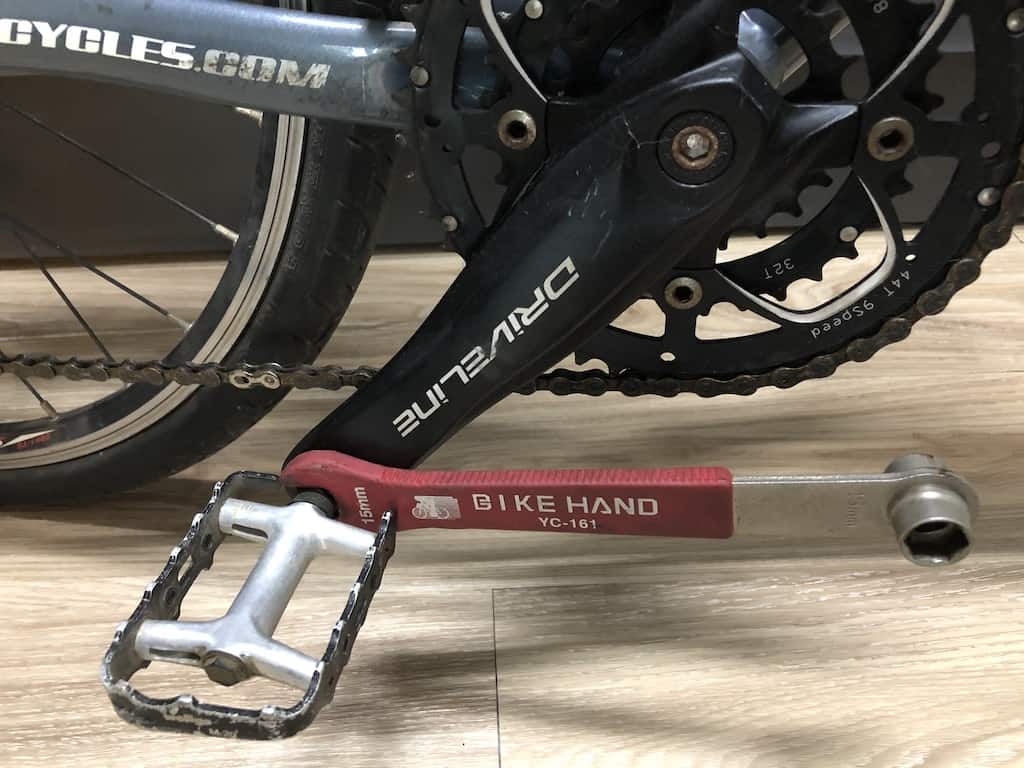
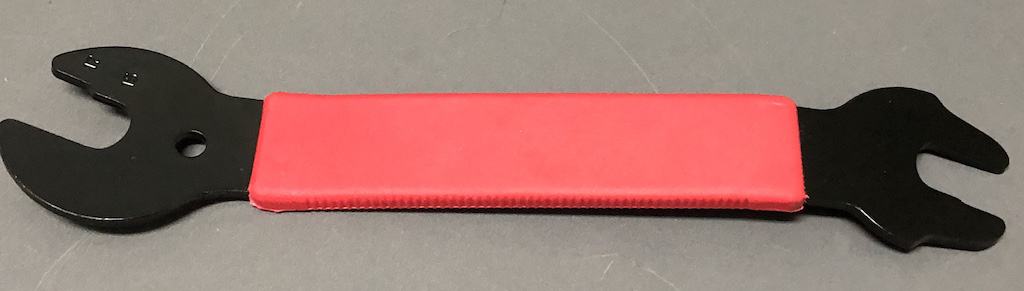
A 15mm wrench with narrow jaw design and a longer handle than standard open ended wrenches is the minimum pedal wrench to have handy.
The jaws fit precisely to the pedal nut; the long handle provides a good degree of leverage.
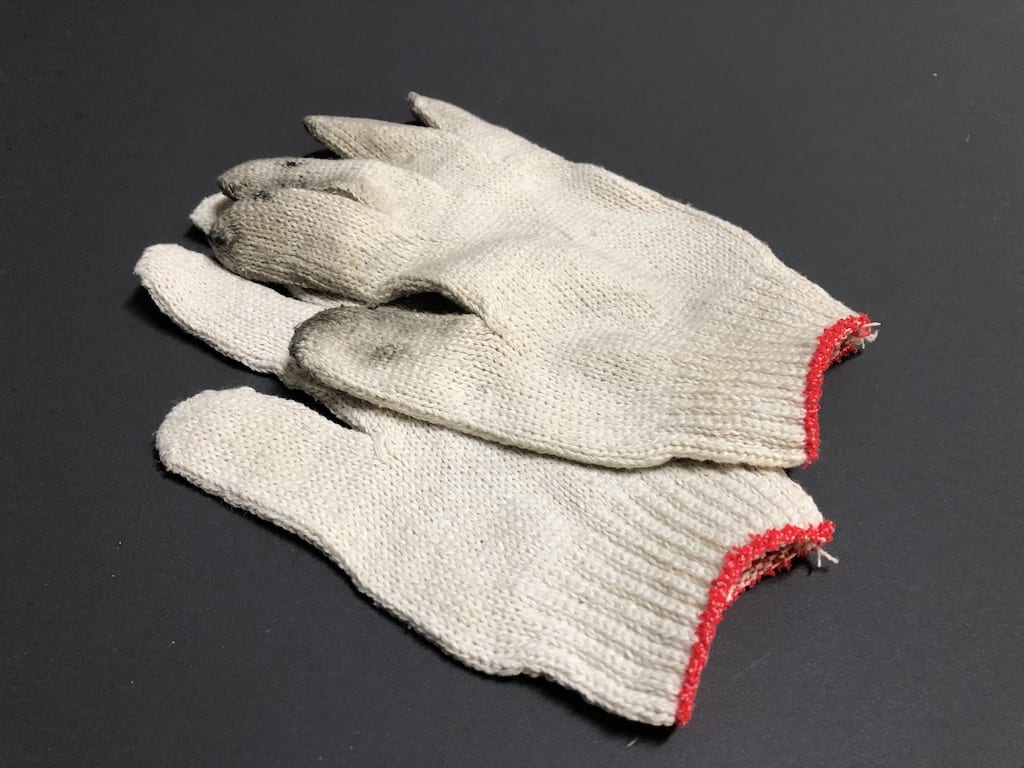
And on that point, better you use a glove, since you need a good grip and the wrench’s edges can cut into your hand.
Light cotton gloves like these are perfect.
The difficulty in using a straight-up pedal wrench such as this is holding the crank in position in order to gain purchase on the pedal you want to remove—this is also the core problem with pedal removal or installation.
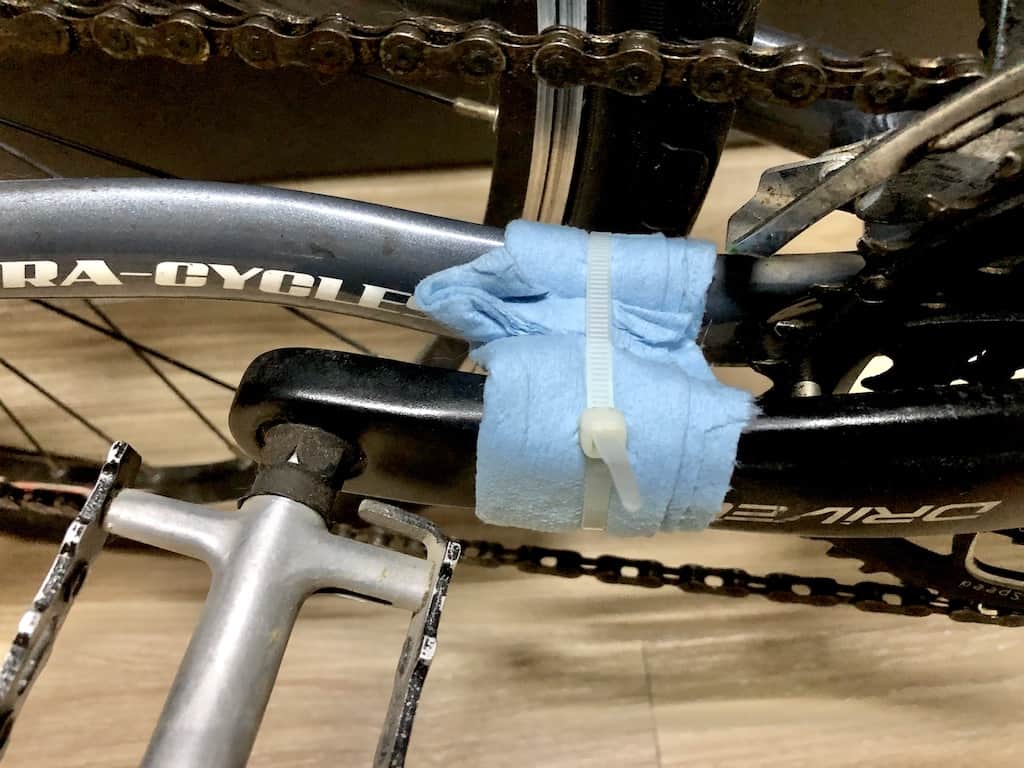
One technique is to fix the crank opposite to the crank with the pedal you’re working on to a chain stay.
A zip tie is one way to do it. The thicker the better since zip ties stretch as the tension ramps up from the torque applied to a pedal.
The insulating cloth prevents the sharp edge of the zip tie cutting into the crank or chain stay as you apply pressure.
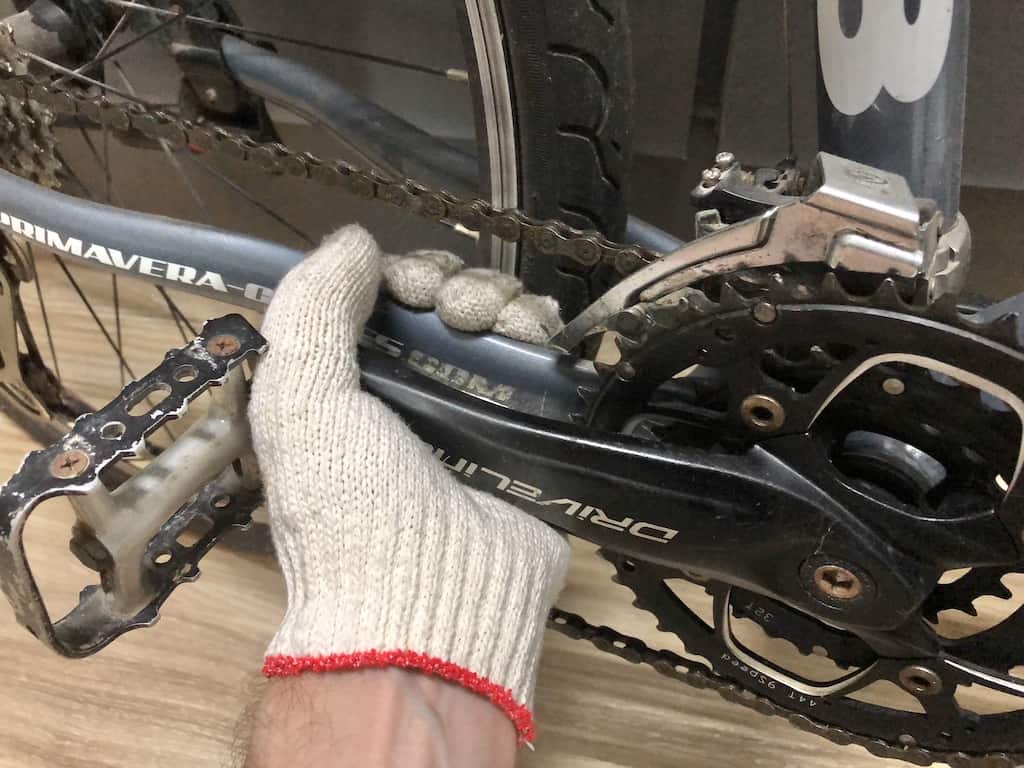
Holding the crank steady against the chain stay is possible: hold with one hand while you apply pressure to the wrench with the other.
If the pedal is not tight (which would mean it’s well below torque tolerance) you can successfully loosen a pedal, although you’ll have to assume an awkward position to carry it out.
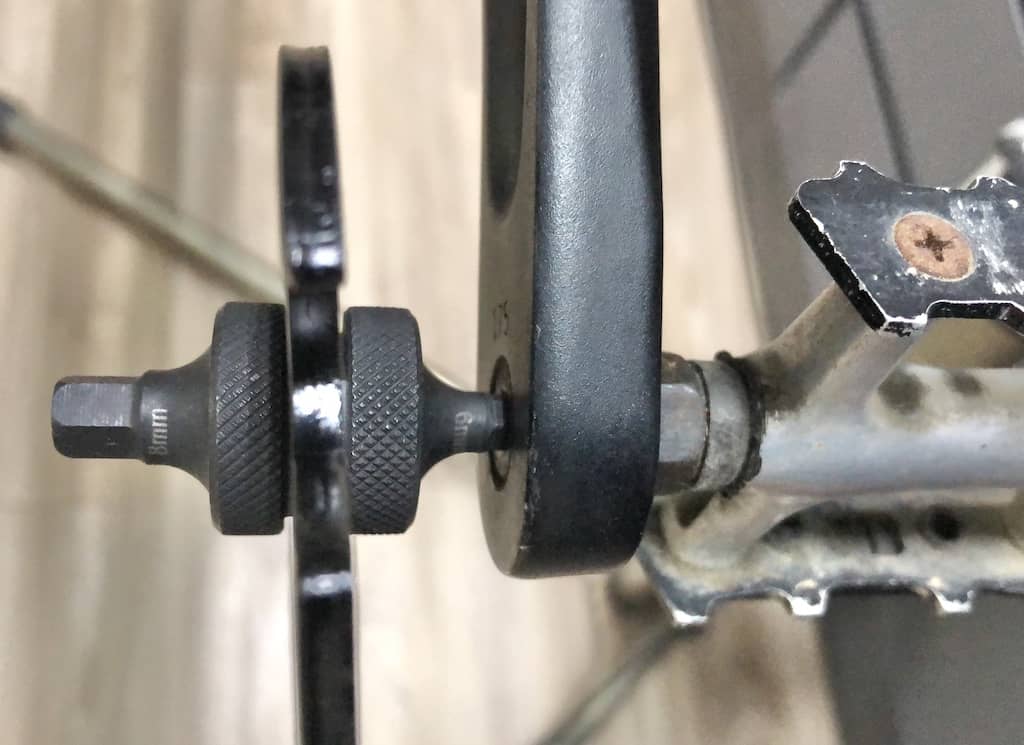
A better tool to use in this situation is an Allen wrench if your bike pedal has a hex socket.
Allen Wrench
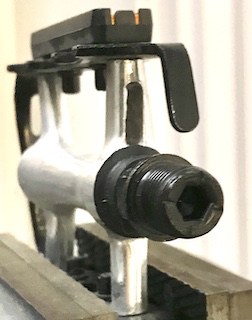
Mid to high end pedals have a hexagonal socket machined into the crank end of the axle, some with a pedal nut, and some without, meaning your only option is to use an Allen wrench.
Most pedals accept a 6mm Allen wrench. Others—Shimano for example—require an 8mm wrench.
Allen wrench technique
The technique is all-important, particularly when breaking the pedal threads free of the crank threads.
Pedals tighten in the direction of the front of a bike—the non-drive side, in other words, is a left hand thread (lefty-tighty).
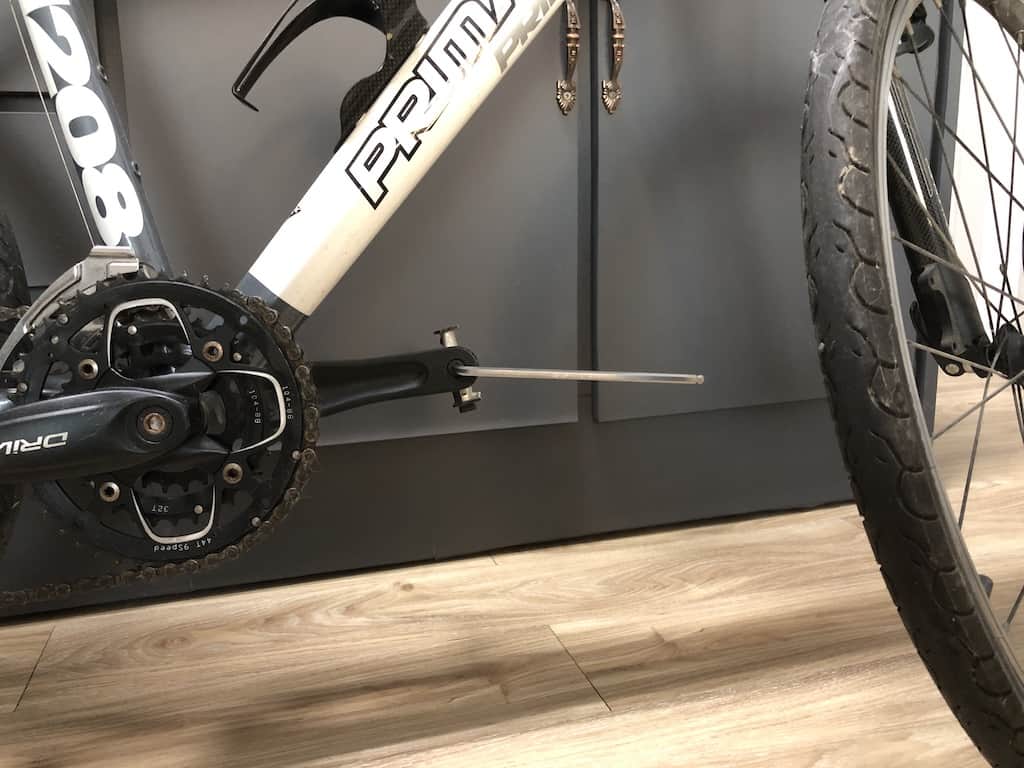
Access the inside of the pedal from the opposite side, under the down tube. That requires turning the front wheel slightly, allowing more space to work.
Insert the Allen wrench into the hex socket, steady the opposite crank, then strike up quickly against the wrench handle.

One blow is normally enough to break the threads free, although it sometimes takes several goes.
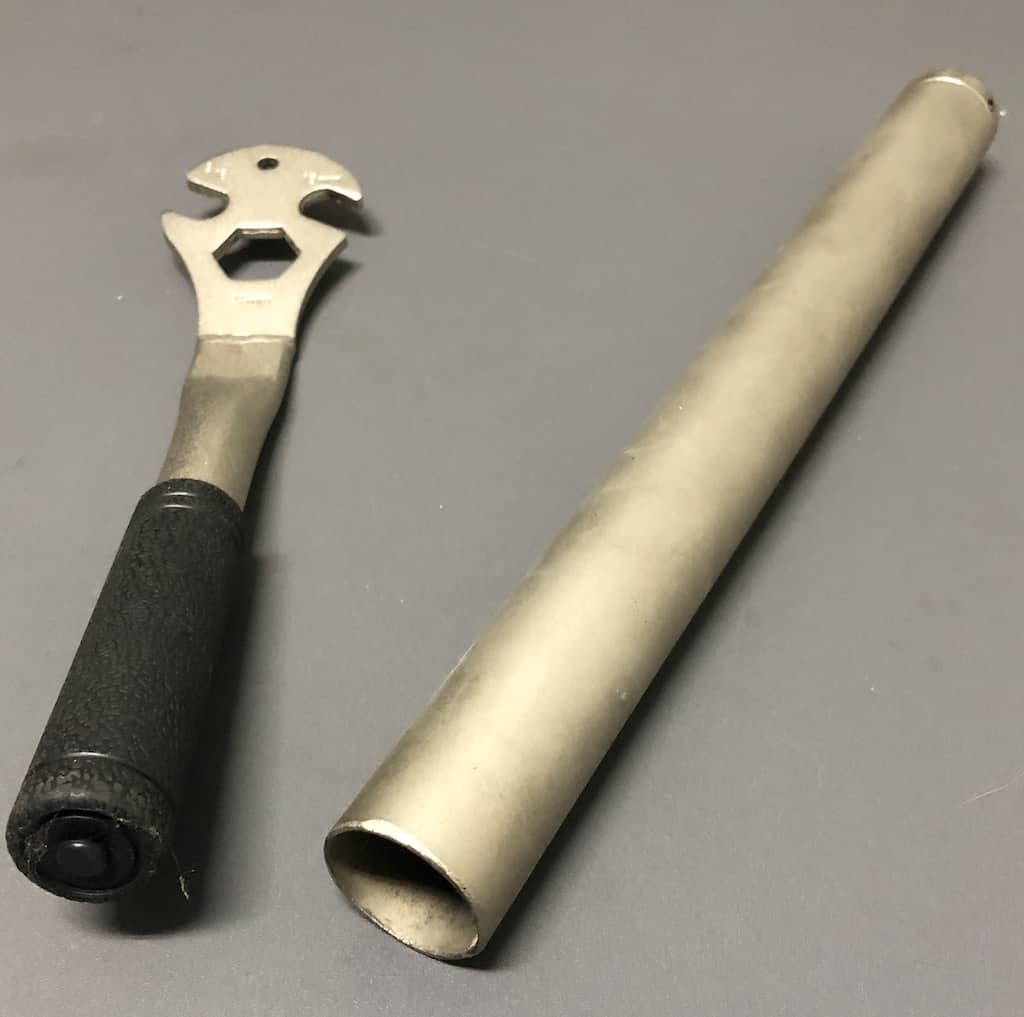
If the pedal does not budge at all, then you’ll need a longer handled wrench.
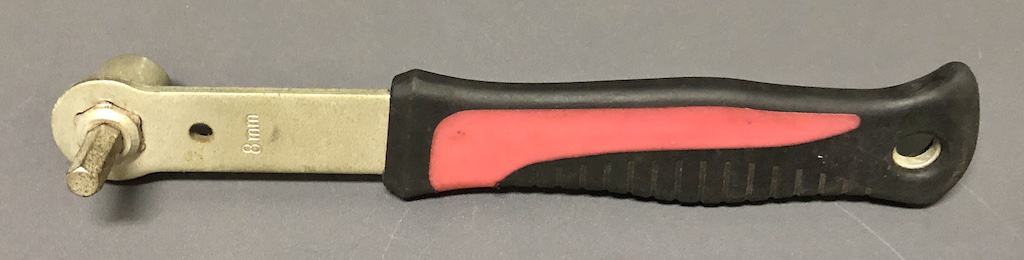
The handle alone gives greater purchase and coupled with the increased length compared to an average Allen wrench (8.75cm vs 8cm), breaking a pedal free of the crank threads via the hex socket is much easier.
You can slip tubing over the shaft of a standard Allen wrench to increase leverage, although maintaining control as you are applying pressure can be difficult.
Long Handled Pedal Wrenches
The longer the lever the more effective the leverage; it takes much less effort to loosen a pedal; tightening is also much easier.
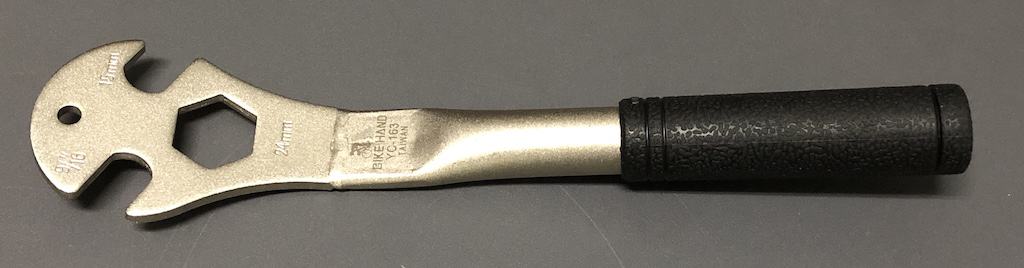
Firstly, the handle makes getting a grip on the shaft much easier, which alone can make all the difference where a pedal puts up resistance as you’re removing it.
The 10cm from handle-to jaws provides much more leverage than an Allen wrench: 7cm of length for a 6mm wrench; 8cm for an 8mm wrench.
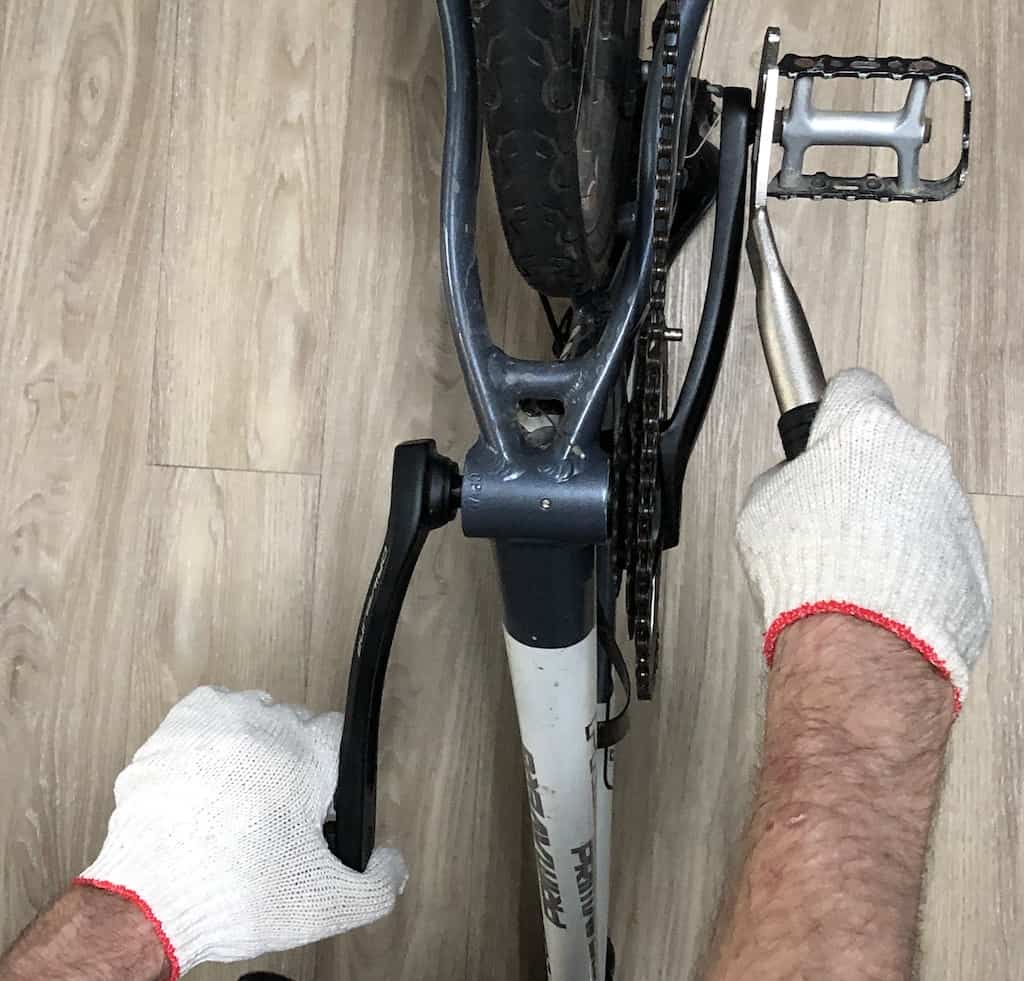
Positioning the bike to get maximum effect from using a tool like this can make all the difference.
Flipping a bike over to rest on the handlebars and seat raises the pedal to a more workable height and makes steadying the opposite crank with one hand easier.
10cm of leverage is still not much when attempting to break a tight pedal free of the crank.
Extending the handle with some tubing (in this case a fork crown race driver) increases leverage massively when needed to loosen tight pedals.
The only problem can be the jaw’s fit to the pedal nut: if not exact, it can slip; and the tubing can also move around on the handle.
Factors influencing jaw-to-nut fit include the hardness of both the tool and the pedal nut.
A good quality tool used on a good quality pedal will reliably loosen and tighten a pedal over many cycles without the jaws deformed—the hardness of the steel used in the wrench is the key.
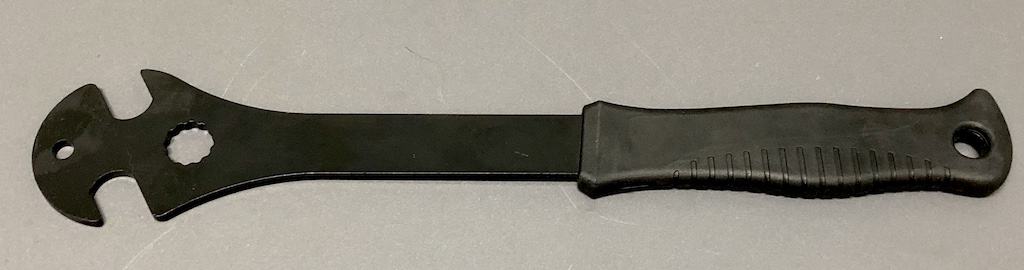
A 12cm (1 foot) professional grade pedal wrench allows maximum leverage: every extra centimeter of length exponentially increases leverage.
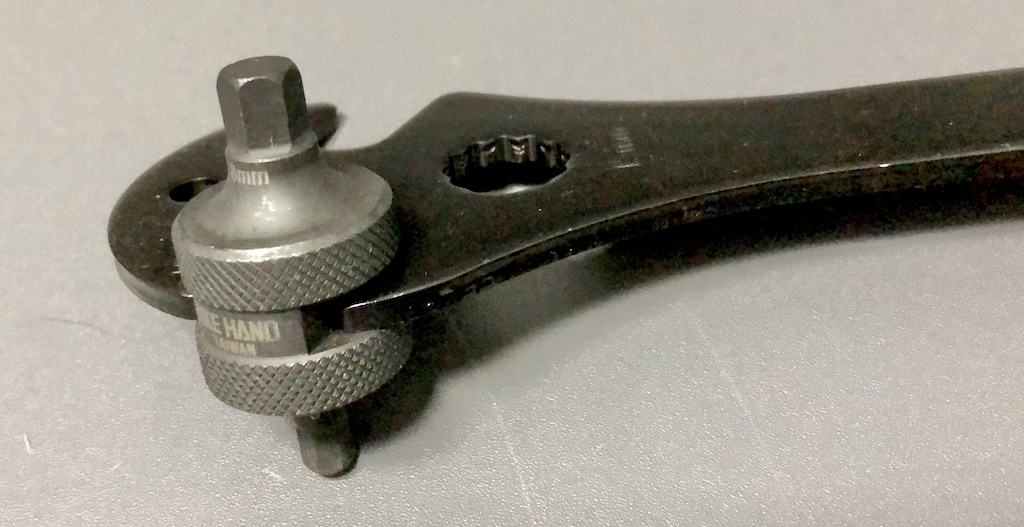
This pedal wrench can also be co-opted to enhance a hex socket through an extension.
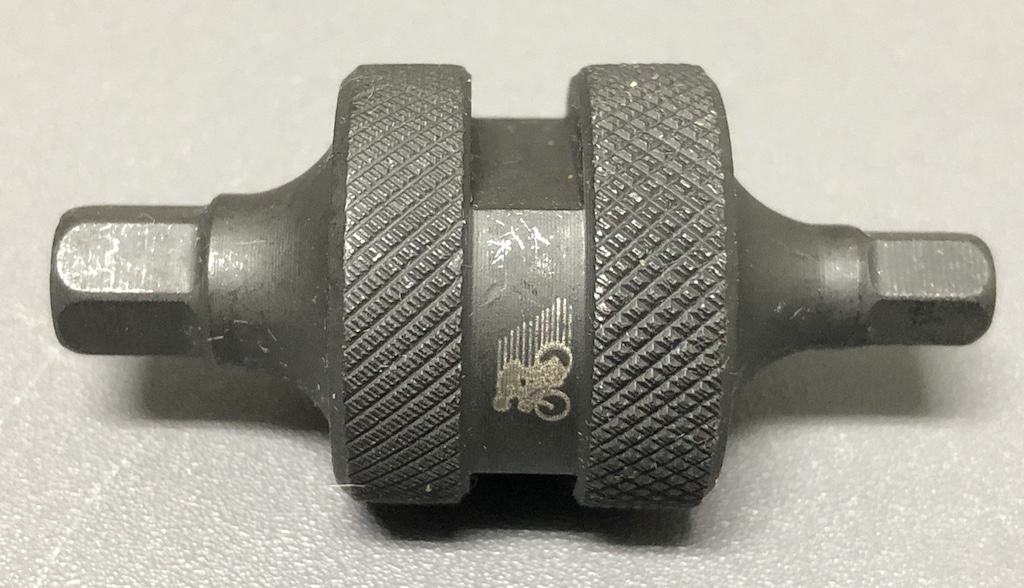
The grip on the outside allows you screw the pedal in by hand.
Once its finger tight, you fit the wrench to the nut.
A pedal wrench extension like this is certainly not necessary.
But having one gives you choices. A bike shop pro would certainly benefit from having one handy.
The point of adding extra wrenches is to provide extra means of removing pedals especially where you are
Other Pedal Wrenches
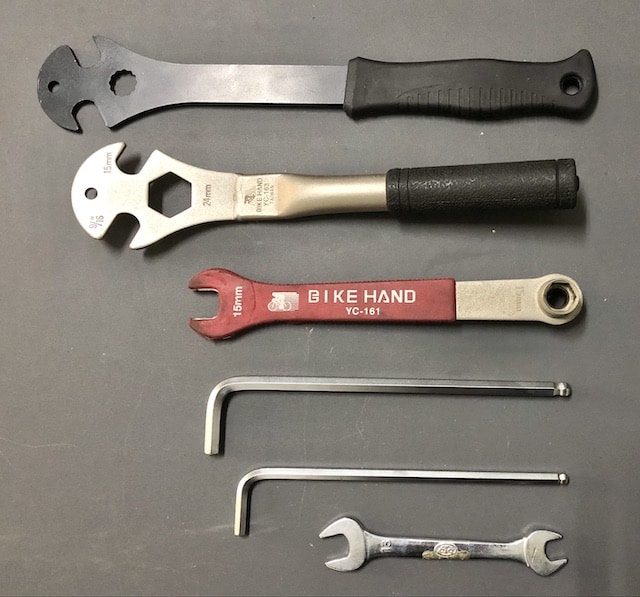
Here are several other types of pedal wrench available for different purposes.
Again, it’s all about convenience: having the exact tool for a job adds convenience thus saving time.
If you run a bike shop this wrench gives three separate jaw sizes—15mm each end on the inside with 16mm and 17mm respectively on each end—enabling you to deal with pedal sizes beyond the norm.
The offset also keeps your hand away from the frame, reducing the chance of an injury should the jaws slip off the nut.

Tools like these may be good for hard trail riding or even trekking since they are light and portable. (Although, the extra weight of a longer, pro pedal wrench would hardly register, so packing one of those would be better).
The minimal weight is countered by the minimal leverage which can be a significant disadvantage depending on the pedal problem a cyclist is faced with.
The tire lever tips and spoke adjusters may or may not be useful depending on the context.
Pedal wrench designs like these come and go as part of OE bike tool manufacturers’ experiments to see which combinations of functions capture the market’s imagination.
2. WORKING ON A PEDAL’S INTERNAL PARTS
Opening up a pedal to clean out or replace the axle or bearings is not hard (although replacing the bearing is generally not easy).
Even if you’ve no specific need to do so, it can be an interesting exercise if you’re so inclined.
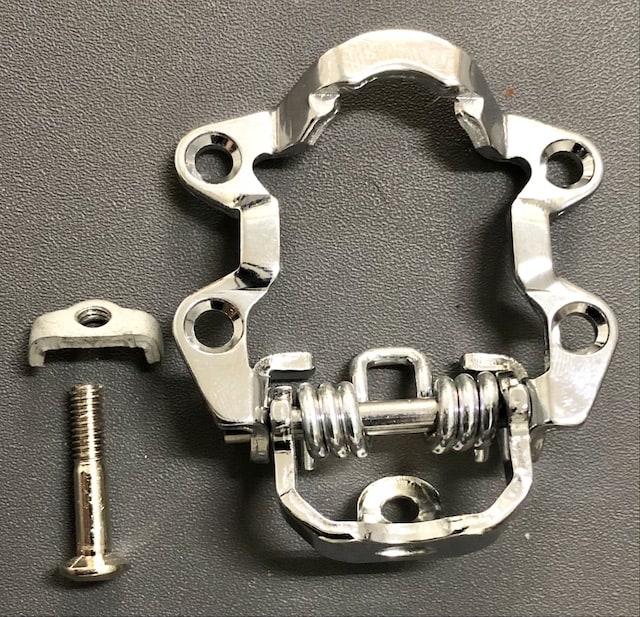
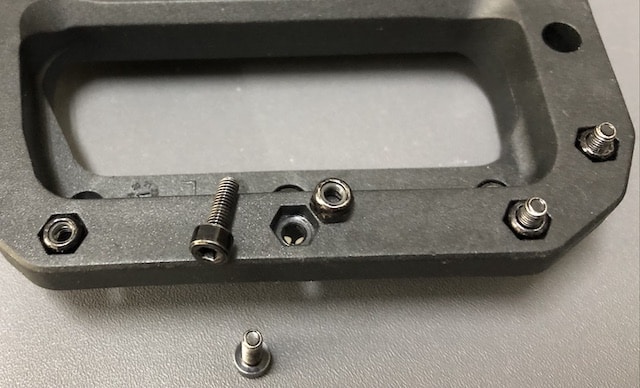
Breaking down a pedal’s external parts, minimally for cleaning, is worthwhile.
Or, at least, having the ability to do so means being able to thoroughly clean around the part or replace it.
A set of Allen wrenches is all you need. The bolts are not tight, so removing these brackets is simple.
Vise
A vise is the key to holding a pedal steady while you work on it.
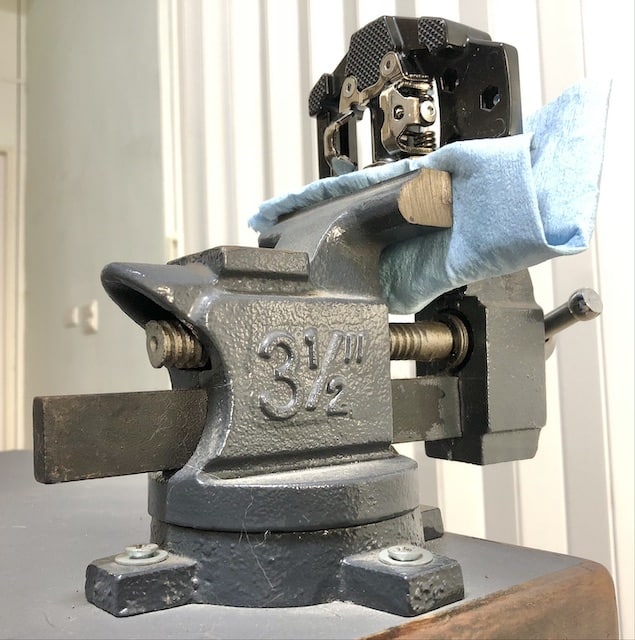
Place an insulating cloth or a generic vise jaw protector on the jaws to avoid damaging the pedal body.
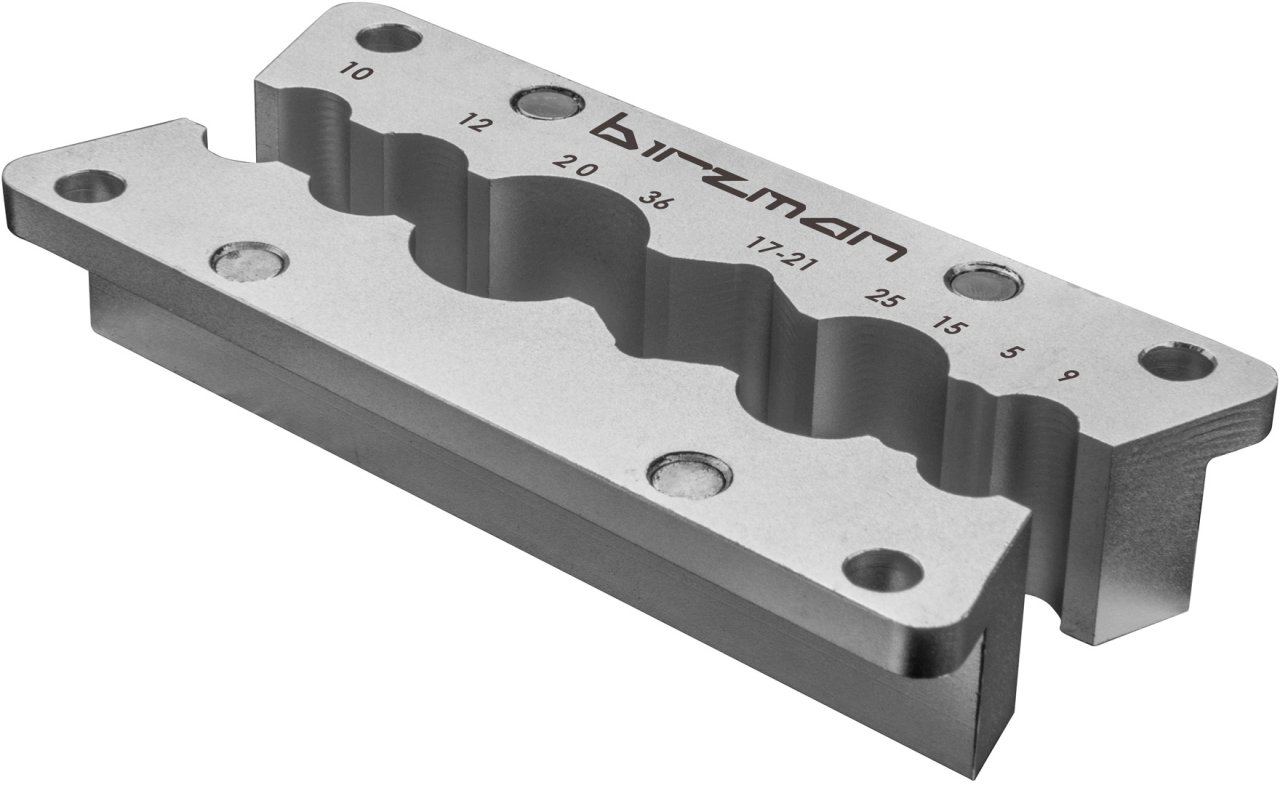
Birzman has a set designed specifically for pedals with a range of axle diameters. IceToolz and Shimano also have similar models.
Rather than clamp the pedal body, you clamp the pedal axle on the threads (not “spindle”, by the way, since the shaft does not rotate when pedaling).
There are also many videos on YouTube demonstrating how to make a variety of “soft” jaws or insulation from wood and other materials.
A good set of Allen wrenches serves you well across the whole gamut of pedal wrenching tasks.
Working with pedal pins requires 2, 2.5, or 3mm Allen wrenches, so having an Allen wrench set from 2mm to 10mm covers you for the range of tasks you’ll encounter.
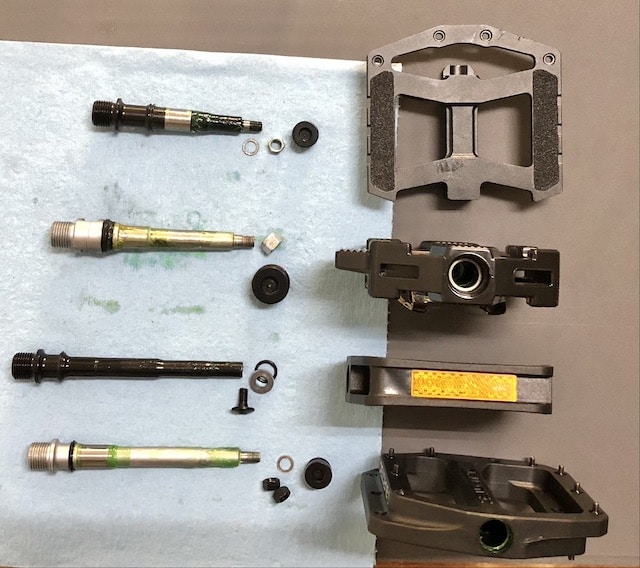
A Socket Set (with Allen wrenches)
A socket set used in conjunction with the right sized Allen wrench are the tools granting access to the pedal body’s interior.
Remove the nut; then remove the interior nut to be able to extract the pedal axle.
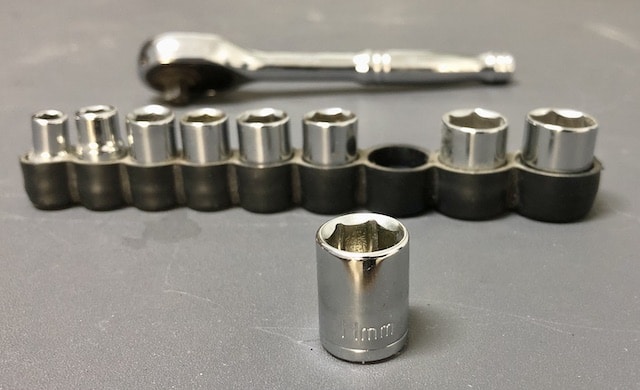
A cheap, simple socket set is enough.

Firstly you need an Allen wrench to remove the dust cap.
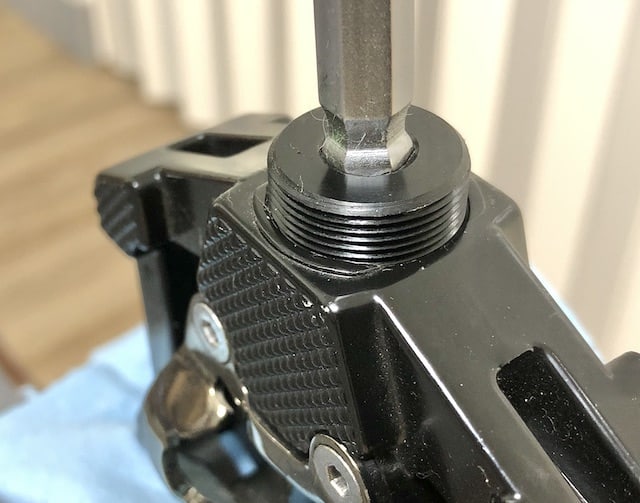
It should not be very tight (1-2 Nm torque maximum for when you replace it).

Inside, the axle nut holds the pedal’s axle firmly in the pedal body.
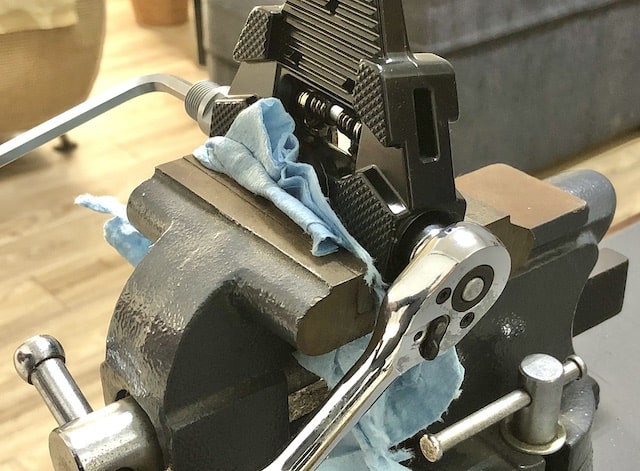
An Allen wrench in the axle’s crank-end with the socket wrench holding the nut steady is the easy way to remove it.
Hold the socket steady and turn the Allen wrench.
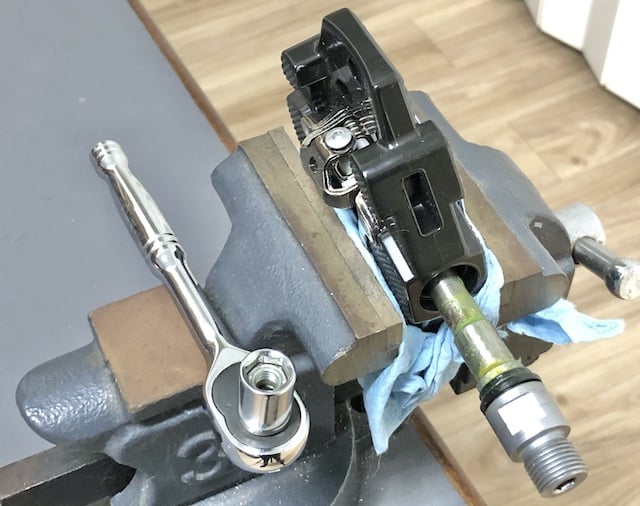
The nut comes out with the socket allowing you to remove the axle.
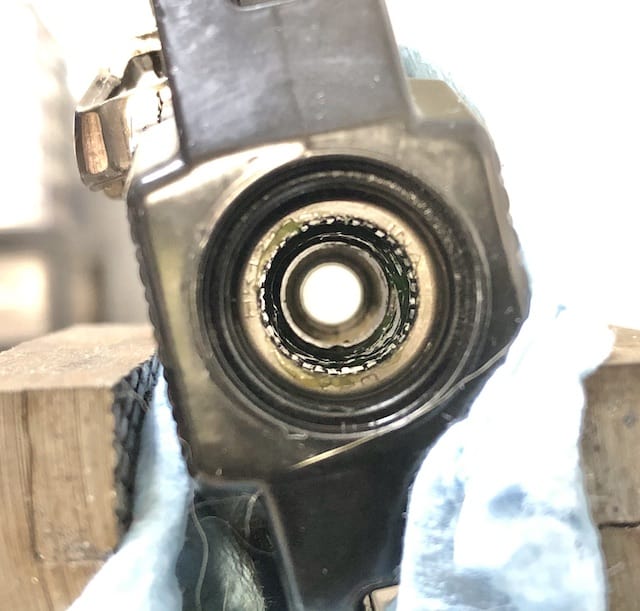
The pedal body’s interior is ready for cleaning or re-greasing.
Bearings are normally pressed into the pedal axle cavity making removal difficult without advanced, specialized tools.
FINAL COMMENTS
You’ll come across a lot of advise online declaring that nobody need a “pedal” wrench, that is, a wrench specifically for pedals.
It’s true. You don’t.
Bike wrenching can be tough and frustrating, however, so having a dedicated pedal wrench makes working with pedals much easier.
The professional, long handled pedal wrench is the optimum tool to have on hand. A good selection is available from a number of brands on Amazon as low as $19.