Welcome to the best guide to BMX Pedals on the internet.
If you are a BMX enthusiast looking for both general and detailed info on pedals, you’ll find it here.
If you are a brand or even a shop, you’ve certainly come to the right place.
We detail (amongst a bunch of other stuff):
- How BMX Pedals are Made
- New Alloy (Deucalite) for Manufacturing BMX Pedals
- The Different Types of BMX Pedals
- How to Install & Remove BMX Pedals
WHAT GOES INTO DESIGNING A BMX PEDAL?
Every pedal design goes through several stages.
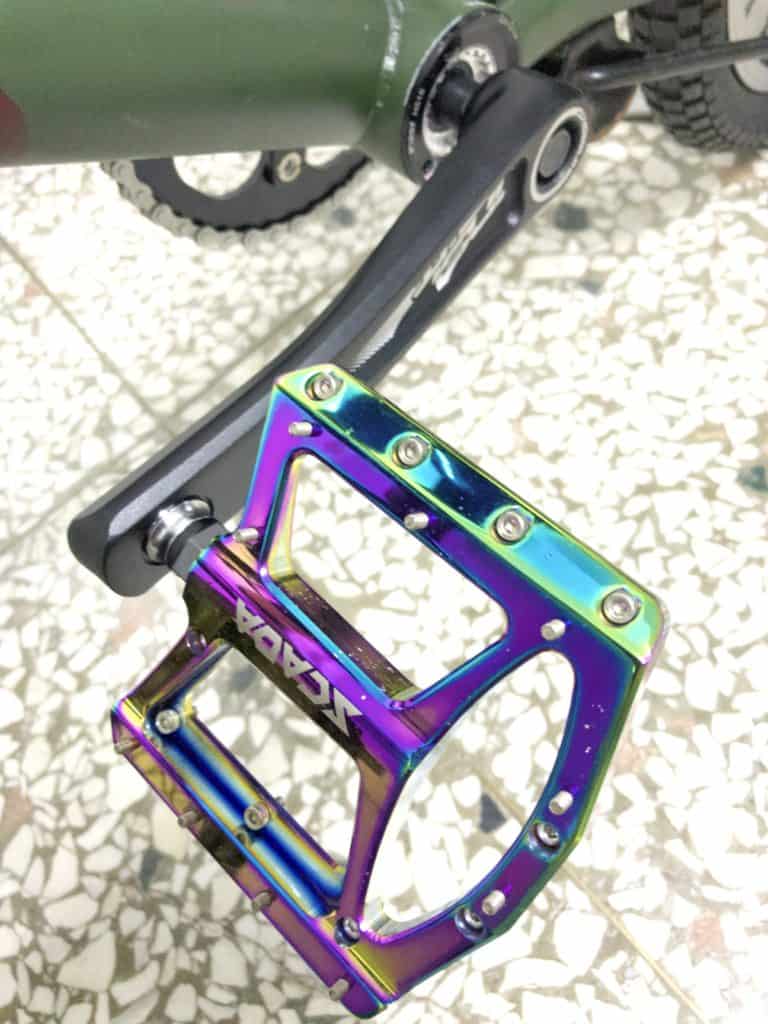
Firstly, a pedal brand comes up with a design, normally in the form of CAD drawings.
Then they reach out to a manufacturing partner, such as SCADA to negotiate the manufacturing details.
Brands typically partner with a manufacturer quite early in a pedal’s development. We have even started the odd project through the submission of rough sketches on the back of lunch paper bags (yes, lunch bags are still around).
Anything you can imagine is possible, although difficulties inevitably arise at different points. SCADA engineers have extensive experience with the sorts of design and material issues which crop up, though, so the bar to realizing a design vision is never too high.
Once a design is finalized at the conceptual stage, we move on to product prototyping by means of our 3D printer, the key item of equipment in the field known as additive manufacturing.
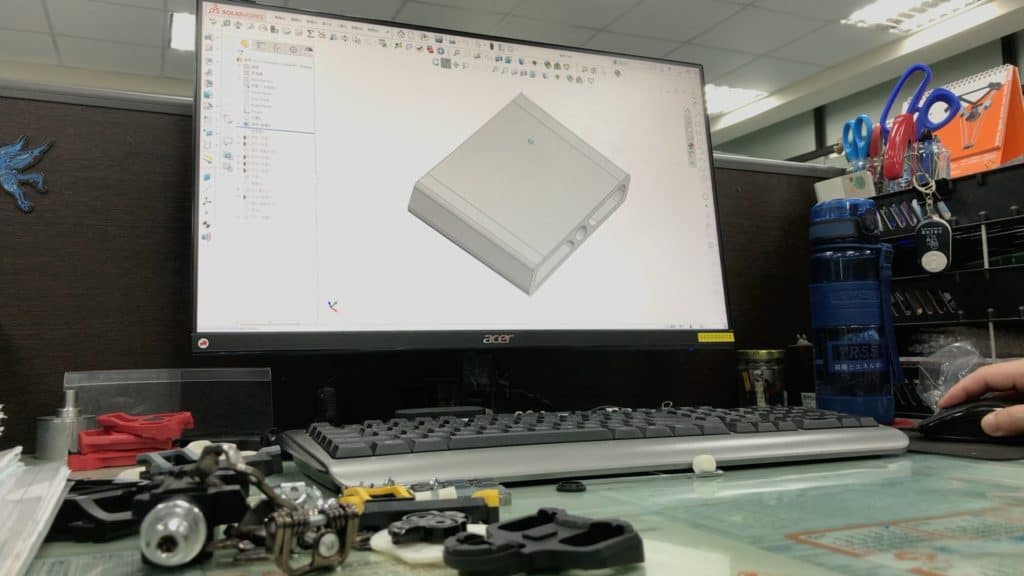
A 3D CAD blueprint design can be viewed and zoomed in from any angle, but there’s nothing like being able to hold the solid object in hand.
A 3D printer version of a pedal design is made from polymer, layered up over an hour or so, that looks and feels just like the real thing.
HOW BMX PEDALS ARE MADE: (1) Aluminum & Process
If you’d like to jump directly to the finished designs, you’ll find the section on CNC, Die-Cast, and Thermoplastic pedal examples here.
After 3D printing the prototype and making any design adjustments, we produce a working model on which we can conduct tests and perform other design-validation procedures.
Testing is an important part of the production process. At SCADA we do our product testing in our own laboratory to the requested standard. (Jump to the section on pedal testing.)
There are three methods for manufacturing BMX pedals (most pedals for that matter):
- Cutting an Aluminum Alloy Blank with a CNC (Computer Numerical Controlled) machine.
- Casting by Pouring Molten Metal into a Die or Mold
- Thermoplastic Molding
CNC Processing of Aluminum Blanks
We’ll concentrate on Aluminum here since alloy is the main focus of our operation: we outsource the raw construction of die-cast and thermoplastic pedals.
The bicycle supply chain works in Taiwan consists of thousands of small or medium sized workshops specializing in one or two products, or specific manufacturing techniques utilizing a limited but high-tech extremely specialized equipment, supply bigger companies (such as SCADA) and are, in turn, supplied by other (often even smaller) companies.
The reason why Taiwan is often referred to as the “Bicycle Kingdom” is due to this supply-chain completeness. From sourcing products to finding a manufacturer of any bike component, you’ll find all you need in close proximity, whomsoever you partner with.
Grades of Aluminum
Aluminum alloy consists of many grades. Each grade is separated by differing proportions of constituent elements.
Manufacturers select an appropriate grade based on criteria such as strength and weldability. Different industries focus on a range of aluminum grades specific to their industry.
In bicycle component manufacturing, (AL)6061 and (AL)7005 grades are most common, with 6061 utilized the most. Each aluminum alloy consists of 90%+ aluminum blended with other trace elements. What those trace elements are and how much of each is added to the “mix” marks the differences between them.
6061 has more magnesium and silicone; 7005 has more zinc. 6061 is a little softer and easier to weld resulting in lower production costs. 6061 is the go-to material for most bike components. 7005’s greater stress resistance and durability make it better for high-end alloy frames.
CNC Processing
A skilled operator loads a program based on a CAD diagram into the computer, making sure the correct toolbit is in place; toolbits rotate at high speed, cutting the design as per the drawing.
A program determines cutter movement on the X, and Y axes (2D plane), and combined with the Z or vertical axis.
Fluid flows across the cutting surfaces and is recycled continuously through filters, keeping the toolbit/piece contact area cool whilst also removing aluminum debris, which is ultimately recycled.
An operator’s job is to place aluminum proto-pedals on the blocks which hold them to the platform during CNC processing.
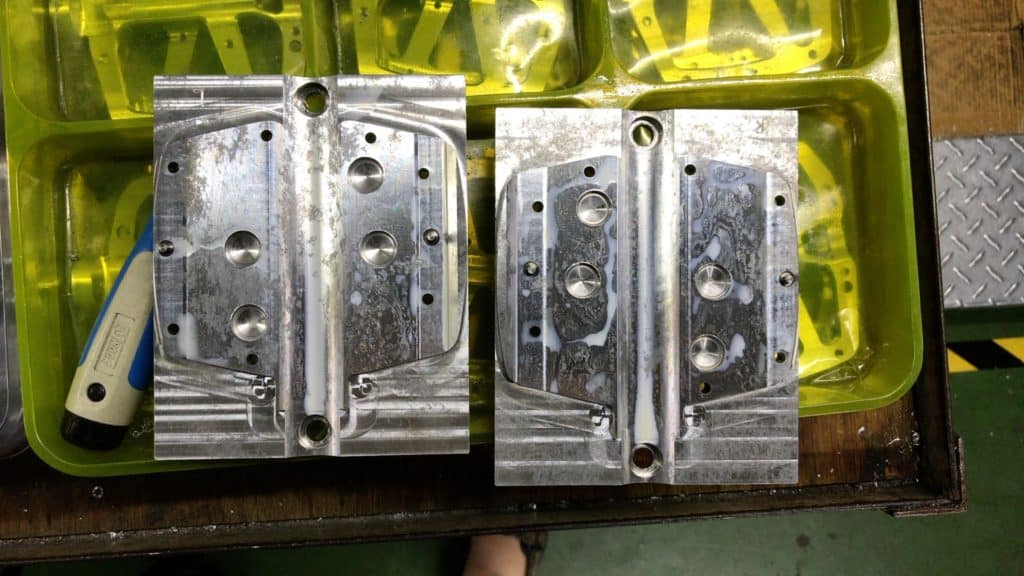
Proto-pedals on the blocks ready to be mounted on the platform inside the machine.
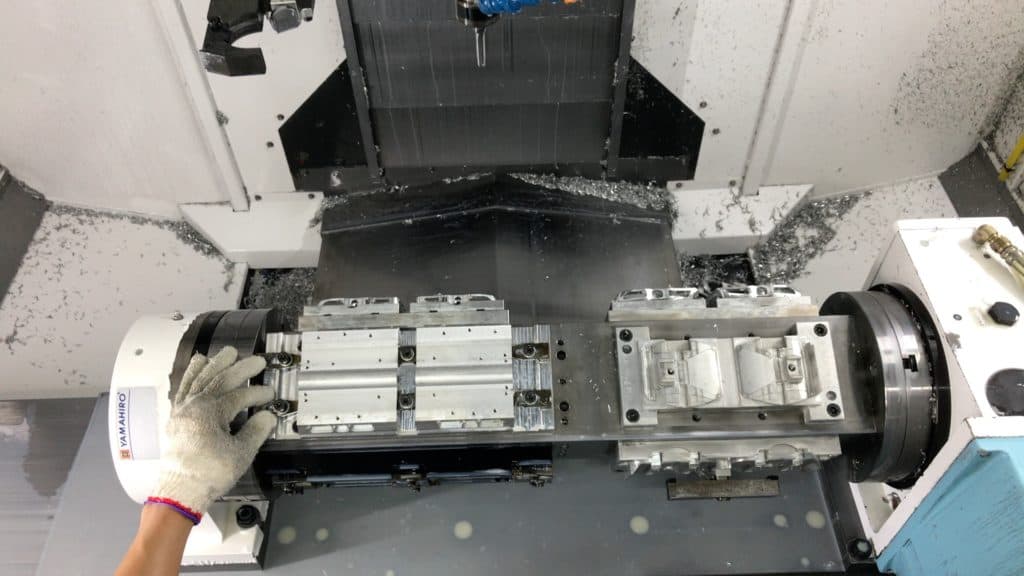
The platform holds several pairs which are processed in turn during one 5-10 minute processing session. Once the pedals on top have been done, the platform rotates to the next set.
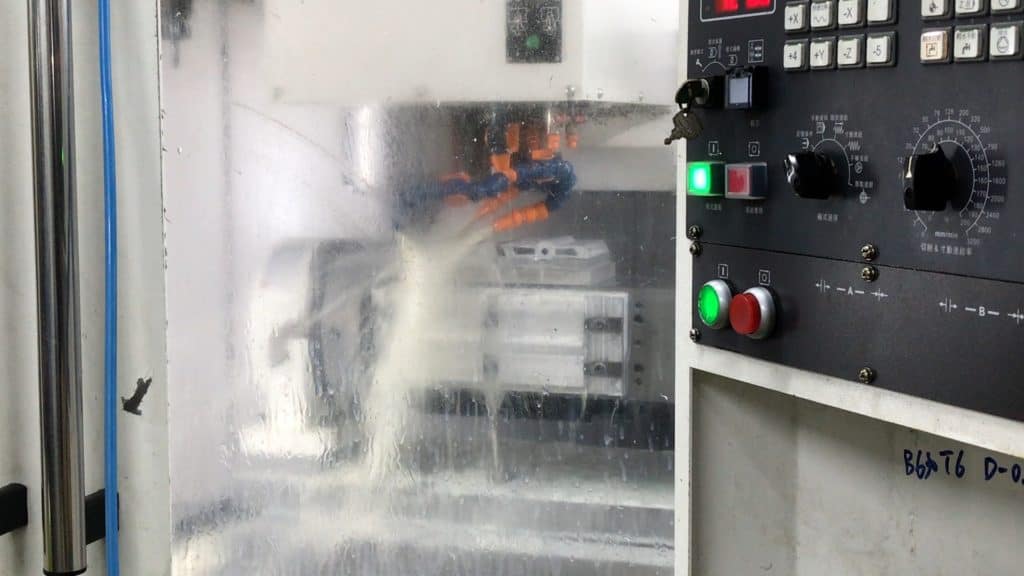
Due to the pressured jets of cooling fluid, the cabinet door is closed making it hard to see the procedure.
Both platform and cutter head move. The platform moves laterally, the cutter heads move every which way (combining X, Y, and Z axes), inscribing the shape according to the program.
Die-Cast Pedals
Die-cast pedals are formed by injecting molten alloy into casts.
Manufacturing pedals in this way works well when a lot of surface detail is required and/or for producing a large batch.
A key cost in manufacturing many bike components (especially bike frames) is the cost of the mold or jig, which needs to be recovered many times over to make it financially viable.
CNC is great for small, custom orders. CNC can also produce super-fine tolerances where required. Machining any level of detail into a design is possible; but die-casting may be a better way to go depending on the batch size. For a great discussion of these issues, check out Sheldon Brown’s site.
‘Engineering’ Thermoplastic
Engineering thermoplastic refers to a group of plastics that are stronger and more durable than common plastics. They have greater resistance to heat, impact and chemicals.
The base polymer of this material includes various chemical “reinforcements”. Thermoplastics also include glass fibers adding extra stiffness.
HOW BMX PEDALS ARE MADE: (2) Assembly & Testing
Once the pedal body is CNC’d or cast, the next step is assembling the axle and sealed bearing(s) into it.
BMX Pedal Assembly
We follow a strict procedure that ensures each part is installed correctly. (The following shots are from pedal productions other than BMX—the assembly steps are the same though).
The main job is securing the axle into the pedal body.
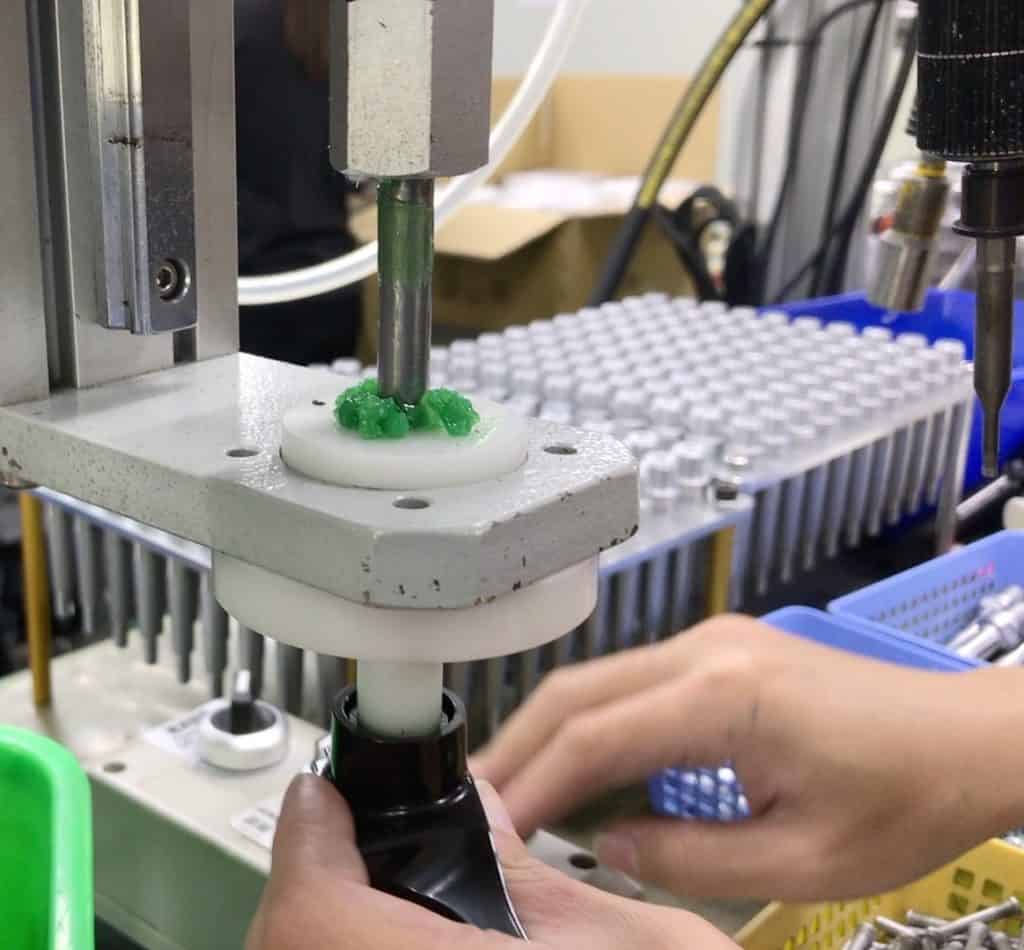
Before inserting the axle, the grease injector feeds grease into the pedal body cavity.
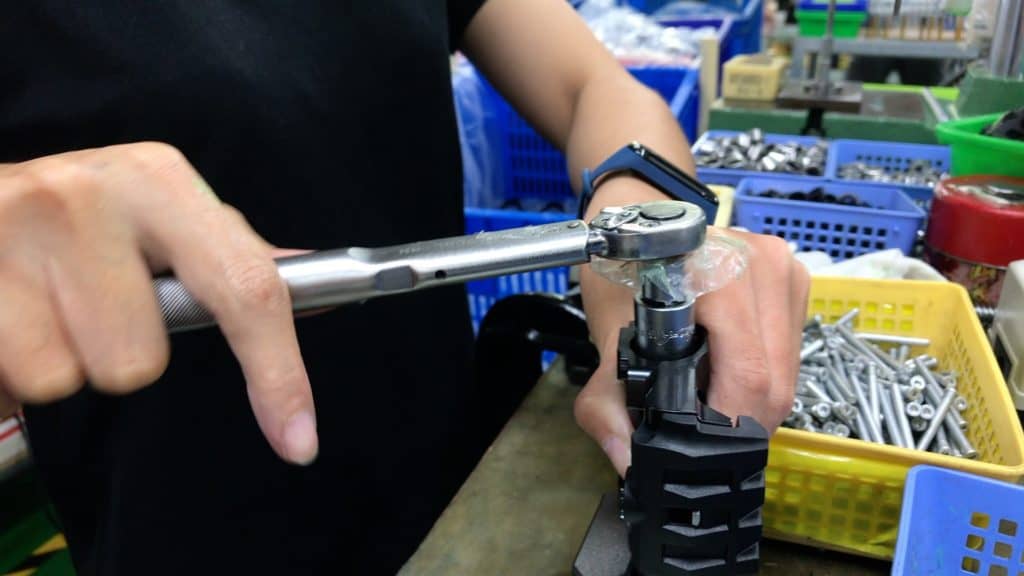
We slip the axle down into the pedal body, then tighten the nut to specification with the torque wrench. The dust cup nut (for those models which have one) is the final addition.
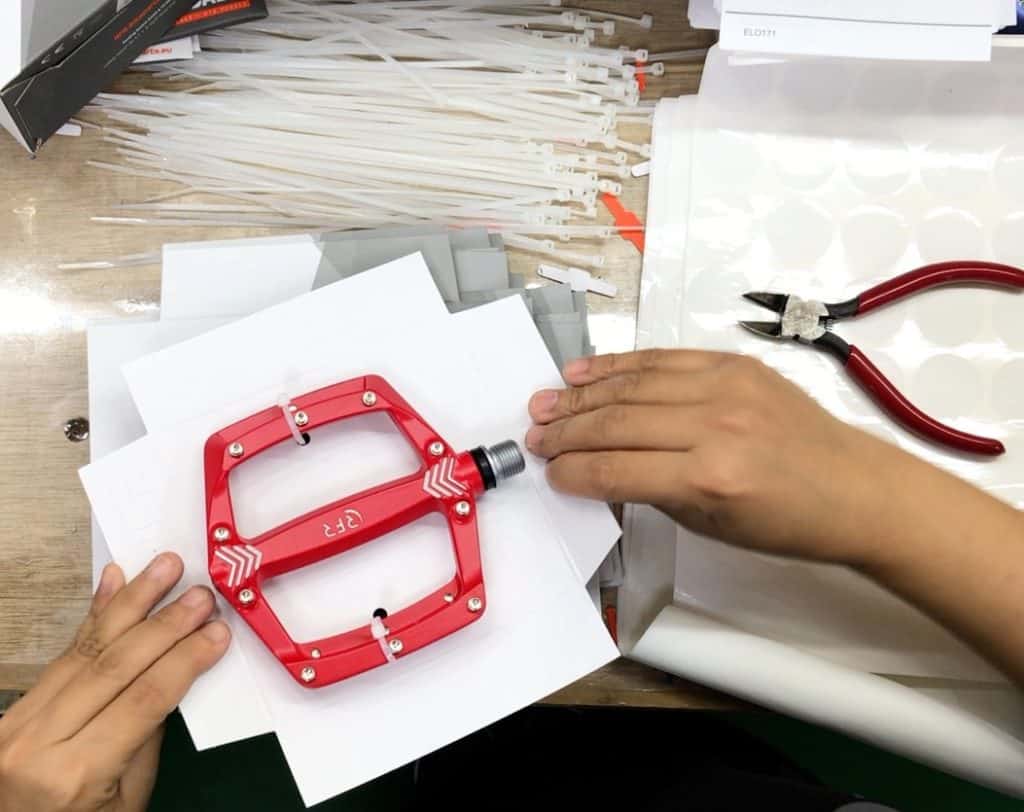
Then it’s a matter of securing each pair of finished pedals in their protective packaging. That’s the form you’ll receive them in at your favorite bike shop.
Pedal Testing
We randomly select pedals for eccentric testing from each production, regardless of whether the design is brand new or a repeat production of an older model.
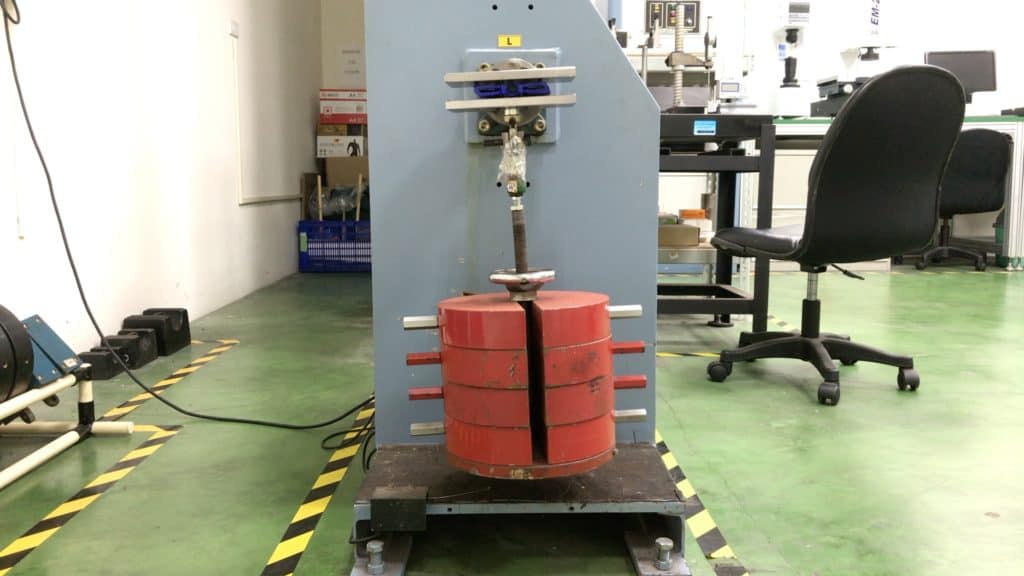
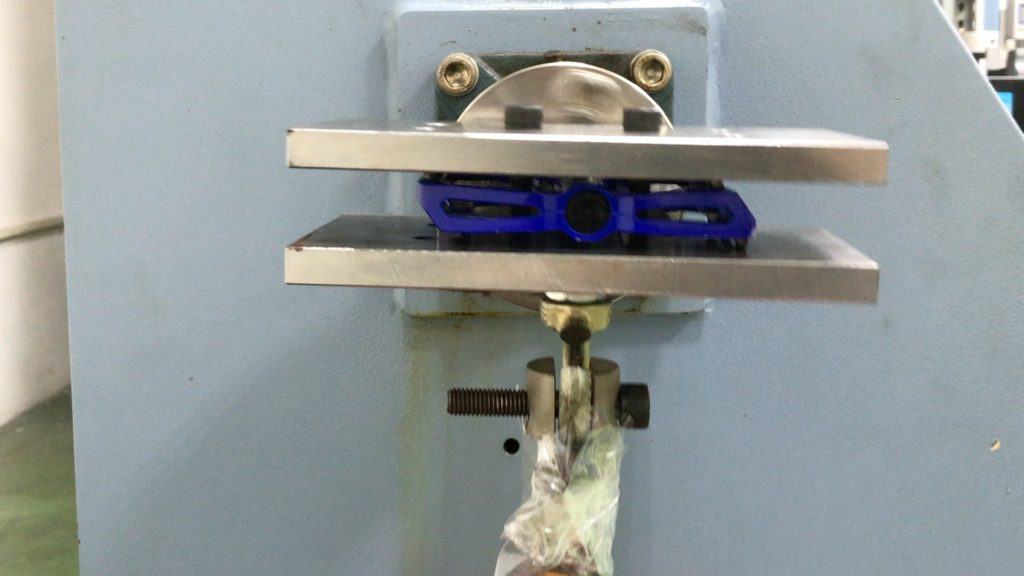
We call this method eccentric since, as you’ll see in the video, pedals do not rotate in a circular motion, but an oblong or off-center motion.
Eccentric motion places maximum stress on the axle and bearing as it takes the full weight of a heavy load. The standard prescribes testing 100,000 times or cycles, but we test to 1,000,000.
Chromoly axles are easily up to the task; but what about the bearings? Well, the bearings take the load and the wear without a problem: they have been designed to take extreme punishment over a long period of time.
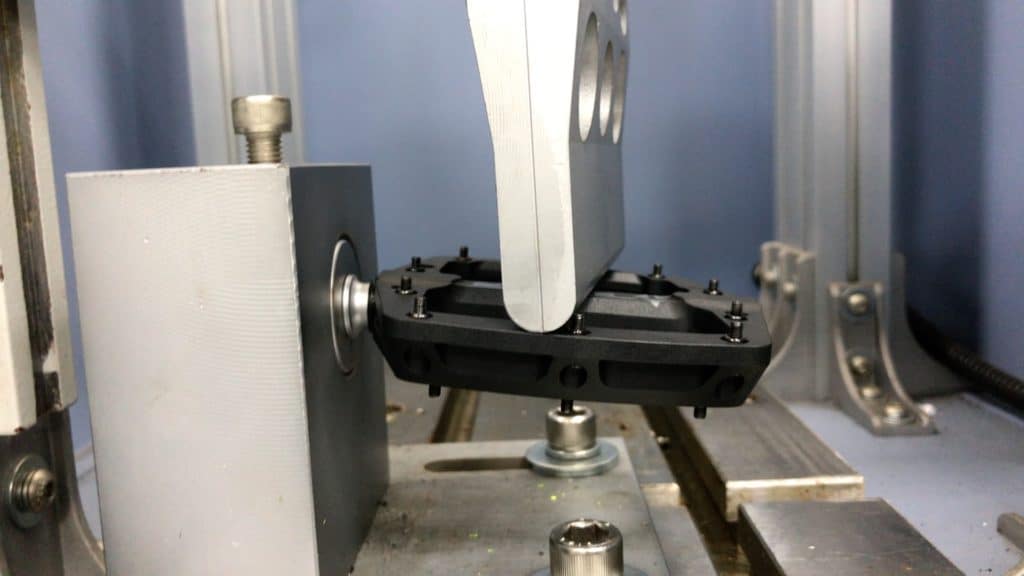
We impact test chromoly axle and pedal body with a 15kg load dropped from a height of 400mm, way more force than a rider consistently exerts on a pedal.
The axle bends under the stress, but does not break. Only years of non-stop riding by someone with very powerful legs could reproduce this effect.
And if you slam your pedals on curbing or pavement multiple times in its lifetime, there’s only a small chance of them bending off-center.
INSTALLING BMX PEDALS ON A BIKE
Removing your older pedals and installing the new is straightforward, but can present certain challenges.
Removing the Old Pair
Your pedals will likely put up good resistance when you attempt to remove them.
Note that if you can break a pedal free of the crank threads merely with light wrench pressure, then the pedal’s not on tight enough.
You can remove both pedals from the drive side of a BMX bike. No need to move around to the non-drive side to remove the left pedal as we turn the space under the down tube into a working space
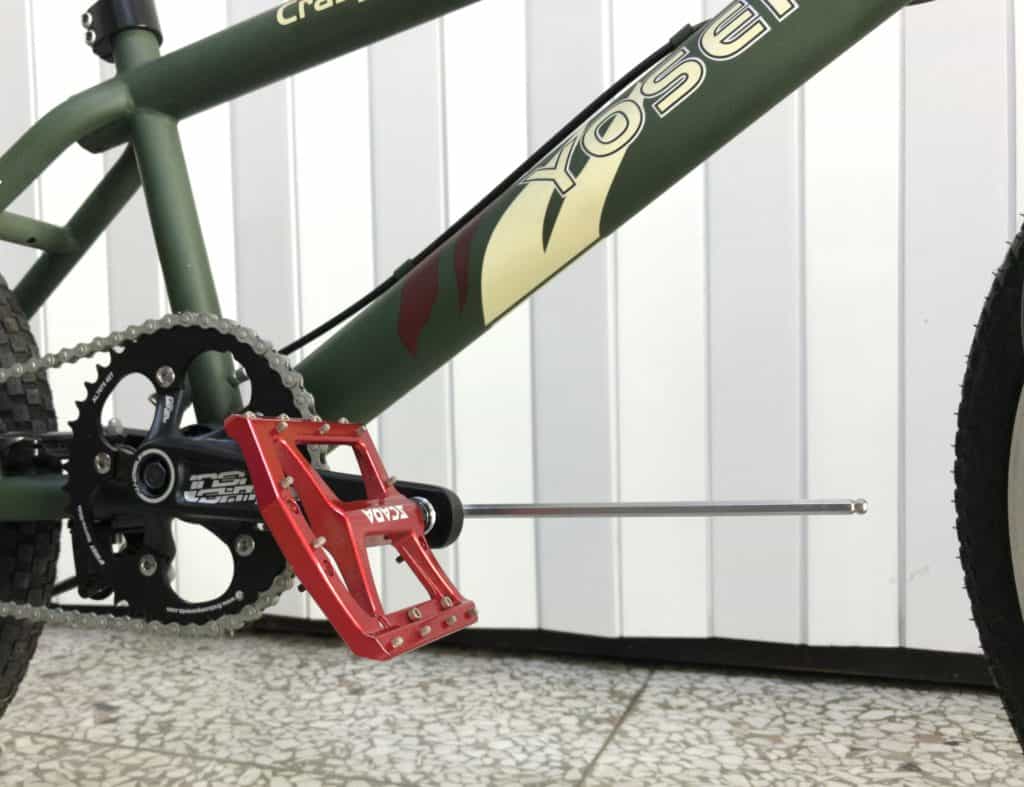
Rotate the crank so the drive side points directly forward.
Slip your Allen wrench into the axle from the rear extending directly forward.
Steady the crank by placing your left hand flat on the pedal (best to use a pair of work gloves, of course, to protect your hands from the pins).
With your right palm, swiftly impact the the Allen wrench from below. You may need to repeat two or three times before the pedal ‘gives’ in the thread.
Or you can turn the front wheel sideways for more space, then slip an extension tube (old seatposts are good for this)
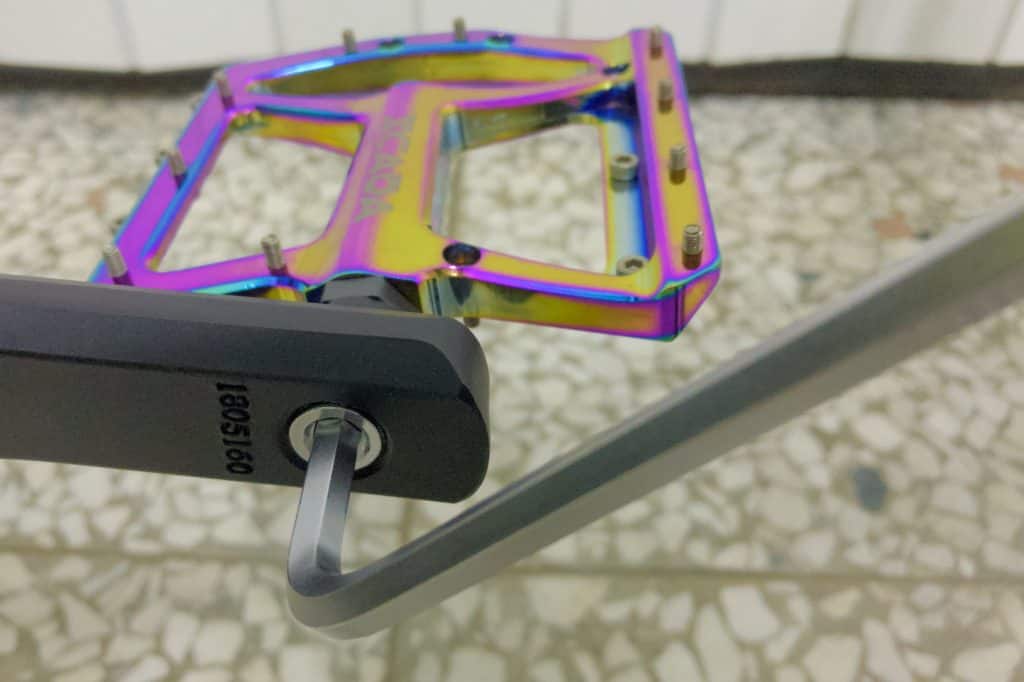
With the drive side done, repeat for the other side.
Extend the crank forwards; engage the Allen wrench; slam it up to release the pedal.
Installing the New Pair
By adding several drops of light oil (sewing machine oil) or a smear of grease to the pedal threads you’ll have an easier time achieving torque tolerance when tightening pedals in the crank.
Removing pedals later also becomes easier, especially where you are dealing with a pedal tightened to the correct torque or—especially—overtightened.
Installing washers also makes installation and removal much easier. The washer buffers the pressure between pedal and crank—you’ll feel the sponginess as you turn the wrench.
You’ll also avoid pedal creaking or clicking, which is often incorrectly attributed to a faulty bottom bracket.
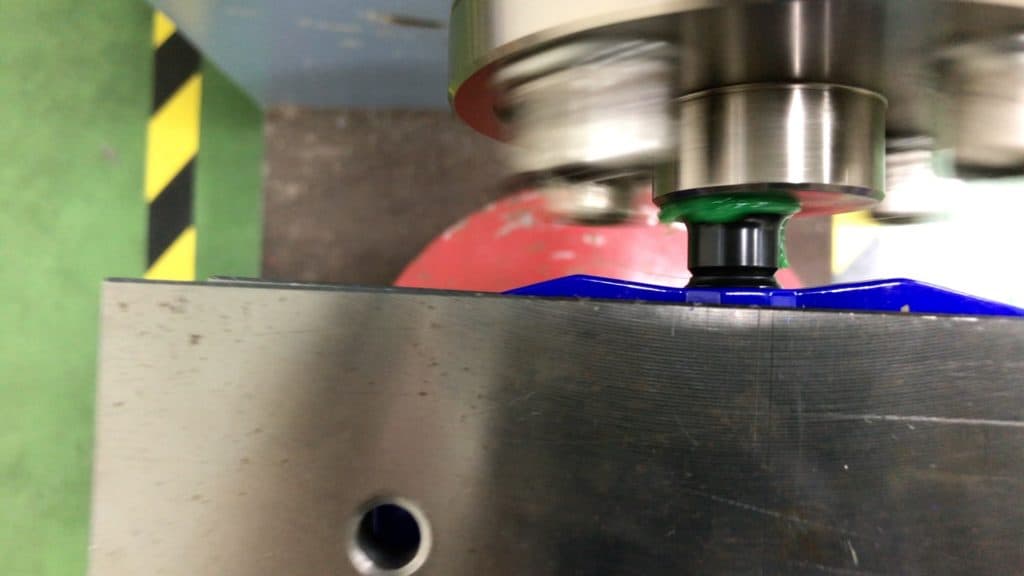
Quality crank manufacturers cut a circular groove around the pedal thread ready to receive a washer.
The trick is to ensure the washer is correctly seated. A washer hangs on the thread, pulled down by gravity. In this image the washer projects over the edge of the lower indent leaving the top of the groove empty; less than ideal.

Hold the washer in its bed as you hand-tighten the pedal in the crank. Once seated correctly, tighten with the wrench. You’ll see the washer is now perfectly seated in the crank groove.
BMX PEDALS – Model Overview
We’ll cover a few of our designs in each material category—CNC, to to give you an idea of current design trends.
Keep in mind, though, that these are representative only; we are working on a whole lot more that can’t yet appear here.
CNC Models
Here’s a showcase of some our notable AL6061, CNC-machined models.
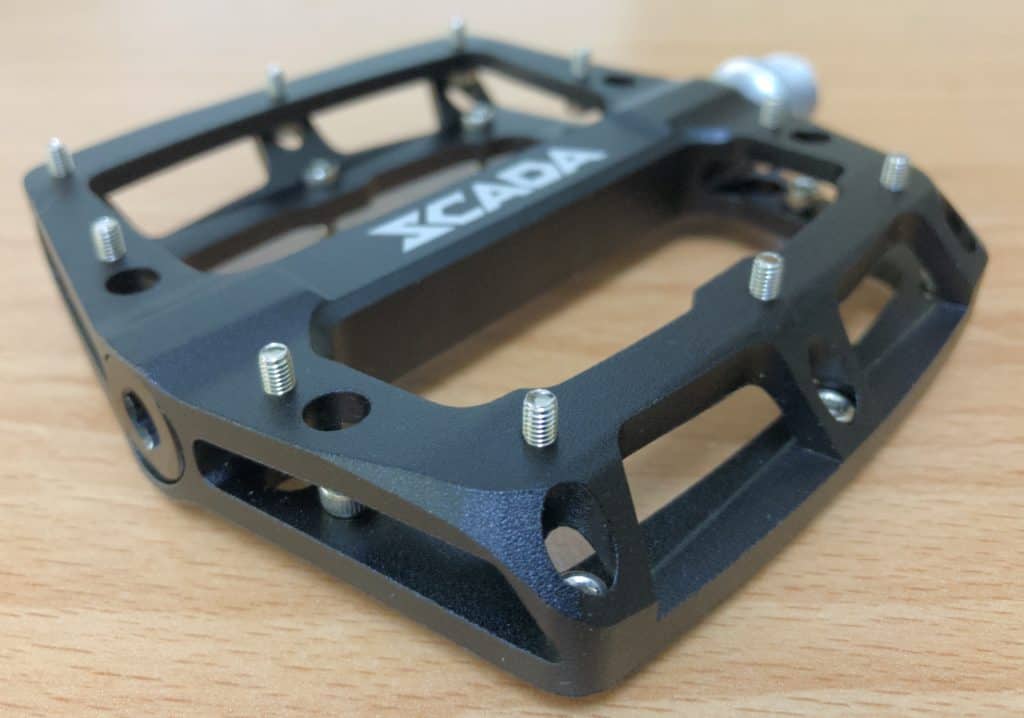
Light and Robust
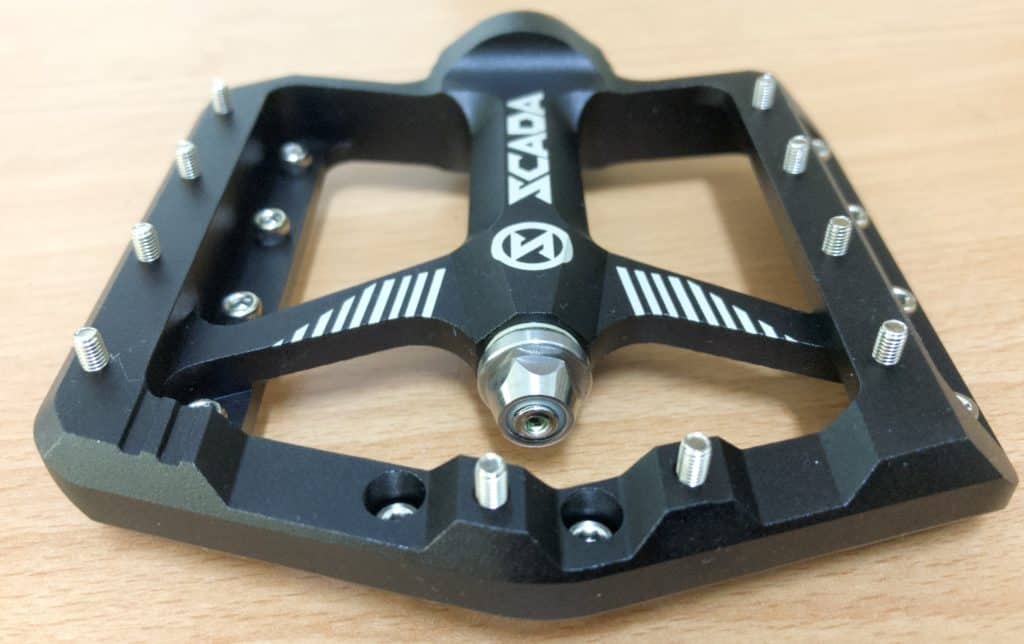
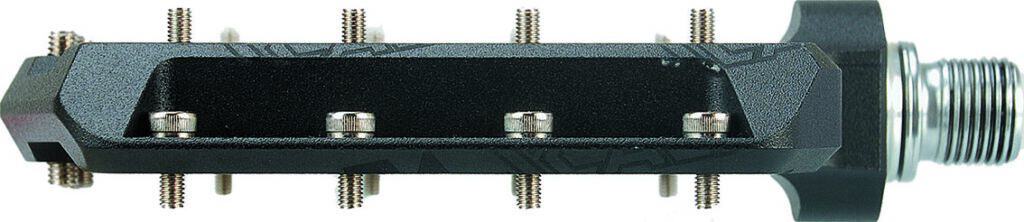
The B680 is in the top echelon of the group.
The low profile together with a chunky sealed bearing make for an extremely efficient uber-durable pedal.
A rider can easily remove or replace any of the 10 pins with a 2.5mm Allen wrench (the pins of some other pedal models require a 2mm Allen wrench). Although, when you’re looking for something beyond basic flexibility in changing pins, B641 is hard to beat.
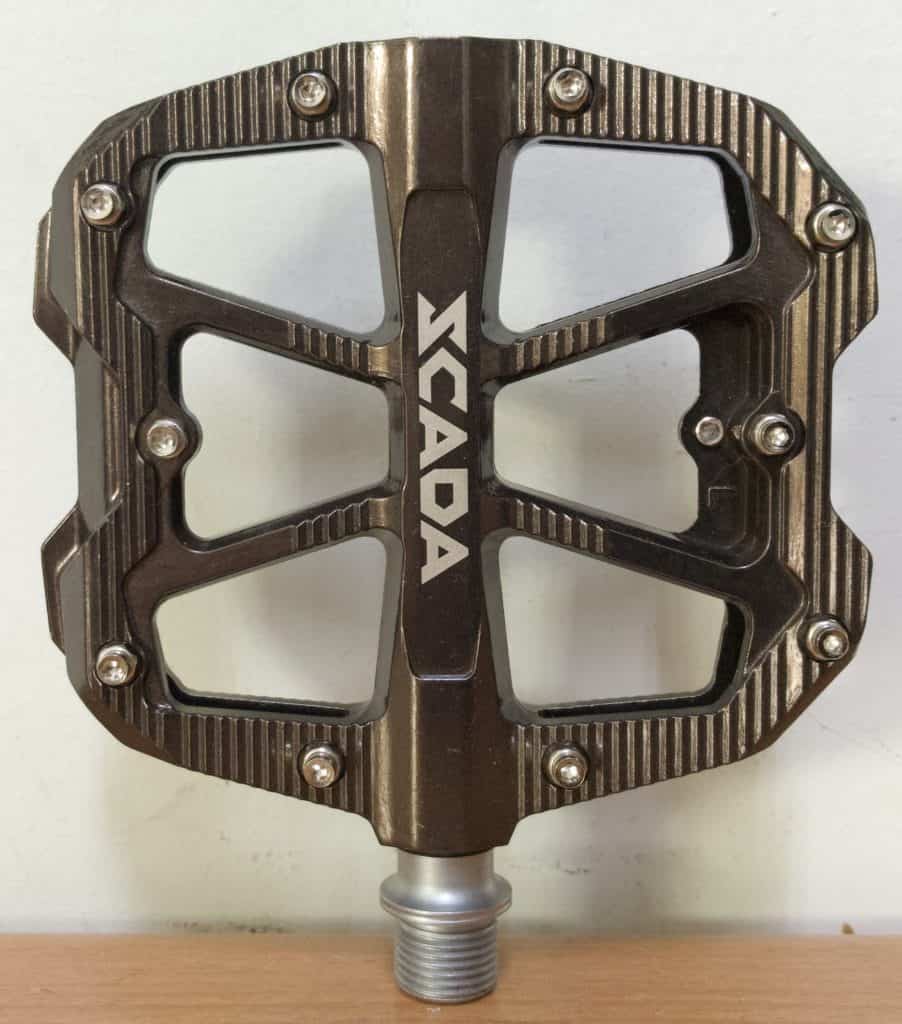
Slide the Pins Where You Want ‘Em
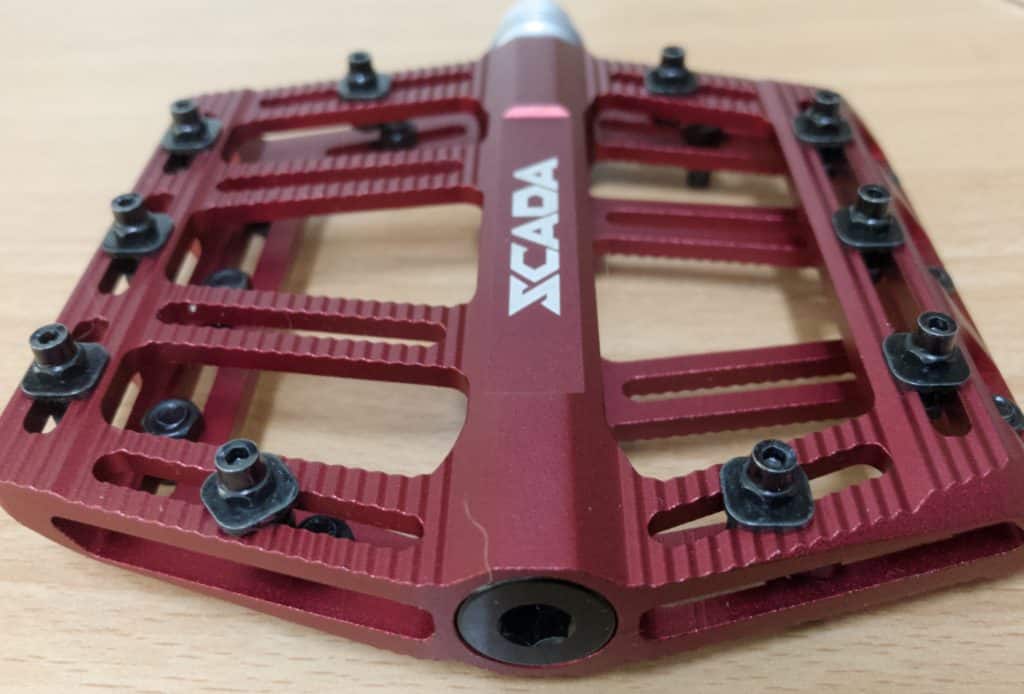
10 pins as with B680. (Just ignore the cat hair down the bottom there…??)
However, B641’s pins are adjustable.
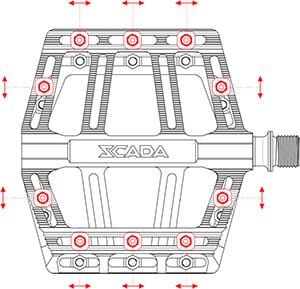
Loosening the Allen bolt from the nut beneath releases the plate from the corrugations which hold the pin in position without having to crank up the torque on the bolt.
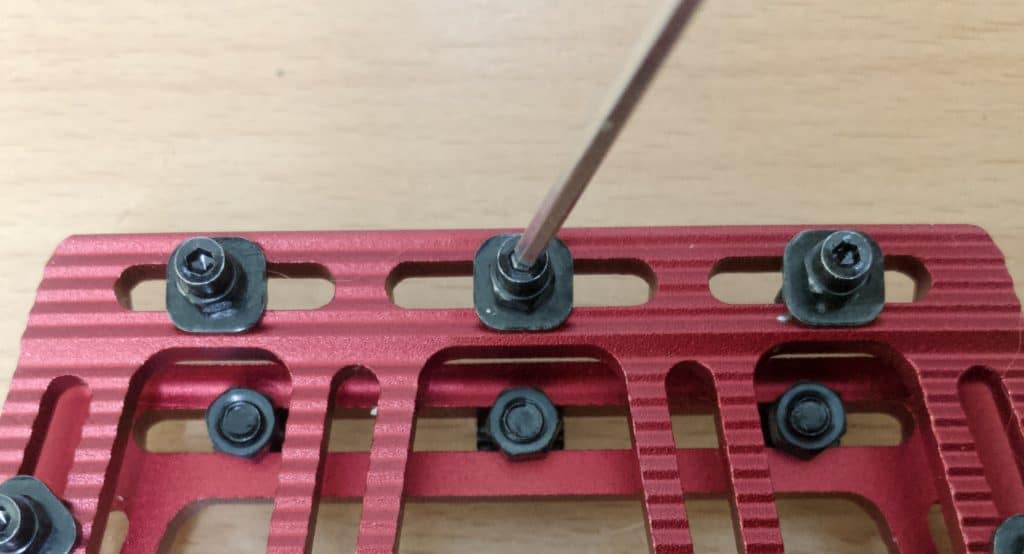
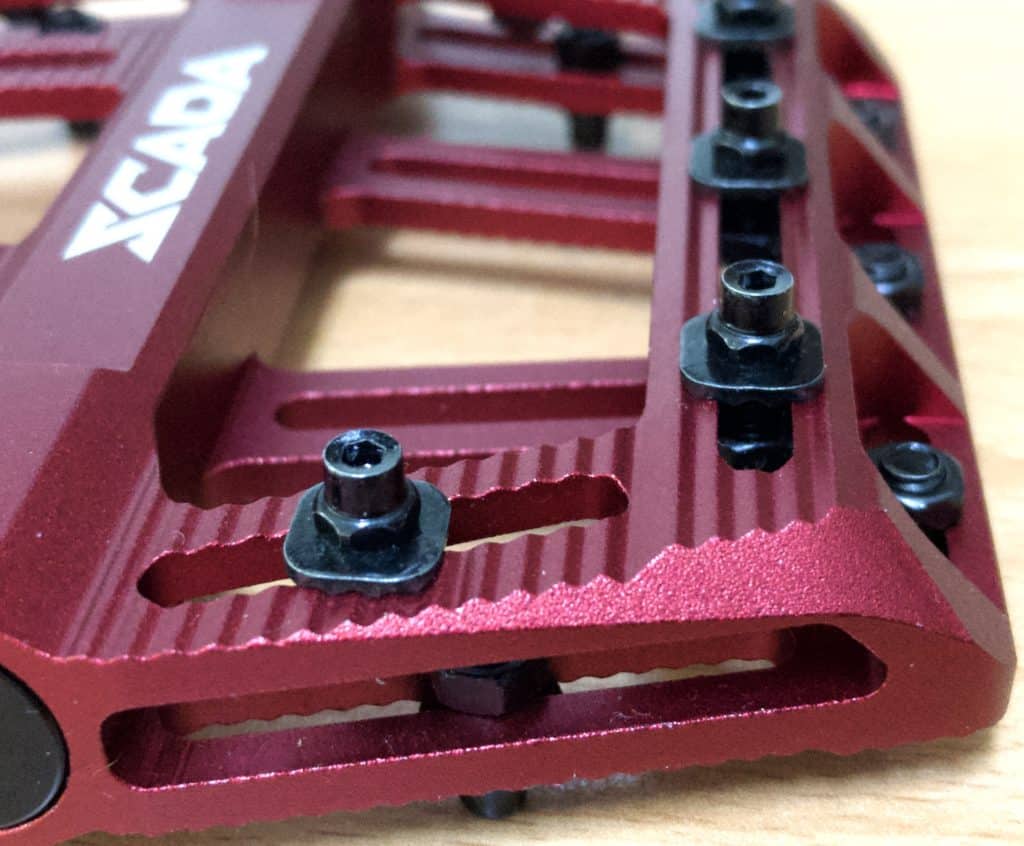
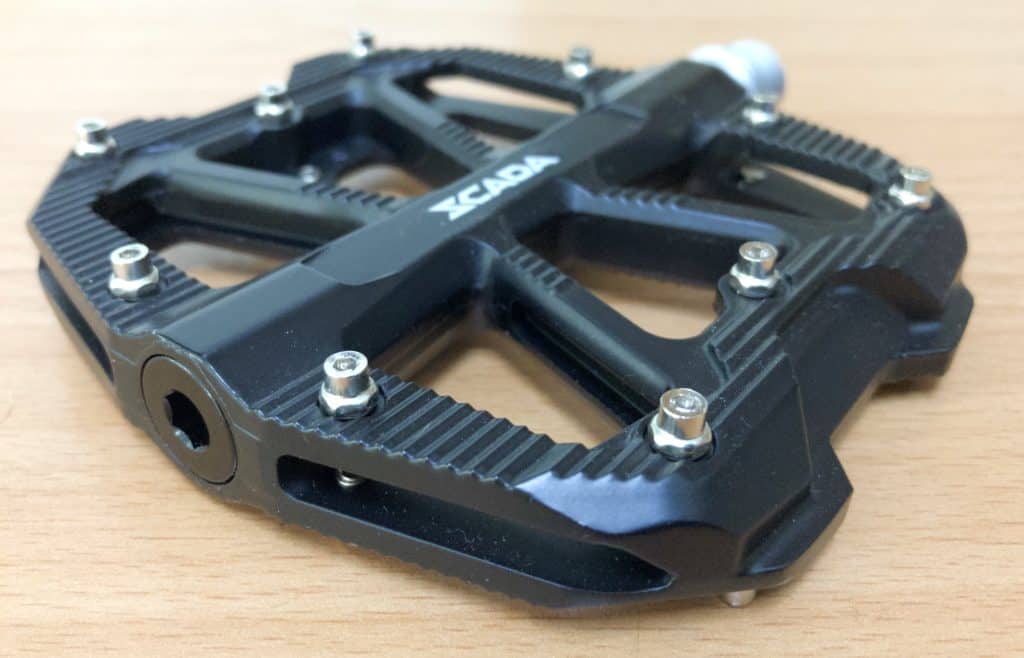
A better view of the nuts holding the flipside bolts.
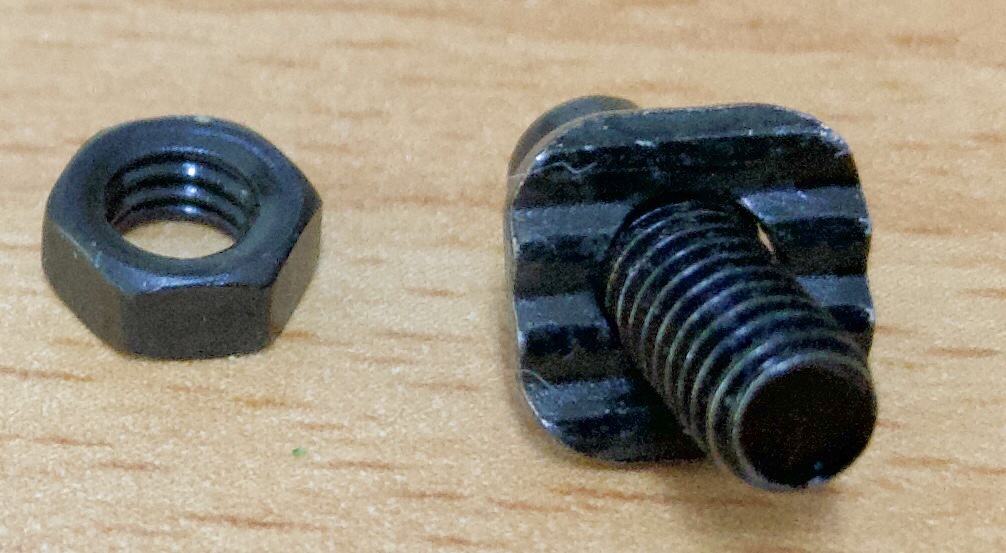
The bolt plate’s underside’s corrugations match the platform’s surface.
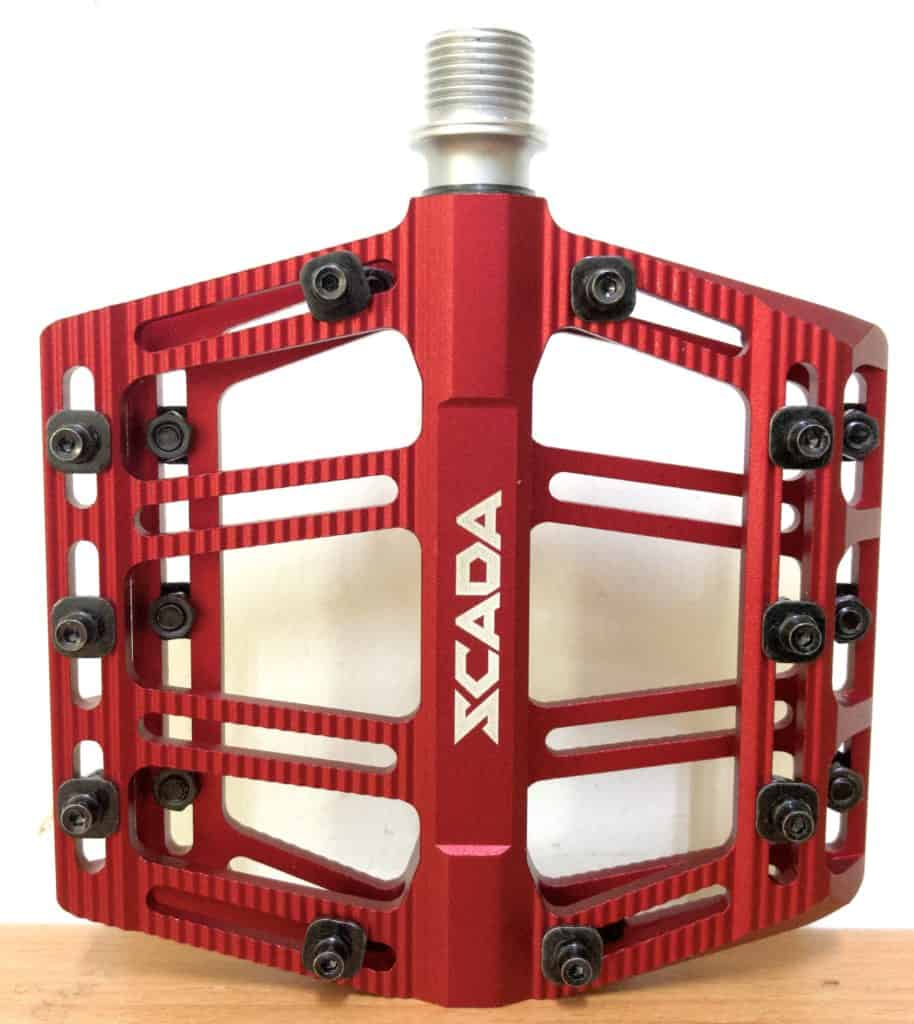
You could opt to centralize your pins.
Or concentrate them to the outside.
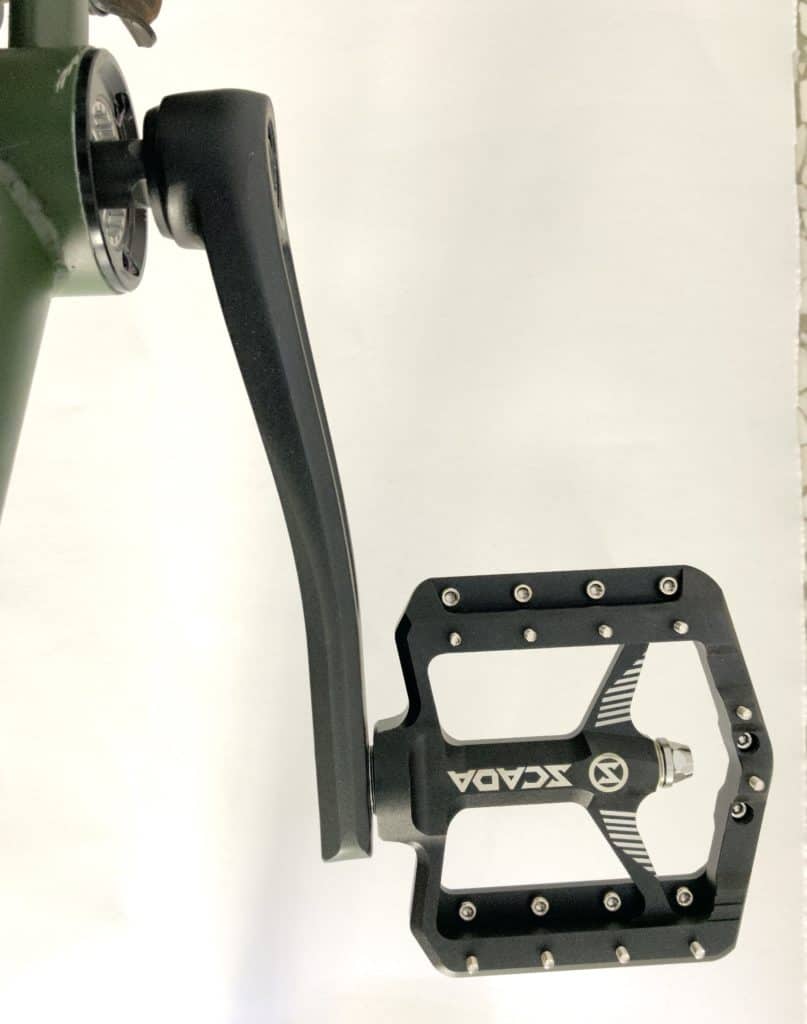
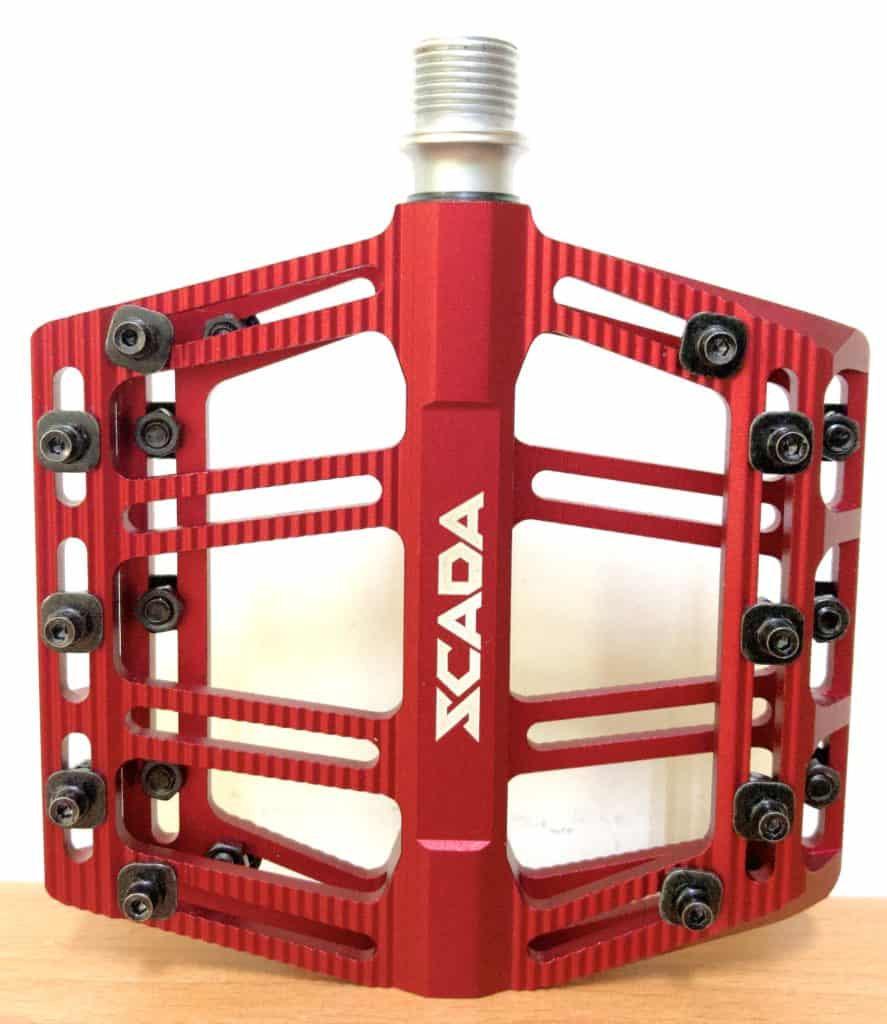
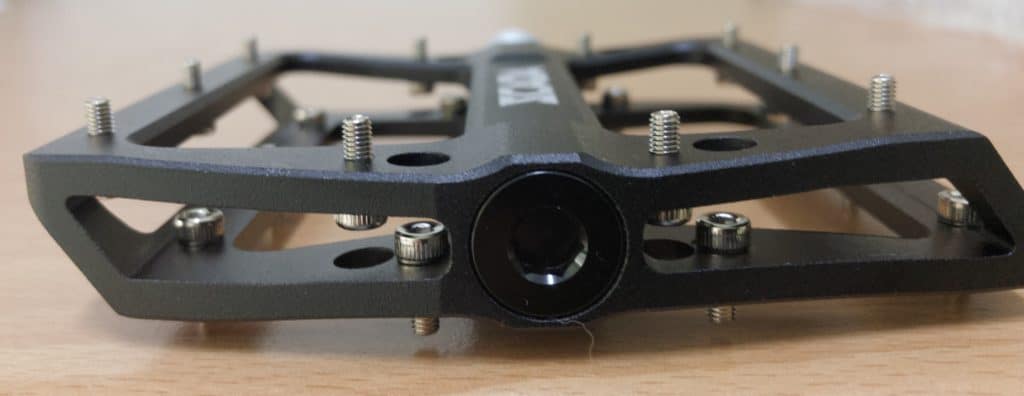
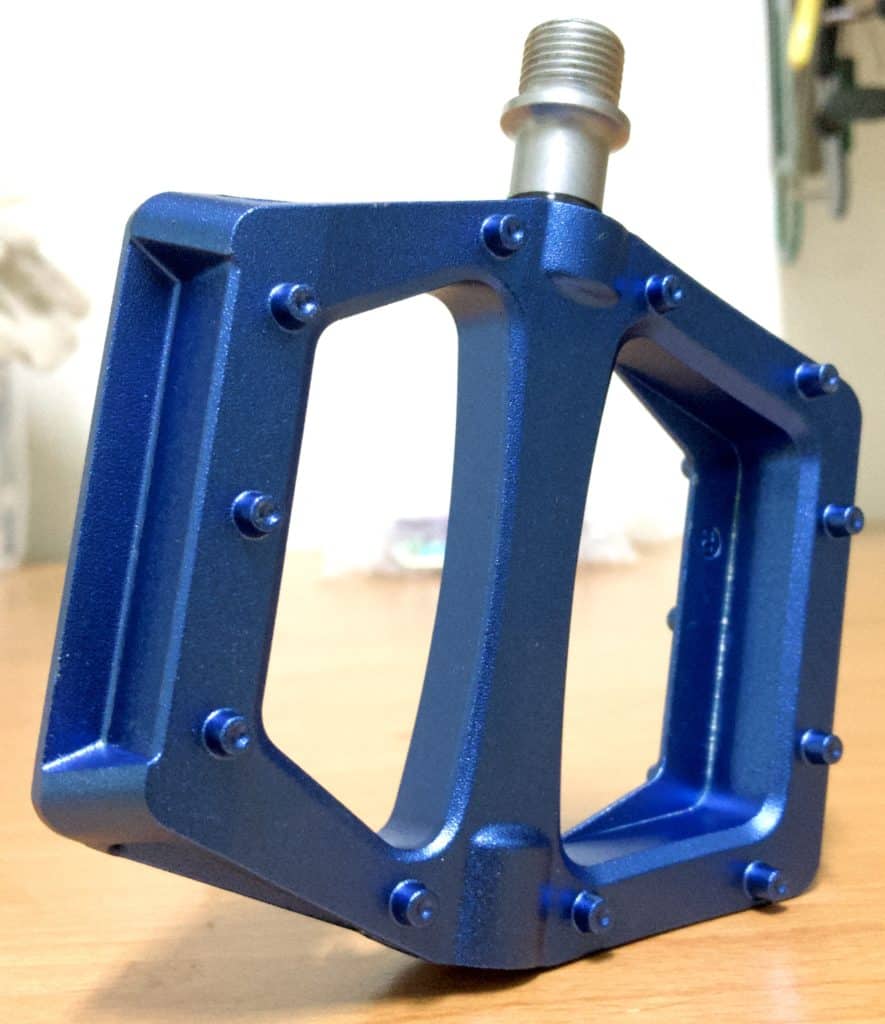
Slender Elegance
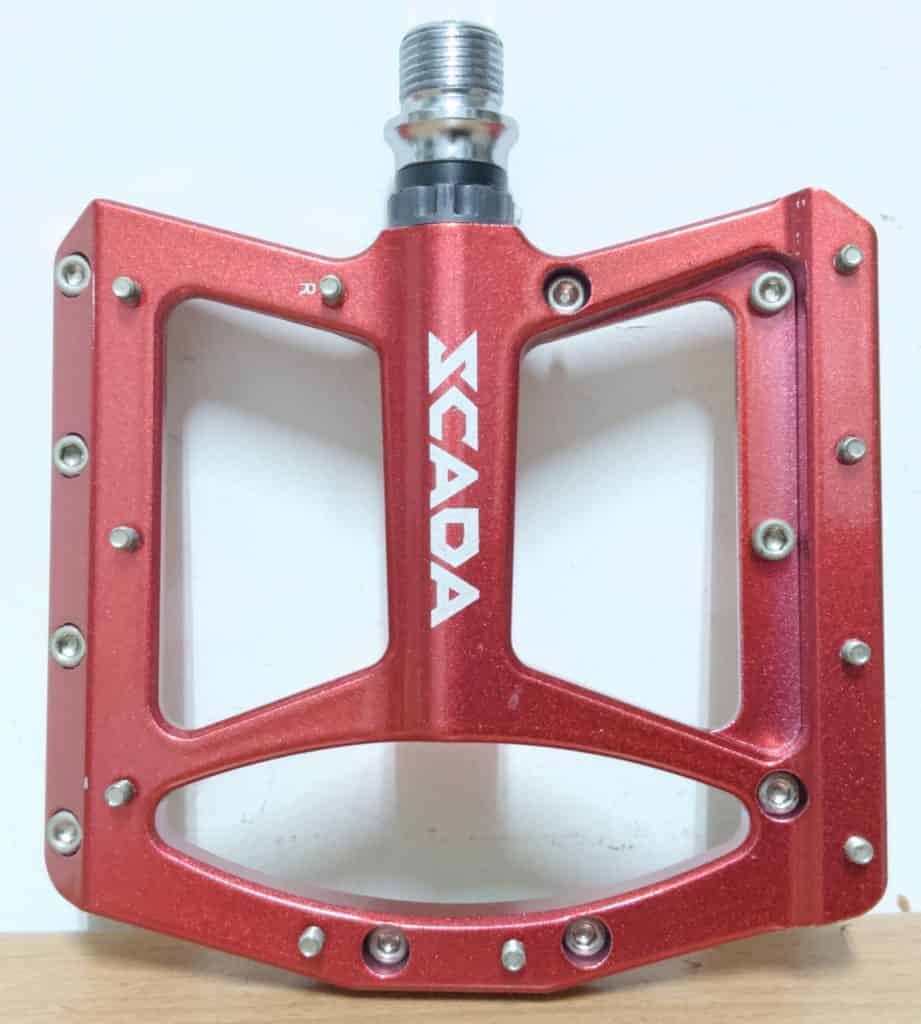
The B649 is another top model.

Use a 2.5mm Allen key for removing or replacing the pins. We’ll use this model to give you a look at how an axle fits into a pedal body. (Yes, it’s the same model, plain red, not oil slick.)
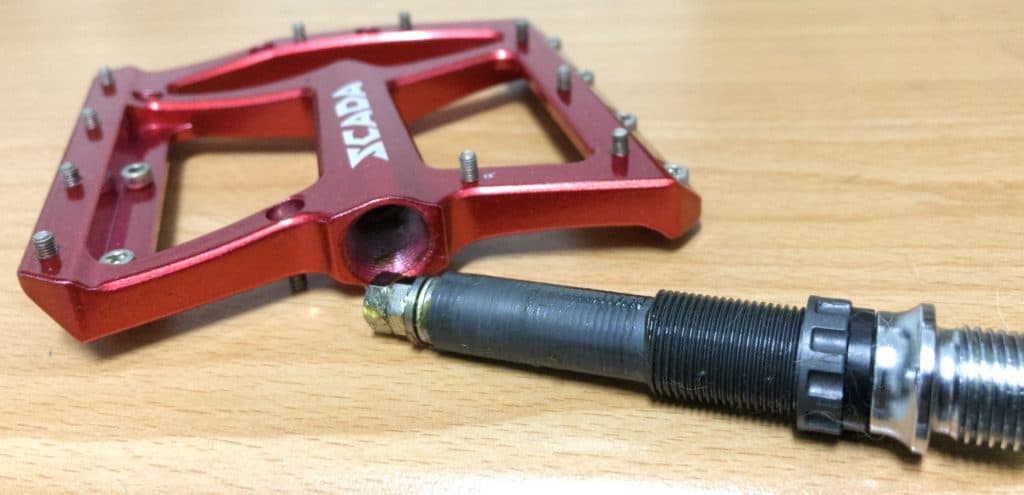
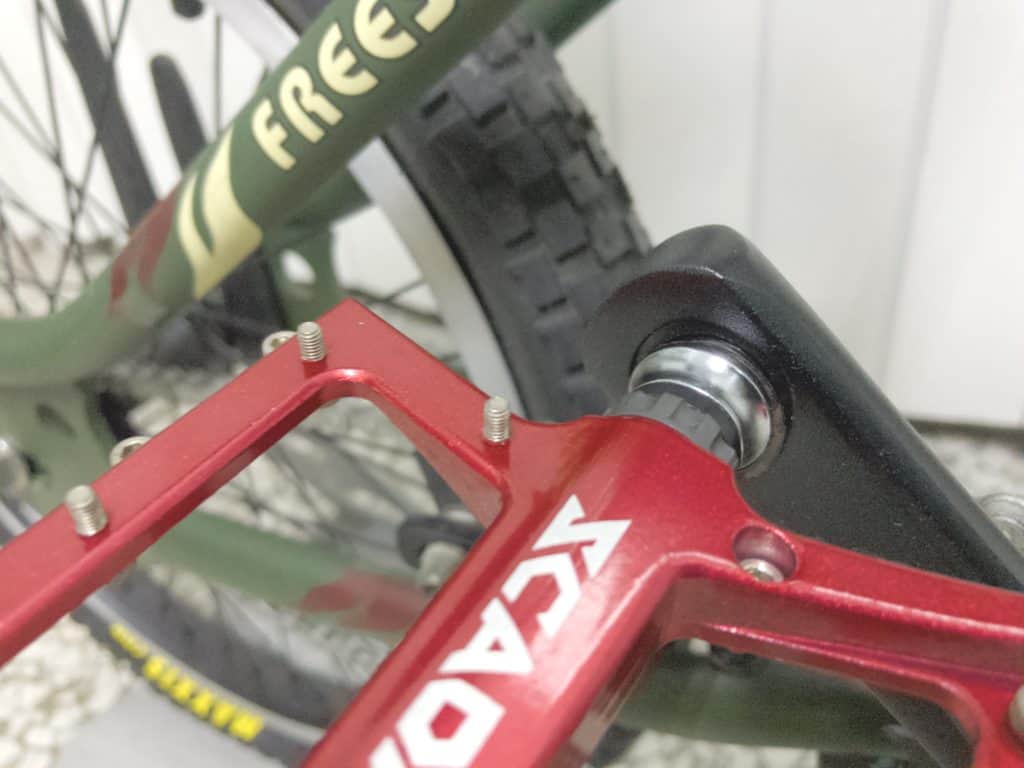
Most pedals have the access nut on the outside (see the B676 below…you remove it, remove the axle nut within, then slide the axle out the opposite end).
The B659’s axle is threaded. We apply a liberal slather of grease, slide it in far enough to engage the threads.
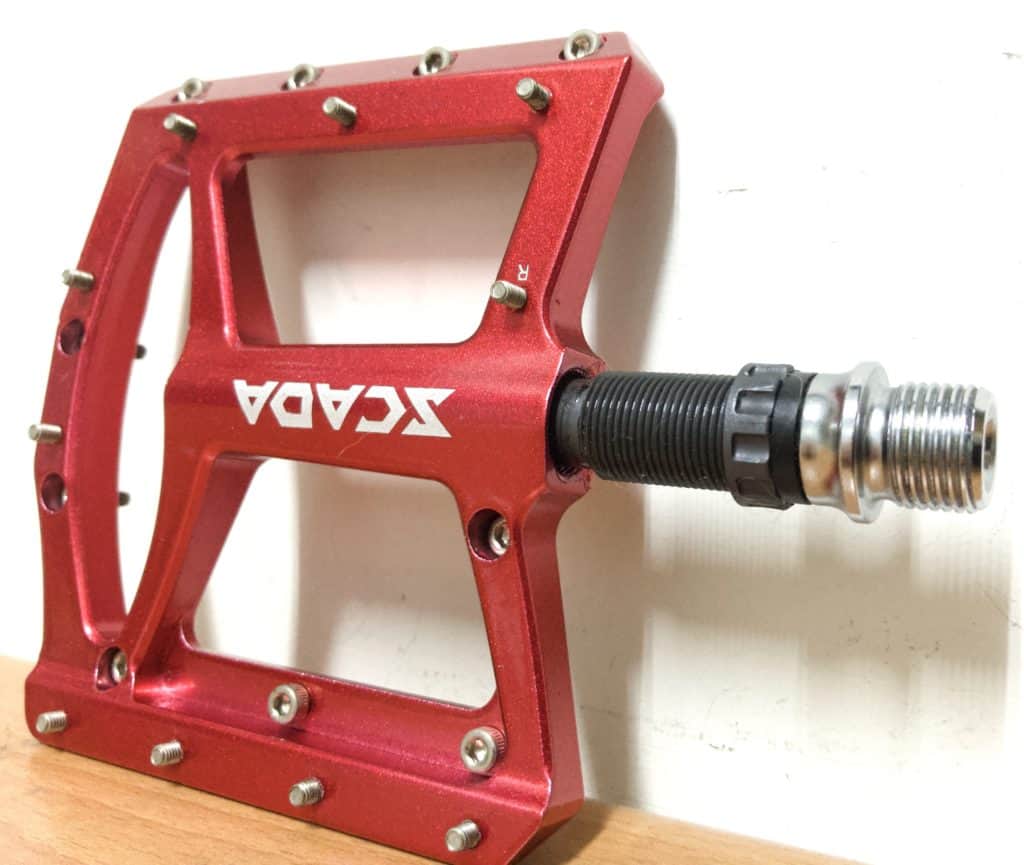
Then flip the pedal clockwise until the body snugs against the flange. Solid as a rock when installed plus it’s easy to remove for a grease when the time comes.
Not quite as minimalist compared with the B659, B676 is a pretty common design you’ll see on plenty of bikes around the place. You’ll see the nut there, giving access to the axle’s bushing end nut. (And another cat hair…).
Die-Cast Models
SCADA primarily carries out CNC manufacturing due to the advantages noted earlier.
Nonetheless, die-cast pedals are an important part of our range.
The easily replaceable pins hold your foot on a broad platform that’s light but infinitely strong, able to take any punishment, colliding with a curb for example. The pins—well, screws—will hold a shoe firmly in place, but can rip into a leg on contact.
B635 little more elegance, especially with the pins: they’ll still hold a shoe rock solid, be less likely to mess up flesh, and are easily replaced (colored pins if you like).
The same design, save that this one’s fashioned from magnesium—B635MG. The alloy model, B635 weighs 250g; this one, 180g. Holding one in each hand, actually feeling the weight difference is impressive.
If you are unlikely to bash curbs, a magnesium model is maybe one to try, aluminum being a little stronger.
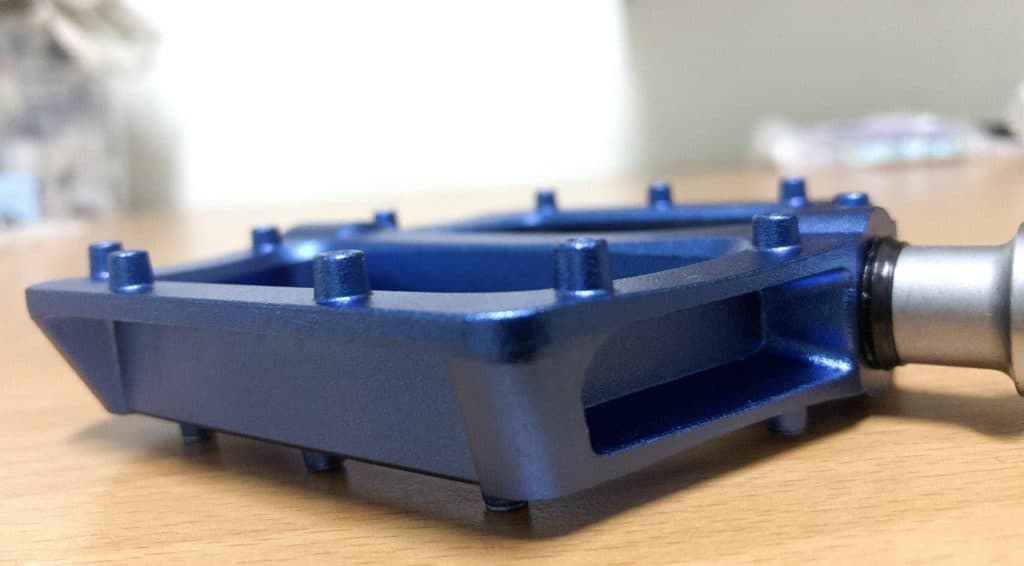
Thermoplastic Models
If your budget doesn’t allow you to snag an alloy model, then hard, tough thermoplastic BMX pedals will do the trick.
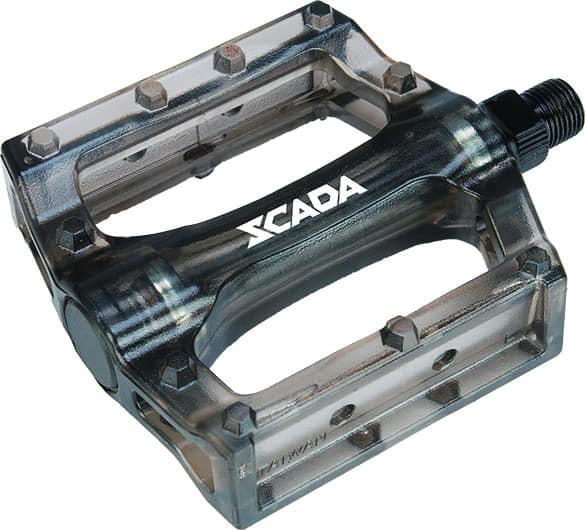
You could go one lower and get a polycarbonate pair, which is maybe an option for a younger rider just starting out.
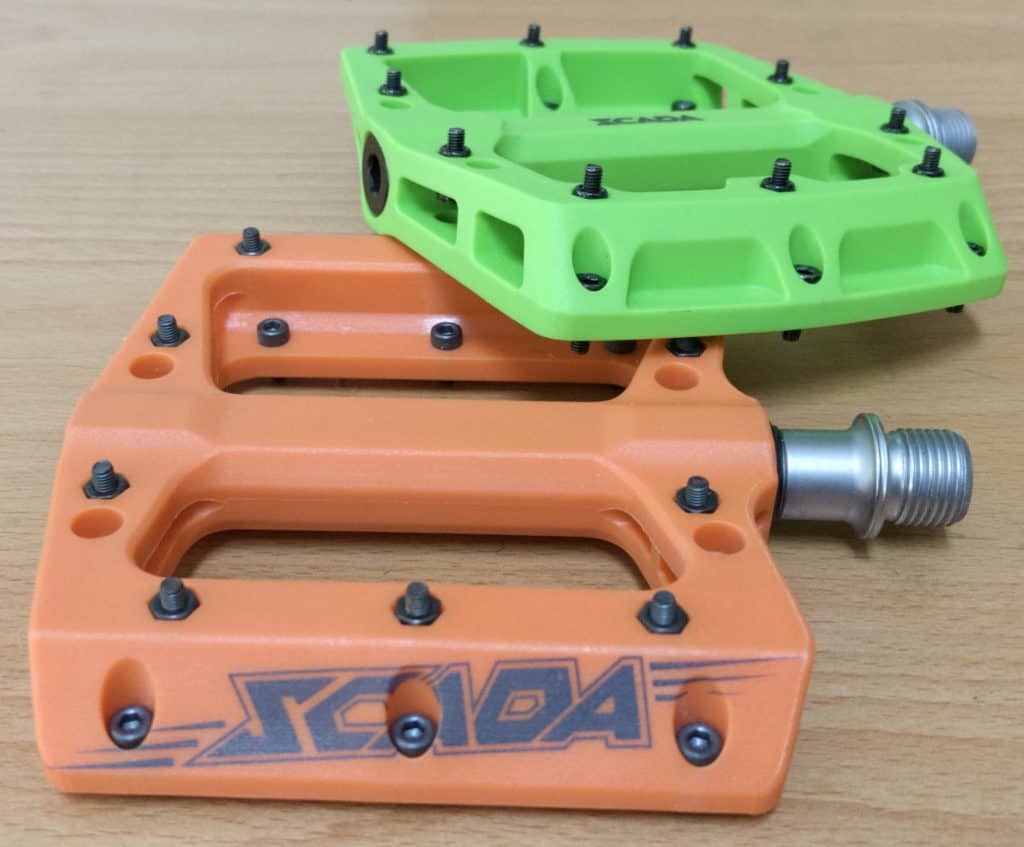
But opting for a thermoplastic design will deliver a more satisfying level of performance. You’ve got great grip pins and the broad platform to minimize the chance of shoe and pedal parting company in rough riding.
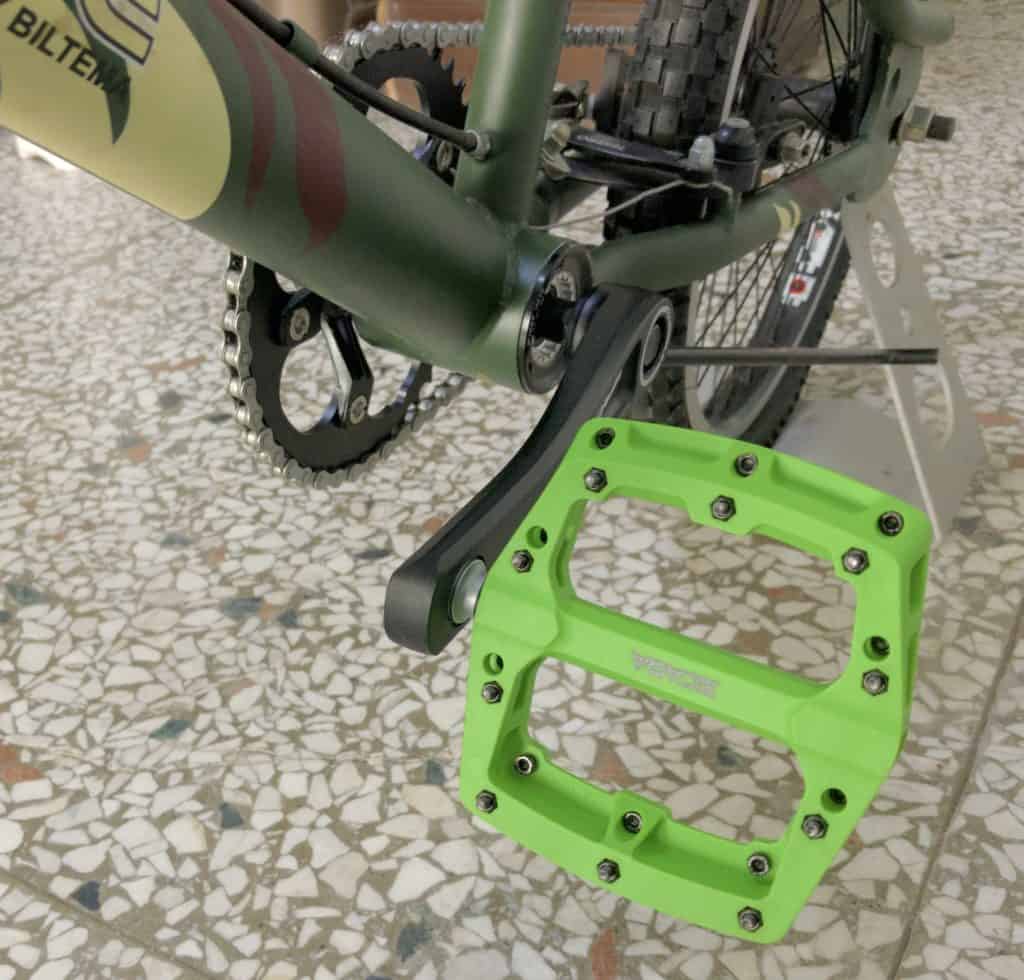
And they look pretty cool too. Again, sure, it’s not alloy, but will stand by you until you’re ready to upgrade.
DEUCALITE — NEW ALLOY IN DIE-CAST BMX PEDAL MANUFACTURING
At SCADA we go by the principle that there is always a better way to achieve something with the only problem being we simply haven’t yet worked out what that is.
We therefore put a lot of R&D effort into finding out what we don’t yet know. In this section we briefly describe the circumstances leading a recent technological “aha” moment in manufacturing BMX pedals.
The technical term for the (Aluminum) alloy used for die-casting pedals is ACD 10. To get a handle on the specifics, lets briefly look at aluminum degassing.
Aluminum Degassing
Foundaries wishing to produce high quality aluminum must reduce the levels of hydrogen in molten aluminum to a minimum. Hydrogen bubbles cause porosity in the finished product—aluminum that should be solid, is not.
A solution to hydrogen gas porosity is to subject molten aluminum to degassing, to
- prevent or at least minimize hydrogen in the melt
- measure and remove hydrogen before pouring the molten aluminum
Degassing is done by means of a purge gas introduced into a batch of molten aluminum by a rotary degassing unit. This gas absorbs hydrogen as it floats towards the surface of the melt.
ACD, then, refers to the Alcan Compact Degasser, a degassing unit pioneering a particular approach to the degassing process. Argon is injected into the aluminum melt to reduce porosity.
ACD 10
ACD 10 is one selection amongst a number of types of aluminum, including (and not limited to) ACD 1, ACD 3, and ACD 14 for example.
Each type differs as to how they score on the following parameters:
- Tensile Strength (measured in MPa or Megapascal Pressure Unit )
- Endurance Strength (MPa) and
- Elongation
Tensile strength measures how much force can be exerted on a material before it breaks. So the tensile strength value recorded for a given material is the maximum force that can be exerted on it before it fails.
The tensile strength of structural steel for example is 400 MPa vs bamboo at 265 MPa (who said bamboo is as strong as steel?)
Endurance strength is measured at the point before fatigue failure after continually bending or folding a metal— cyclic stress in the jargon. Elongation measures the degree of elastic deformation a metal experiences under tensile stress.
The important point to note is that no ACD type is definitively superior to the other. It’s all relative. Each possesses particular advantages and disadvantages depending on the intended use. Each type balances tensile and endurance strength with elongation tolerance with a view to its intended use.
For in-depth info on these topics, check out Aluminum Degassing and the Alcan Compact Degasser.
Deucalite—Unique BMX Pedal Die-Cast Alloy
Deucalite offers a key advantage in making die-cast pedals.
High-grade aluminum can be CNC’d to perfection. And you can anodize it—a huge plus. But it’s (relatively) expensive.
Using a die-cast ACD 10 reduces the cost but
- its high tensile and endurance benefits are not strictly necessary, plus
- you can’t anodize it
Deucalite is a die-cast alloy that can be anodized.
What’s great about anodizing?
In brief, anodizing protects alloy by becoming a part of the surface rather than merely adhering to it.

You might think aluminum doesn’t corrode, which it certainly does, but just not in the same way as steel. Anodizing stops corrosion without the disadvantages of paint, particularly powder-coating.
An anodized surface is also a bit like a ceramic glaze, offering excellent abrasion resistance.
So, Deucalite allows you to have your cake and eat it too: die-cast, anodized pedals.
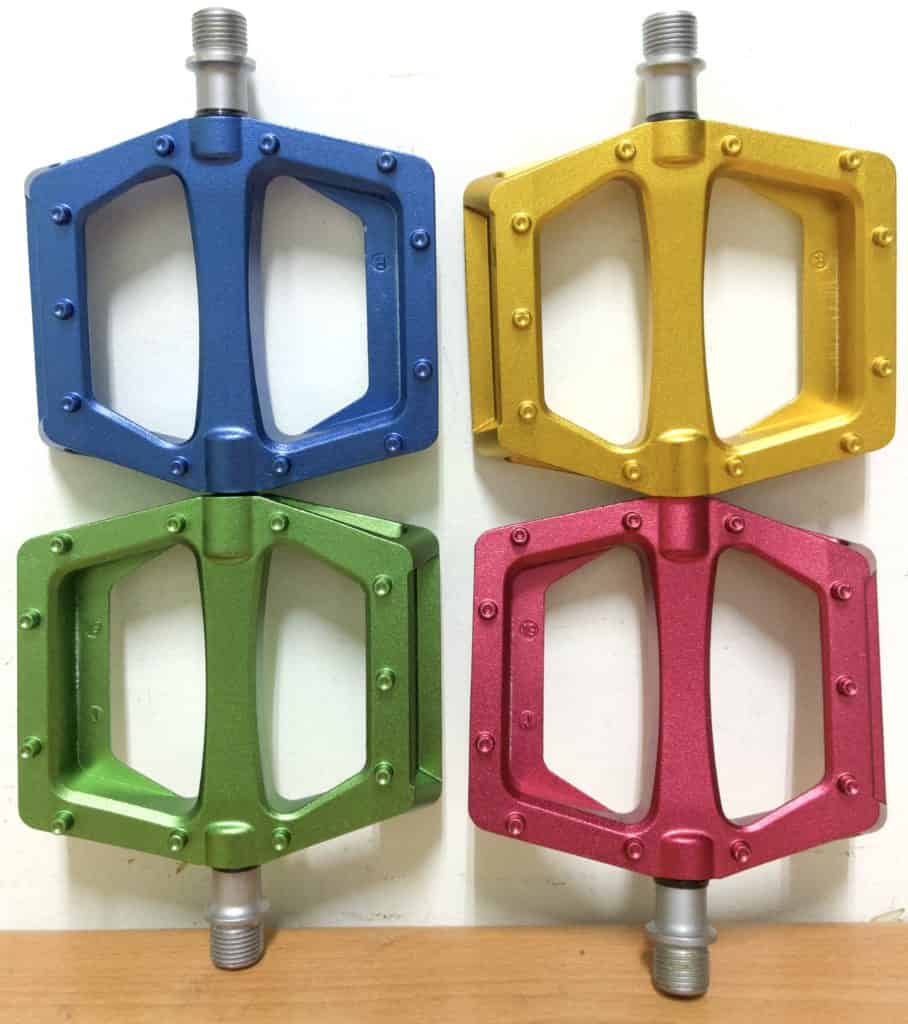
These are the first batch of pedals made from Deucalite—others will follow in due course.
FINAL COMMENTS
If there’s someone you think should know about the info you’ve discovered here, send them the link, especially if that someone is your local bike shop.
The surefire way to get a hold of any of our designs is for your favorite brand or local shop ordering a batch for the local crew.
We’re SCADA and we make BMX pedals for a whole range of the top brands.
We’re devilishly, obsessively committed to bike component innovation and making the best products for passionate riders around the world.