The Complete Guide to Dropper Posts
As designers and manufacturers of dropper posts for a growing list of bicycle companies and brands, we know this component inside and out.
Our unique perspective informs this guide to dropper posts, covering the main issues, and giving you answers to the most commonly asked questions.
There’s also a section on how to replace an air cartridge unit.
QUICK LINKS TO SECTIONS
What is a Dropper Post For?
Do You NEED a Dropper Post?
History of Dropper Posts
How Does a Dropper Post WORK?
How Do You SELECT a Dropper Post
Installation & Setup
How Do You MAINTAIN a Dropper Post?
How to REPLACE a Dropper Post Hydraulic Cartridge (VIDEO)
MANUFACTURING a Dropper Post
WHAT IS A DROPPER POST FOR?
A dropper post greatly improves your MTB riding experience as well as your riding efficiency in the saddle.
As you’re about to go over the lip of a critical descent, hit the handlebar-mounted lever and push the seat close to the top of the seat tube.
This lowers your center of mass/gravity—the same principle behind a street BMX bike, except that the seat is permanently lowered in that case.
A lower center of mass gives you much greater control in the descent, especially through tight curves.
A lower CoM means you can go faster—more safely—of course. But not all of us are racers, so even if speed is not your aim you can, at the very least, make descents that would have been very dicey prior to using a dropper post.
Riding the flat before you go into an ascent, you’ll set your seat height at around the the level it would be if using a standard seat post. As you go into the hill you have the option of raising your seat to gain increased leverage.
In short, a dropper post enables a way-above-average experience—literally.
Prior to dropper posts you fixed your seat height in position, unless you stopped to adjust seat post height of course. Now you can go way below and way above on the move. No more average riding for you.
Do Dropper Posts Have Suspension?
A first glance you might think so. But a dropper post, as we have seen is for adjusting seat height: the mechanism is not for absorbing impacts.
Think of the seat height adjusting unit embedded an office chair. Exactly the same principle. Tap the lever to adjust up or down.
Can You Put a Dropper Post on Any Bike?
You could. But you wouldn’t. Dropper posts are most useful on mountain bikes, particularly in steep terrain.
You might consider installing a dropper post on a gravel bike, if you traverse MTB trails where using a dropper post would improve your ride. There is otherwise no reason you would use one.
A dropper post on a road bike, for instance, cannot add value to your ride. Your seat is in exactly the right position on the rolling descents or on the steepest climbs. The ability to raise or lower your seat in a jiffy is not necessary.
"DO I NEED A DROPPER POST?" you ask

Yes, if you are even half-serious about improving your trail mountain bike experience.
Dropper posts were barely around 10 years ago. Nowdays they’re not merely a desirable accessory but a vital component—for serious mountain biking.
If you are a casual mountain biker and having a performance edge is not important, then you can do without one. If you try one out, though, you’ll probably never go back.
If you require enhanced performance, then a dropper post will enable you to increase speed safely in steep terrain, or if you are not looking to go faster then you’ll still be able to ride more safely in challenging terrain.
Dropper posts also allow modified frame design—a steeper seat tube angle is possible since the saddle can be “dropped” out of the way when necessary but also be right there for support when necessary.
For riders who pursue higher levels of performance advanced frame geometries incorporating dropper posts, then you’d hardly be without one.
How much WEIGHT Does a Dropper Post Add?
The only legitimate argument against having one is the weight penalty, if you could call it that.
A dropper post averages 600 grams, give or take. The average weight of aluminum alloy seat posts is around 250-300 grams. Less for most carbon seat posts.
So you’re doubling the weight.
You need to balance the increased efficiency your dropper post gives you, against the loss of efficiency caused by the added weight.
There’s no way to evaluate this differential without an objective measurement. But just from an experiential perspective, a dropper post adds way more to a ride than you lose through carrying an extra 2-300 grams.
Is a Dropper Seat Post Worth It?
Getting through technical obstacles on the trail, especially downhill sections, will have you worshiping this addition to your bike fairly quickly.
Fully extend the seat for climbing. The saddle is right there for support at the touch of a lever.
Fully retract for downhill. A low center of gravity and being able to position your weight right back means a much more efficient—and safer!—descent.
The ability to get your saddle out of the way or have it available for support at the touch of a lever has become central to the MTB experience these days.
Again, it comes down to the level of performance you seek, but if are into any sort of trail riding, you absolutely will appreciate the unique dropper post experience; a dropper post will become an indispensable part of your kit.
DROPPER POST HISTORY
The dropper post concept has been around from the early days of mountain biking, only taking the market by storm in the last decade or so.
The Breeze and Angel Hite Rite was the first attempt to make seat height adjustment on the trail easier.
Ok, this gizmo, the Hite Rite, is not a dropper post as such.
The function’s the same though, allowing quicker and more nimble saddle height adjustment.
The key was the spring clamped to the seatpost and anchored at the top of the seat tube binder-bolt mount.
A cable lever opened the binder-bolt via a quick release cable. Take your weight off, seat and post rises.
Plant your butt firmly down in order to lower the saddle height. Lock the position.
That spring though: not the most elegant solution and you’re likely to damage it—and yourself—when you stack. The Hite Rite slowly faded away.
The modern dropper post comes into view with Wayne Sicz and his CNC machine c.2002.
Originally inspired by the Hite Rite, he put his new idea to Rock Shox. They wanted nothing less than suspension revolution and said “Nahhh…pass”.
Learn more about this unique, early stage in dropper post evolution, in Mountain Bike Actions’s article on the subject.
Whilst not exactly a suspension revolution in Sicz’s view, you could still make the case that it was.
Suspension keeps your wheels in contact with the ground in critical situations. Your dropper post enables you to stay close to your bike in those same circumstances.
HOW DOES A DROPPER POST WORK?
Think of an office chair, computer chair, a chair with a simple piston and lever at any rate.
Lift the lever, push down a bit, down goes the chair. Or push the lever, make as if to rise out of the chair, up comes the chair as you rise.
Dropper post mechanics relies on pressurized gas/air or hydraulic oil. You change position, or lock down an existing position, through changing or stabilizing the pressure.
Practically speaking, a flick of the remote handlebar-mounted lever gives you the position you want.
This capability opens up your riding performance possibilities no end.
Using a dropper post, you’ll find you can rapidly adapt to rapidly changing terrain. The faster you can adapt, the faster you can traverse that terrain.
Imagine blasting down the descent. Then, in a jiffy, you’re attacking the next ascent having effectively altered your bikes geometry on the fly!
Spending more time in both a comfortable and efficient pedaling position over the duration of a ride means a massive advance in performance possibilities.
Mechanical, Hydraulic or Electronic?
In other words, from the most simple to the more complex. Differences hinge on how the remote lever exerts control on the dropper post unit.
Mechanical models are cheaper, easier to setup and easier to maintain.
Simply keeping things clean is a great habit to get into with each variation by the way. You get to to know the equipment as well—staying close and intimate reduces expense and maximzes safety.
If you’ve ever had experience with hydraulic disk brakes, then you’ll know what you’ll be in for with hydraulic dropper posts, aside from the extra expense at purchase.
The lever acts as a piston pushing fluid through the hose thus activating the dropper mechanism.
A clear advantage is the absence of a cable to wear out. The hose can also be shaped to most any angle, providing improved installation options.
The downside is that you’ll be replacing the fluid at the end of every season.
Electronic systems are neatly self-contained and function smoothly. But you’ll pay a premium for that.
Dropper Post Lever
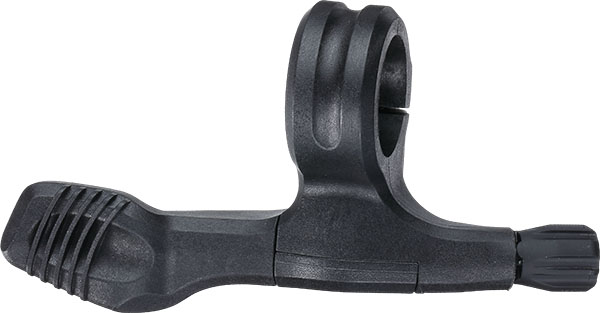
You’ll either have a remote lever (most common) on the handlebars or the seatpost (most common in the early days).
They are most commonly thumb-operated in the same way as a gear shift lever.
If you get hold of a dropper post without a remote lever, there are plenty of aftermarket options available.
Running a single chainring? 1x gearing allows an ergonomic below-handlebar location for your dropper remote.
HOW DO YOU SELECT A DROPPER POST?
Start with your bike’s seat tube. What is the ID or Internal Diameter?
You’ll find its either 30.9mm or 31.6mm.
27.2mm and 34.9mm ID seat tubes are also around though.
With gravel bikes catching on in a big way, expect to see more 27.2mm dropper post offerings.
One issue is stiffness. 30.9/31.6mm flex much less. But if gravel or cyclocross is your thing, flex is a minor issue.
Another issue is lack of accommodation for internal cable routing. Again not necessarily a big deal since your particular biking discipline is the key consideration.
All you have to do now is select a dropper post with the corresponding OD or Outer Diameter to your seat tube’s ID.
Next for consideration is the dropper post’s
- fit to your bike frame geometry
- fit to your physique
Insertion Length
Measure how far down you can insert your existing seat post into your seat tube without obstruction.
Does it insert almost to the “hilt”? Or does a bend in the seat tube prevent it going all the way down?
For many mountain bikes, the seat tube curves at and/or is obstructed by the suspension mounting bracket.
Measure the maximum insertion length. Record it.
In common with seat posts, dropper posts have a manufacturer-recommended minimum insertion length.
This ensures the post’s stability in the frame, vitally important considering the forces applied in full flight on the trail or downhill.
You want neither a broken post nor ruptured seat tube precipitating a major crash event, shall we say.
How Much Travel Do I Need in a Dropper Post?
Most dropper posts have infinite adjustment—the post can be stopped and locked in at any point along the travel.
Some posts are available in fixed detents from a simple up and down to as many as 10 selections.
The benefit is in the improved riding experience that can come once you get used to which particular settings work in which riding situations.
The length of travel is the distance between when it’s fully lowered and fully extended.
Here’s a commonly applied technique for choosing a dropper post in terms of travel.
- Move your seatpost to the highest position possible—your climbing setting.
- Measure the distance from the top of seatpost collar to the seat rail (stack height) then subtract 50mm
(Your seat’s rails are what the seatpost clamp fastens onto to hold your seat firmly in position.)
Your measurement here is the maximum travel length for the dropper post that you can comfortably install.
Dropper posts are commonly available in 80mm, 100mm, 125mm, and 150mm versions.
Be aware that a dropper post’s overall length increases as the length of travel increases.
You want to avoid a post that’s too long, a mistake more often made than buying one that’s too short.
If you are a taller rider, you’ll probably be looking at a 150mm.
A shorter rider’s bike will have a smaller frame. Together with the height limitation, 125mm is the maximum post for consideration.
An Example
Say your stack height is 170mm. Subtract 50 from 170 =150. Therefore the maximum travel is 150mm allowing you to consider the whole range of dropper post lengths.
At maximum extension, you should be at your perfect climbing height.
DROPPER POST INSTALLATION & SETUP
Get your local bike shop to do it, unless you are really into DIY.
Placing a seatpost into a seatube is easy enough. However your dropper post needs to be properly connected to the remote lever via a cable in most cases.
The main consideration is whether you have internal or external cable routing.
Internal, or stealth cable routing, is most common, following the trend to internally rout all cables on mid- to high-end bikes, mountain bike or road.
The cable connects to the remote lever at the shaft of the post.
Internal cable routing is the best way to go. It’s a much nicer look. Or rather the absence of cables is the nicer look.
The cable is also protected from damage, dirt and debris. The action becomes stiffer over time as dirt enters and accumulates.
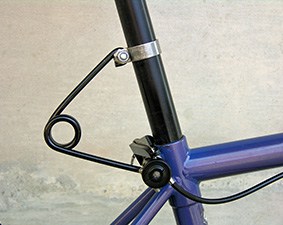
If you’re installing a dropper post to an older mountain bike, external cable routing allows you to get up and running quickly. A few zip ties and you’re good to go. Attaching the cable (housing) to a rear brake hose works well.
And should the cable sustain damage, repair is easy. Ongoing maintenance is also easy.
For internal cable routing getting the cable routed internally is the tricky bit.
You could use a magnetic pickup tool. Learning how to manipulate it and get the cable threaded and linked up would involve a bit of trial and error.
Threading a string, sucking it out with a vacuum, then drawing the cable through is another suggestion.
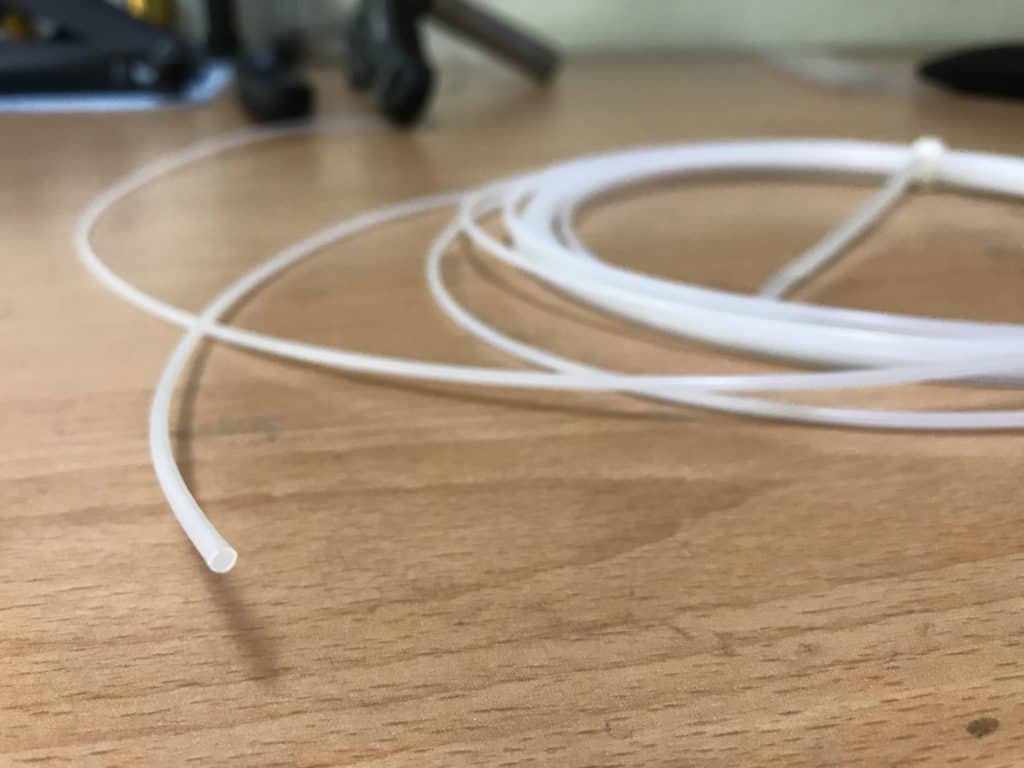
Many bike assemblers thread lengths of 2mm tubing through bike frame tubes to carry brake and derailleur cables to their destinations.
This type of tubing is stiff so it can be straightened or shaped into the right curve.
There is a learning process with these methods. Again, better to have your local bike technician install the post for accurate and smooth operation out on the trail.
Is it OK to Drill a Hole in the Lower Seat Tube?
No. Never do this!
The potential for a hole to interfere with your bike frame’s integrity is too high. For safety’s sake there are other ways.
You need a frame that has been designed for internal cable routing, particularly for dropper posts.
HOW DO YOU MAINTAIN A DROPPER POST?
The constant forces applied to a dropper post’s components, particularly the lever-cable/hose-post system, across the mountain biking season means you need to be vigilant to ensure your post keeps working as designed.
You’ll already be in the habit of cleaning your bike . . . right? You know regular cleaning lengthens the life of all components, including the frame; cleaning your dropper post then is a mandatory part of your cleaning routine.
Rinse off heavier grime and dirt from your bike, paying special attention to the seat post tube itself. The wiper seal is an especially sensitive component. Periodically add a smear of suspension grease to the seal to prolong its life.
You may have added lube in the past which has attracted grime. Never use any type of degreaser (let alone WD40) on any part of your dropper post for cleaning this type of dirt. You’ll dissolve the factory grease in, and under, the seal, which will significantly reduce dropper post life.
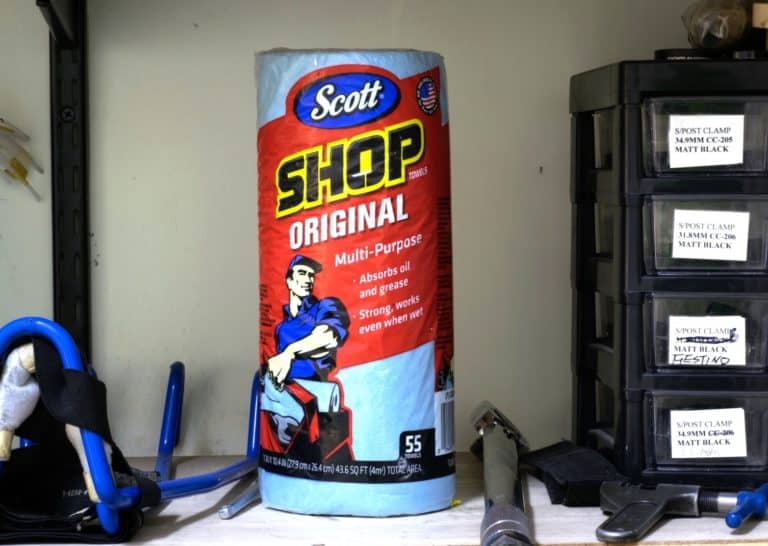
Use a soft cloth such as Scott workshop towels for any cleaning.
Special Attention for the Actuator
The dropper post actuator sits inside your seat tube, low down. Since water enters a bike frame during use and from bike washing, the actuator will be exposed to that water.
Remove your dropper post at season’s end (at the least); clean the actuator and give it good lube job. The grease seals out the water and lubricates the mechanism.
Signs You Need a Service
Your dropper post is subject to an intense workout across the mountain biking season.
The constant forces applied to the lever-cable/hose-post system means you need to be vigilant to ensure your post keeps working exactly as it’s designed to.
The main unit uses gas or hydraulic fluid, or a combination. Having a skilled professional service it is best.
Watch for the following:
- sagging under your weight (not being able to support you as when it was new)
- leaking seals
- more play than normal
- slow, lagging extension
- unusual noises (the sounds of un-silence)
A normal service involves (among other things and where necessary)
- replacing seals
- bleeding off and replenishing hydraulic fluids
- pressurization of gas or fluids
Some simple steps you can take to prolong the time between maintenance sessions and reduce the likelihood of failure out on the track include avoiding incorrect cable tension or poor hydraulic bleed. This can lead to poor travel extension and thus overtightening the seatpost binder bolt.
Also avoid grabbing and lifting your bike by the saddle with the dropper at the lowest position. You may find air will get sucked into the unit that will probably necessitate professional attention.
The working life? You’ll get around three years—assuming consistent use across the riding season—so you probably wont notice performance lags inside of two years at least. But the time will come when performance decreases and you’ll need to replace the unit.
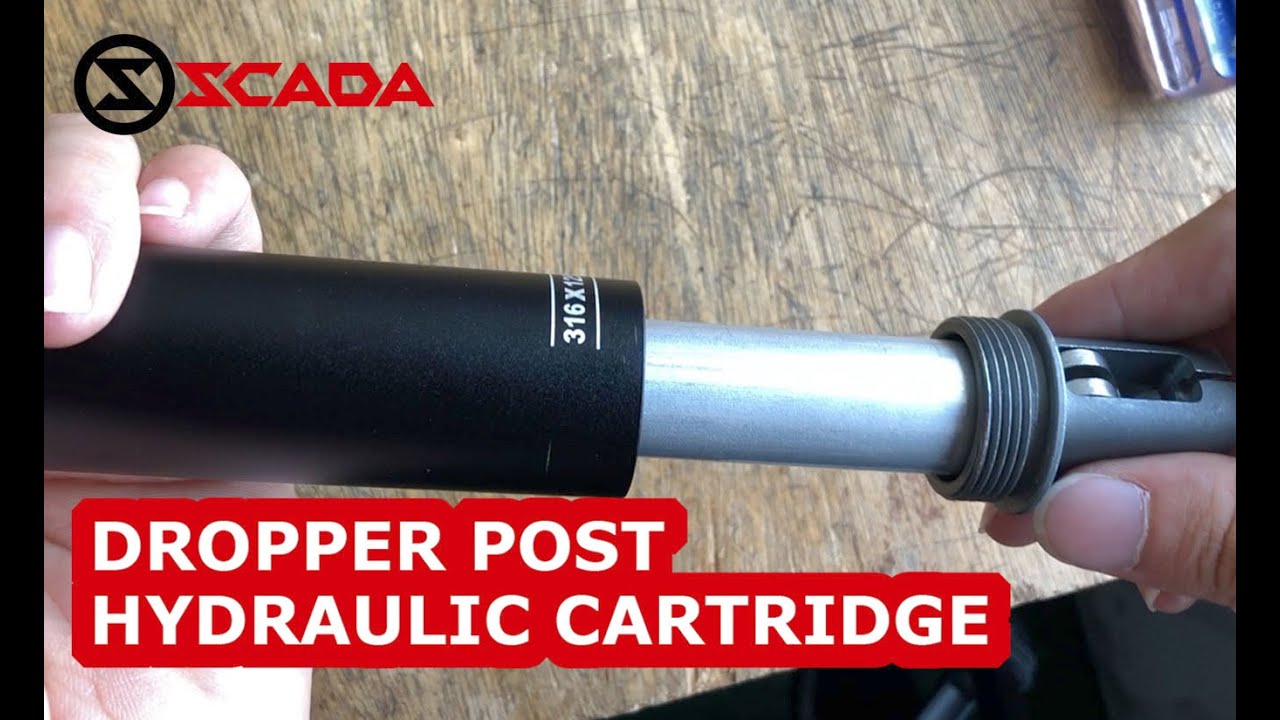
CHANGING A DROPPER POST HYDRAULIC CARTRIDGE
In this section, I’ll detail how to change a Scada dropper post hydraulic cartridge which is easily replaced in this type of dropper post—literally a 5 minute job that anybody with basic home tools can complete.
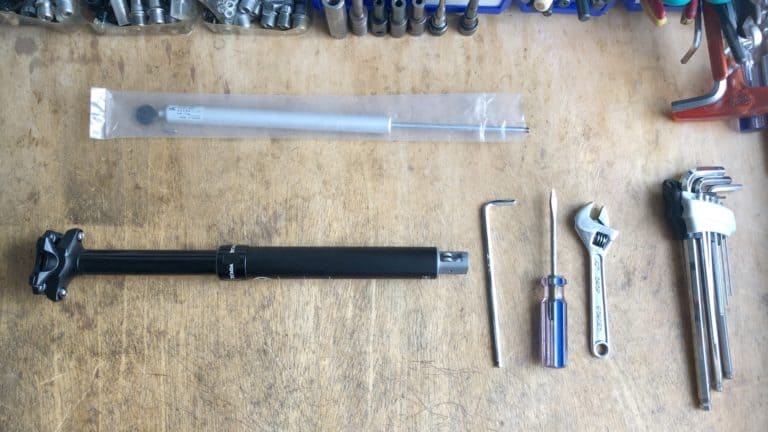
Although we’ve got a formidable range of tools at our disposal on the work bench, we just need an:
- Allen wrench
- flat screwdriver
- crescent wrench/adjustable spanner
The new cartridge comes with a new cushion and thimble. We’ll remove the old cartridge, then install the new. Installation is the reverse of removal.
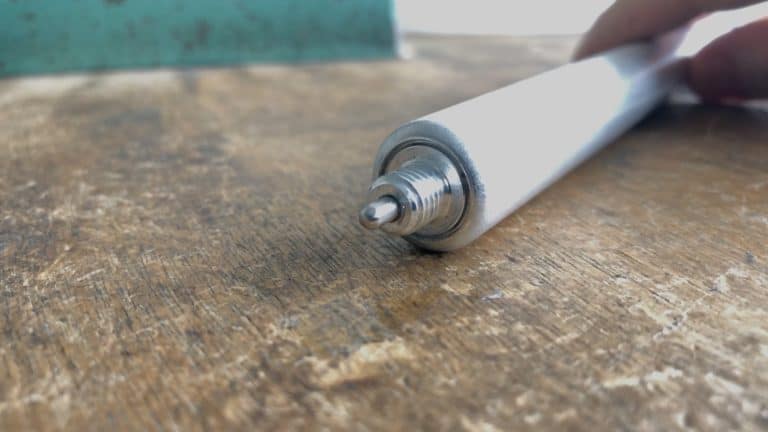
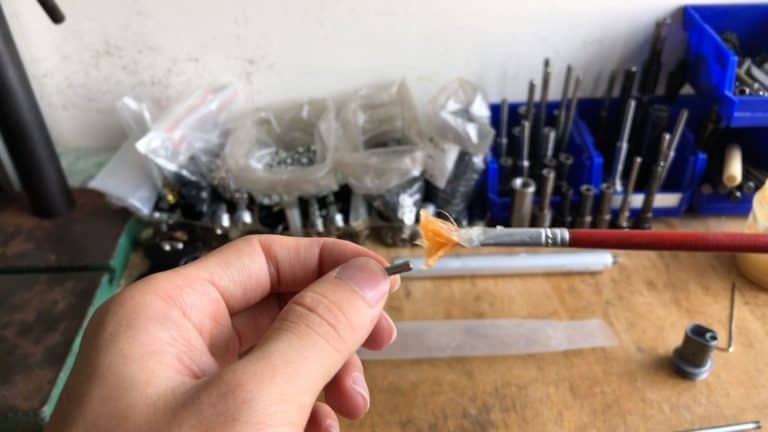
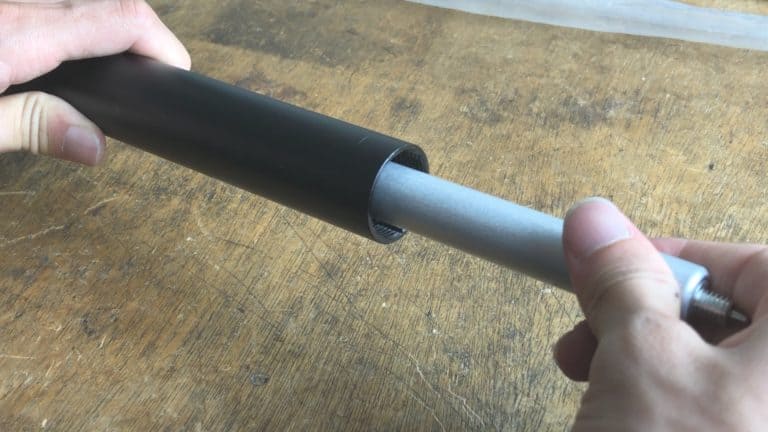
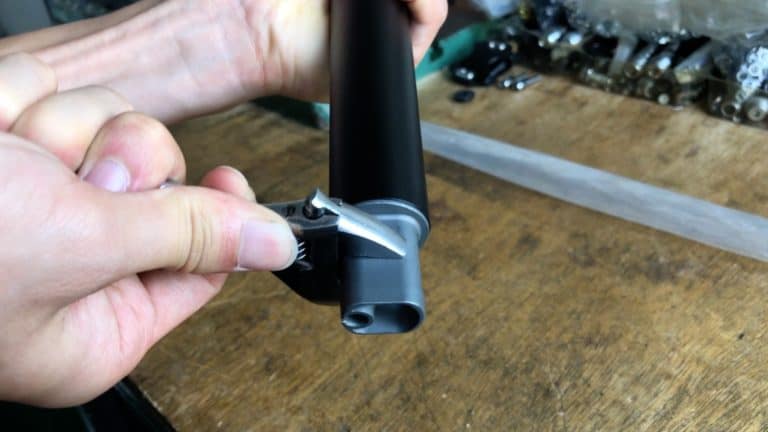
Removing the Dropper Post Hydraulic Cartridge
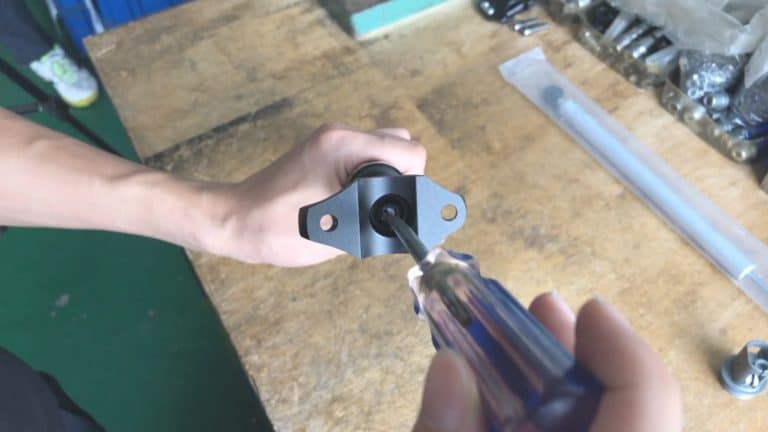
The actuator screws into the base of the post. Removing it enables you to slide the cartridge out once you’ve released the screw inside the saddle bracket.
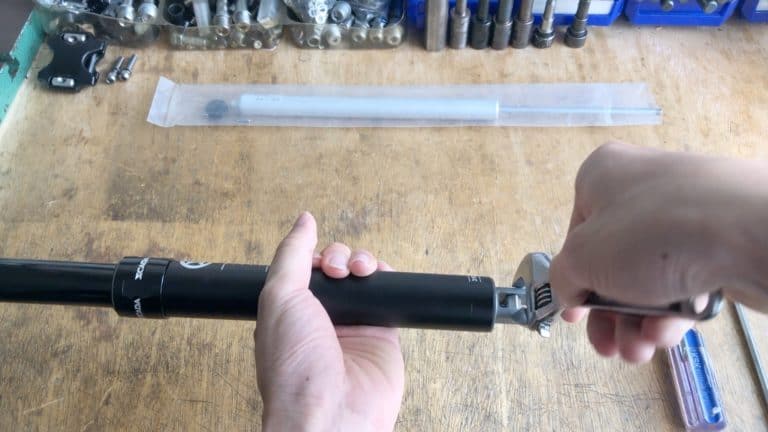
You’ll find the actuator tightened to 2-3 Nm, or a little more than finger-tight; the crescent wrench aids in gently breaking it free of the dropper post body threads.
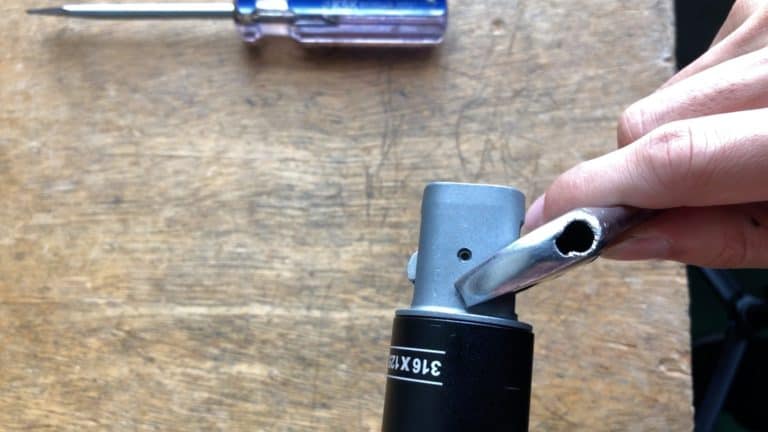
Simply slide the crescent wrench on and give it a turn. No need to worry about scratching up the surface of course since this part is concealed, so you could use pliers. But the wrench is still the easiest way to loosen the actuator.
Once loose, continue to remove it by hand to the point where you can freely extract the piston from the dropper post body.

Slide the piston a little way out to where you can get a firm grip on the cartridge, since you still have to remove the cable bracket nut from the cartridge.
A few turns will separate the actuator from the threaded boss which contains the air cartridge pressure pin. You can put it aside ready to be assembled back onto the new cartridge—the penultimate installation step.
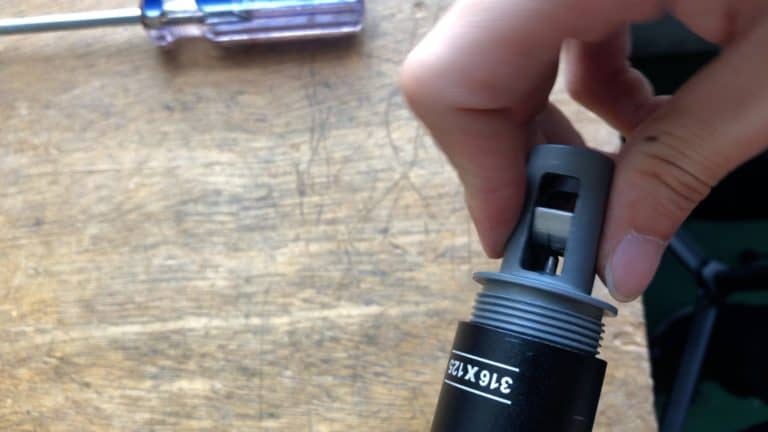
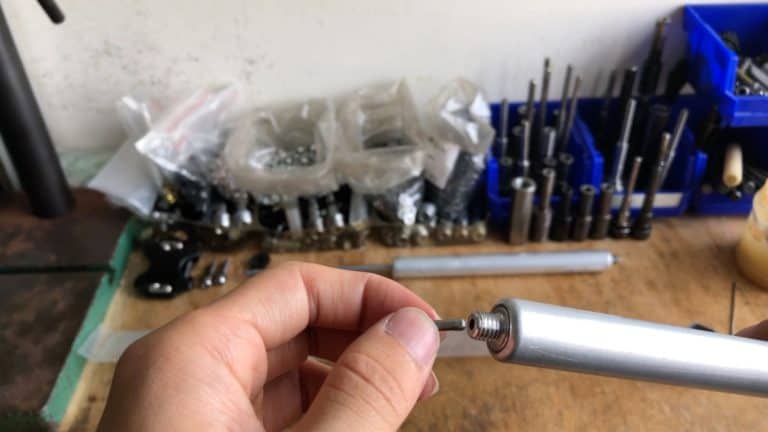
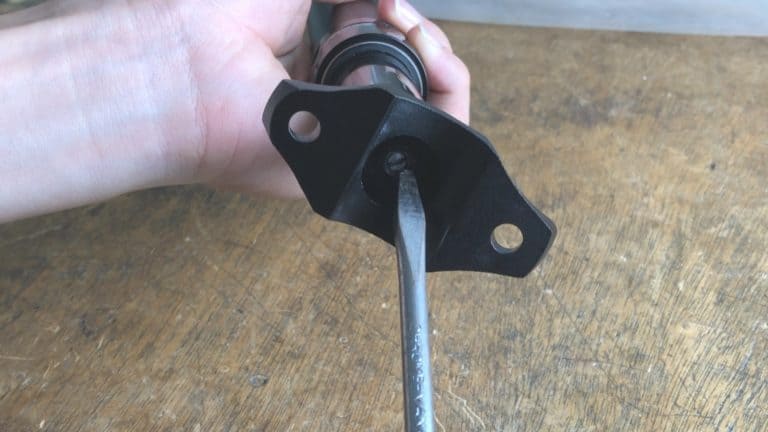
Rotate the dropper post 180° giving you access to the cartridge release screw inside the top just below the seat post clamp bracket.
Using a flat screwdriver, a half turn of the screw clears the way to remove the cartridge from the seat post body.
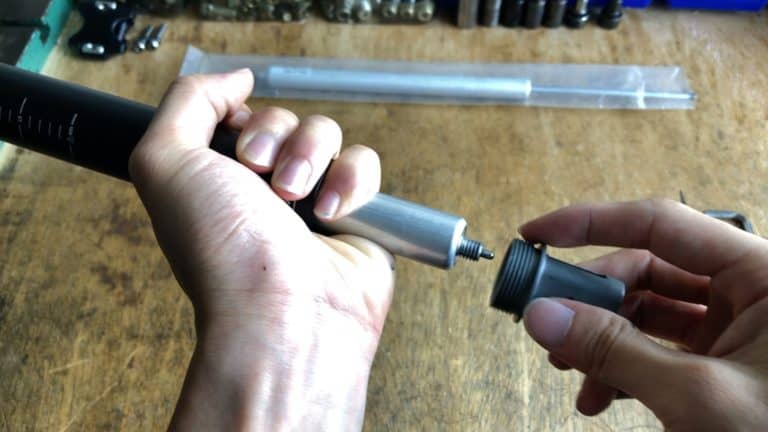
Flipping the post back to the other end, turn the cartridge counter-clockwise. When it releases from the threaded socket at the rebound rod’s opposite end, you slide it out.
Normally the cushion at the end catches on the shaft threads. If not, and it becomes lodged inside the pedal body, a few light taps dislodges it.
Installing the Dropper Post Hydraulic Cartridge
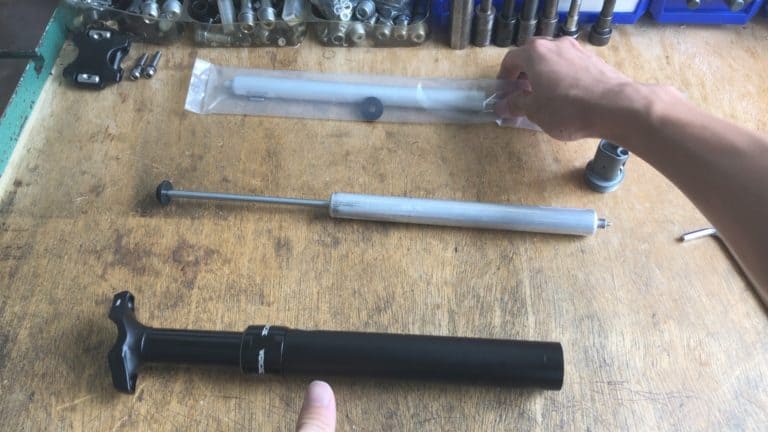
To install the new cartridge simply reverse the steps taken to remove it. The new cartridge comes with a new cushion and thimble.
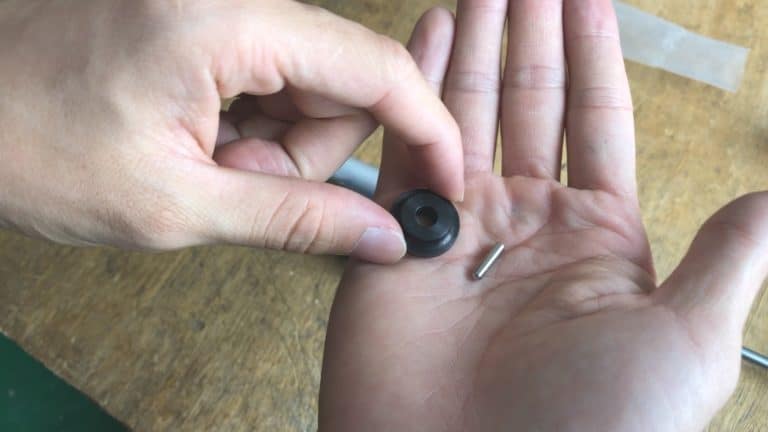
Be extra careful with these. The pin is especially easy to lose.
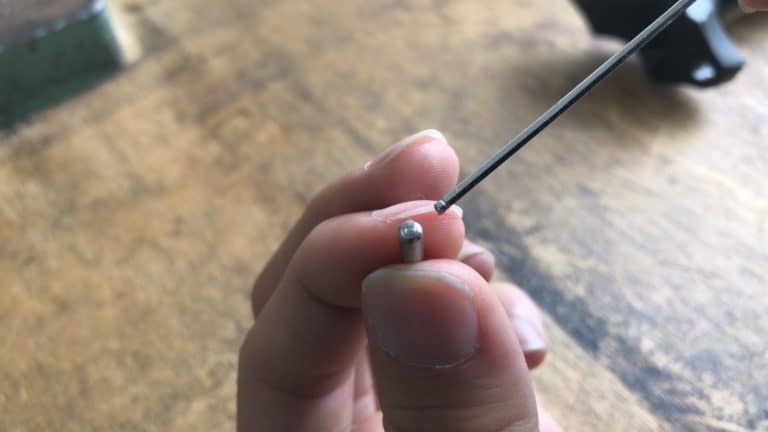
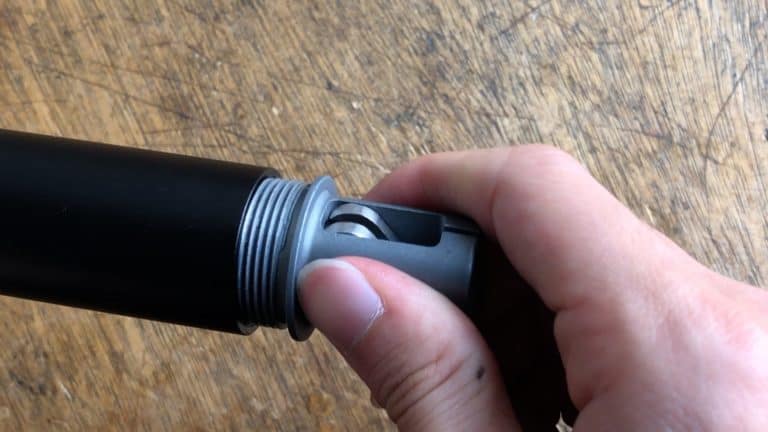
Note the flattened but indented end of the pin. This is the end to insert into the air cartridge body.
As with almost every bike part, give it a coat of grease before inserting into the cartridge body.
The flattened end is the one to insert.
All being well, this is what you should see.
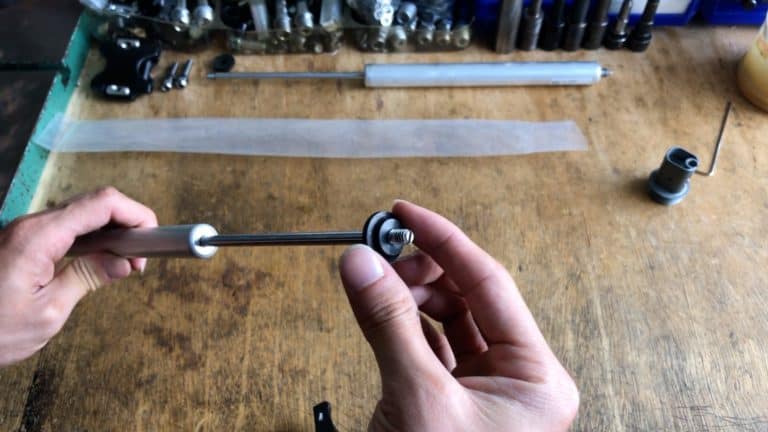
Flip the new cartridge to the opposite end, then slip the cushion over the end and down to the base.
Slide the assemblage into the dropper post body.
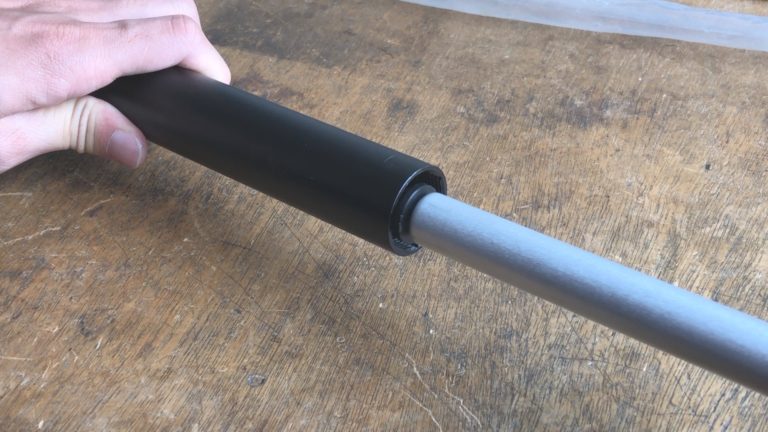
Once the rod reaches the end of the dropper post body, screw it into position. Not tightly. Just enough to hold it.
Turn the screw counter-clockwise to secure the rod.
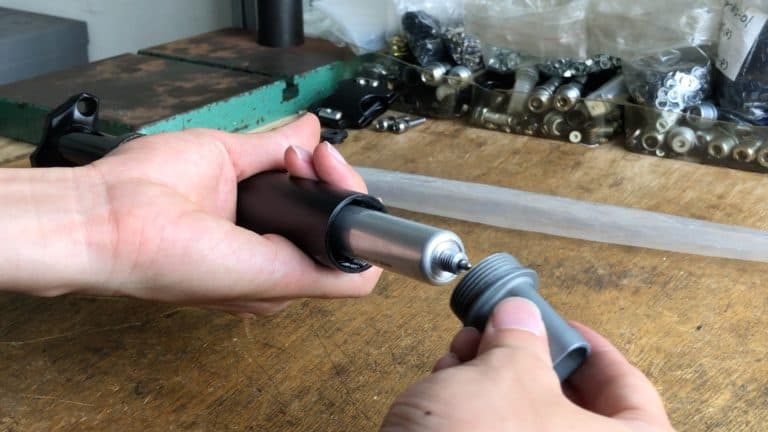
Screw the actuator back onto the end.
Then push the assembly back into the dropper post body. Once the actuator threads engage the dropper post body threads, screw it all the way in.
Then tighten the actuator firmly into the the dropper post body.
MANUFACTURING A DROPPER POST

A dropper post is made out of mostly CNC machined parts. In this video we show how we machine the dropper post body.
One of the most important part of the process is continually checking samples for consistency. There’s usually never a problem, since CNC machines are precise with little variation in tolerances.
FINAL COMMENTS
If you are into trail riding, and your trails traverse varied terrain, get yourself a dropper post. No question.
Maintenance is easy and you can easily replace the hydraulic cartridge in your post if you have one. Although dropper posts vary in design and construction between brands, the section above gives you a good idea of the simple principles behind their manufacturing. Bookmark the page for reference.
Get in touch with us if you are a brand looking to create your own dropper post design—the form is right below.